Thanks for your feedback!
EDIT
Certificates are digital credentials that include identification and public key. They can be validated by a certification company for more security.
Overall, a certificate is a mechanism that ensures secure communication between client and server.
There are two types of certificates that can be registered on the Manager: certificates for the connection between the gateway and the backend (or destination certificates) and certificates for the connection between apps and the gateway (inbound certificates), the latter for use in specific environments.
The Certificates screen is found under Security, in the main menu.
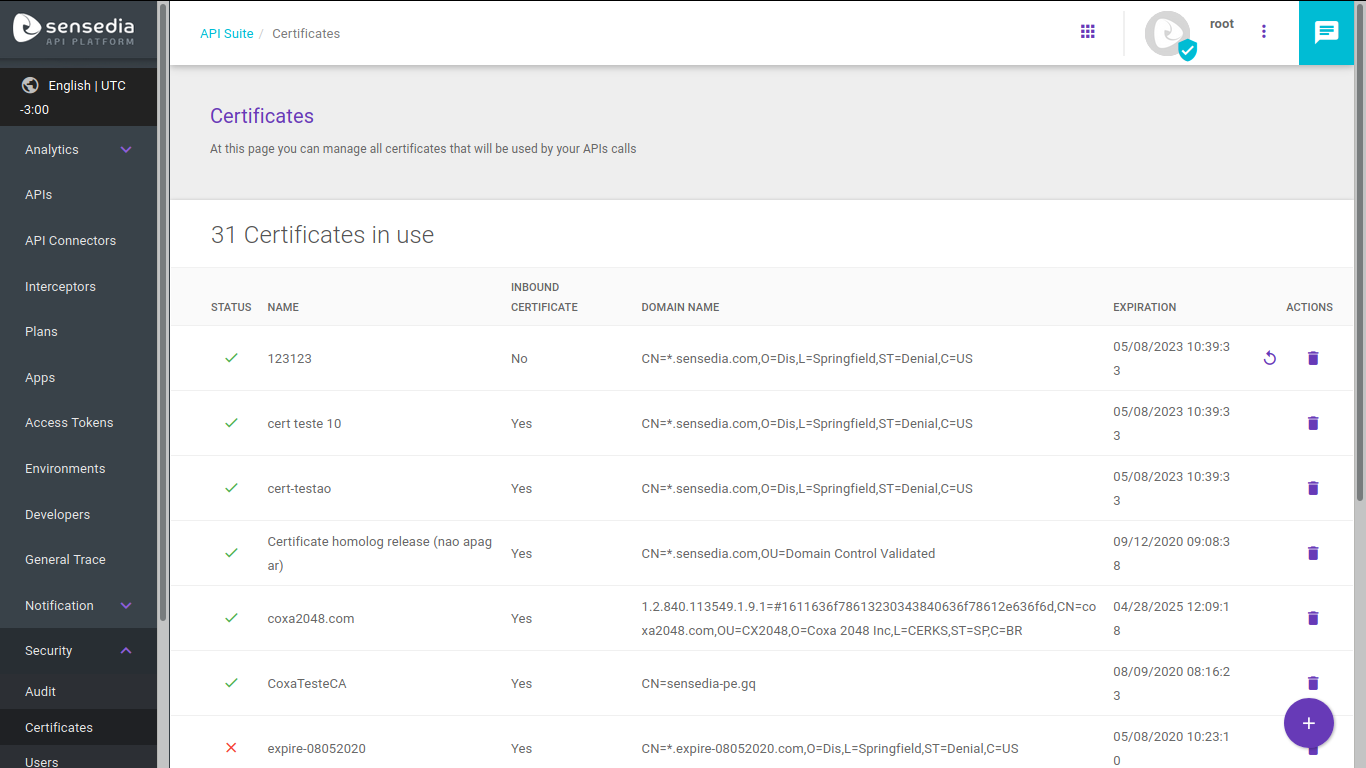
The screen shows all existing certificates, with this information about them:
Status: informs whether the certificate is active (icon: ![]() ) or expired (icon:
) or expired (icon: ![]() ).
).
Name: unique name for the certificate.
Inbound certificate: informs whether the certificate is to be used inside an environment (for the connection between apps and the gateway) or not (in the latter case, it’s a certificate for the connection between gateway and backend).
Domain name: exhibits the name and information regarding the domain.
Expiration: certificate expiration date and time, in format mm/dd/aa hh:mm:ss. Fields with past dates mean that the certificate is expired and fields with future dates mean that the certificates are active.
In addition to these data, the field Actions has two options: refresh or delete a certificate (read more about them below).
To register a certificate, click the Create Certificate button represented by the + symbol. You will be directed to a screen where you can fill in the required data.
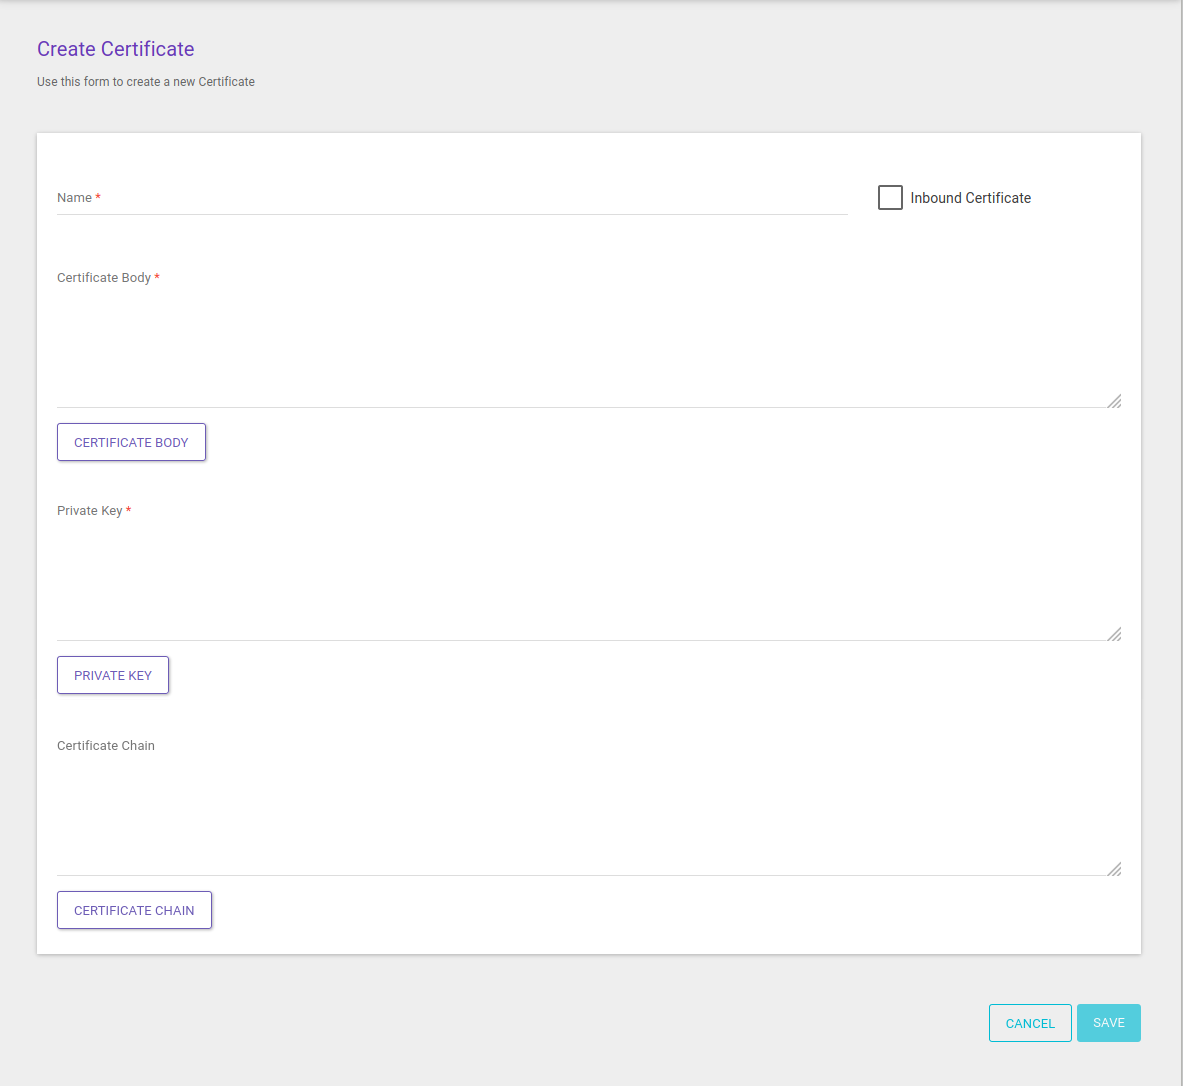
For certificates used in the connection between gateway and backend, do not flag the option Inbound Certificate. The data to be informed for destination certificates are:
Name: required field for a unique name.
Certificate Body: required field to insert the body of the public domain digital certificate in PEM format. If you prefer, the Certificate Body button can be used to upload a file (either .pem or .crt and not encrypted).
Private Key: required field to inform the private key, in PEM (PKCS #8) format. The key can’t have a password. It can also be passed on by uploading a file (accepted format: .key and not encrypted).
In case the key to be relayed has any type of password, it may be removed.
To do so, copy the private key file to your OpenSSL directory and, using OpenSSL, execute the command openssl rsa -in privateKey.pem -out newPrivate.pem.
| See tips about converting private keys here. |
Certificate Chain: optional field to insert the trust chain that validates de certificate’s emission entity.
The field may contain one or more certifying entities; each entry must be separated by ----BEGIN CERTIFICATE---- and ----END CERTIFICATE----, respectively.
If you prefer, the Certificate Chain button can be used to upload a file (.pem or .crt).
After you fill in the data, click Save. You will be redirected to the listing screen, that will now contain your certificate.

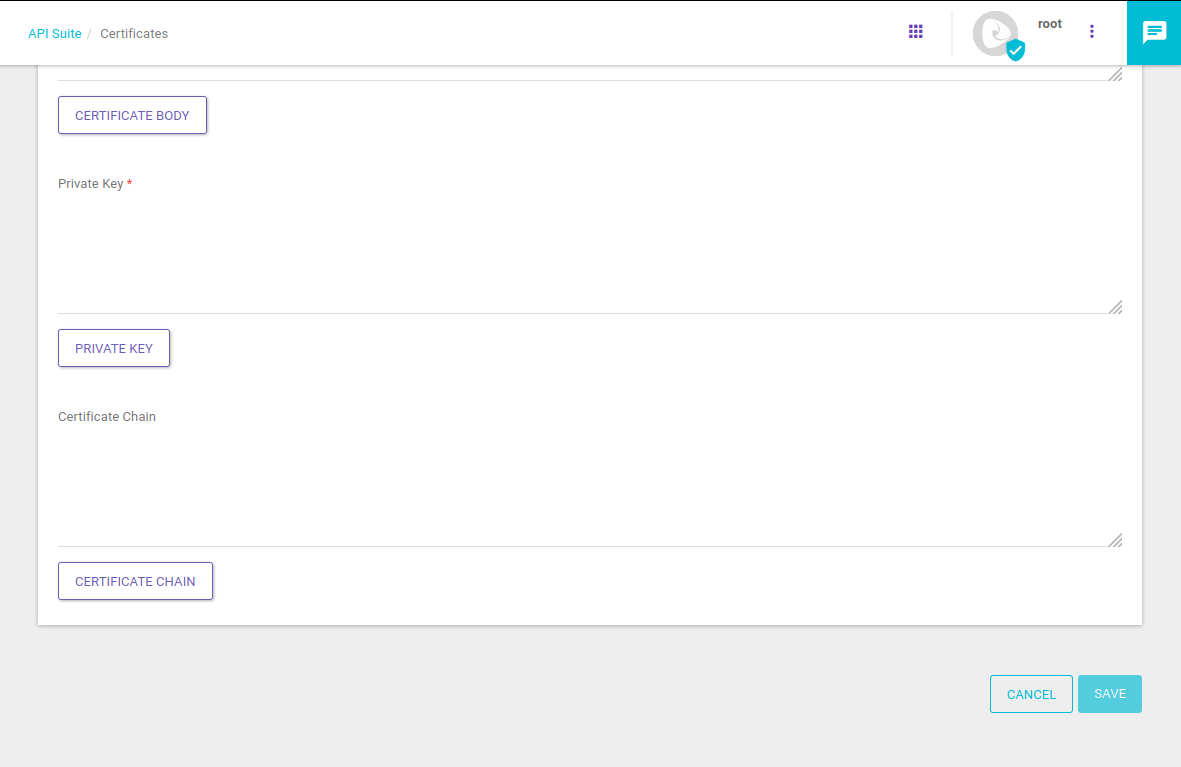
For certificates to be used internally, in an environment, referring to the connection between apps and gateway, first flag the option Inbound Certificate. The data to be relayed in this case are:
Name: required field for a unique name.
Certificate Body: required field to insert the body of the public domain digital certificate in PEM format. If you prefer, the Certificate Body button can be used to upload a file (either .pem or .crt and not encrypted).
For inbound certificates, the minimum size accepted is 2048 bits.
Private Key: required field to inform the private key, in PEM (PKCS #8) format. The key can’t have a password. It can also be passed on by uploading a file (accepted format: .key and not encrypted).
In case the key to be relayed has any type of password, it may be removed.
To do so, copy the private key file to your OpenSSL directory and, using OpenSSL, execute the command openssl rsa -in privateKey.pem -out newPrivate.pem.
For inbound certificates, the minimum size accepted is 2048 bits.
| See tips about converting private keys here. |
Certificate Chain: optional field to insert the trust chain that validates de certificate’s emission entity.
The field may contain one or more certifying entities; each entry must be separated by ----BEGIN CERTIFICATE---- and ----END CERTIFICATE----, respectively.
If you prefer, the Certificate Chain button can be used to upload a file (.pem or .crt).
Trusted CA: field in which to include the certificate chain used by the partner to make requests to the environment. This chain contains information about the certificate and the authority that emitted it.
The field may contain one or more chains; each entry must be separated by ----BEGIN CERTIFICATE---- and ----END CERTIFICATE----, respectively.
If you prefer, the Trusted CA button can be used to upload a file (.pem or .crt).
| This field is optional if TLS is being used and required for mTLS. |
After you fill in the data, click Save. You will be redirected to the listing screen, that will now contain your certificate.
| So that an inbound certificate is applied to an environment, it must be added to an inbound address configured as the host of the environment. In this case, if the user wants to enable mTLS as a security option, the field Trusted CA must be informed. Read about how to set up an inbound address here and about how to register an environment here. |
It’s possible to extract information from a client’s X.509 certificate via header (x-forwarded-client-cert) in mTLS connections.
The header can be used in any requests with mTLS connections and it can extract information when the TLS handshake is successful (i.e., when the step of exchanging certificates and generating keys is completed).
It’s useful, for example, when certificate information needs to be validated at runtime during an API call.
The pieces of information that can be transported in the header are: By, Hash, Cert, Chain, Subject, URI, and DNS.
Our Product Engineering team has developed a custom interceptor (called x509 Interceptor) to extract and manipulate data from X.509 certificates via the x-forwarded-client-cert header.
It can be added to the request flow of APIs used in mTLS connections.
You can access its code and more detailed information on how to use it here.
If you have a WAF layer (Web Application Firewall) before Sensedia’s Gateway, it is necessary to change the header name x-forwarded-client-cert to another one (for example, forwarded-client-cert).
Another method is to attribute the certificate value to another header name before sending it to the Gateway.
Keep in mind that if you have WAF, you can: allow the WAF to handle the mTLS or TLS or set up a bypass so that Sensedia’s Gateway can handle this assignment.
|
Registered certificates can be updated through the listing screen.
To do that, click the Refresh button (icon: ![]() ) on the row of the target certificate.
) on the row of the target certificate.
You can refresh both expired and active certificates, even if they are in use.
| Inbound certificates cannot be refreshed, only deleted. |
Upon clicking the Refresh button, a window will pop up to confirm the action.
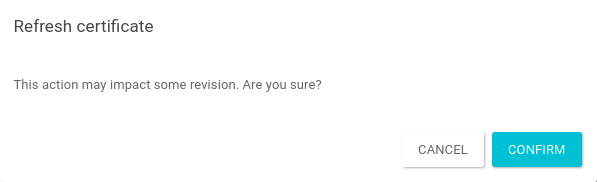
After clicking the Confirm button, you will be directed to a screen like the certificate registration page, with the data fields that you can alter.
To refresh a certificate, you must send a new certificate body, a new private key and, optionally, a new certificate chain. However, the following actions cannot be performed:
editing the name.
updating the certificate without informing the certificate body and private key.
updating the certificate in case any of the attributes used to fill in the certificate fields are already related to any other certificate registered.
You can delete a certificate by clicking the Delete button (icon: ![]() ), also found on the row of the target certificate, on the list of existing certificates.
), also found on the row of the target certificate, on the list of existing certificates.
A window will pop up to confirm the action.
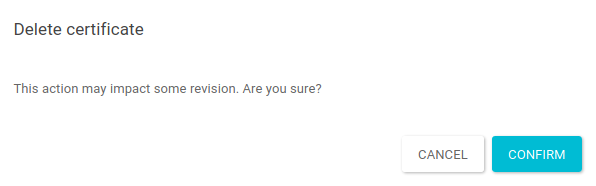
Upon confirming it, the certificate will be deleted and will no longer show up on the list of existing certificates.
| You cannot delete inbound certificates if they are being used in an environment host (that is, an inbound address). If you want to exclude such a certificate, you must first remove it from the host, on the Inbound Address screen. |
Share your suggestions with us!
Click here and then [+ Submit idea]