Thanks for your feedback!
EDIT
See on this page how to:
Obtain the following access credentials:
Create a new connection with a MuleSoft gateway.
| See the MuleSoft documentation for more details. |
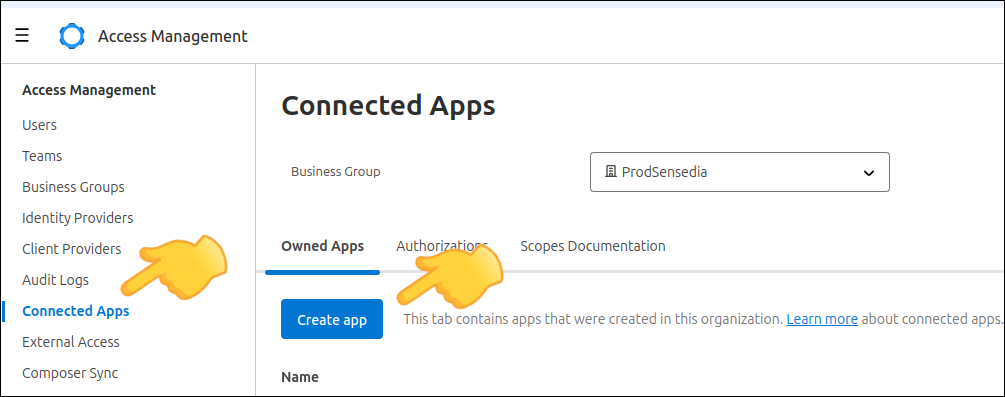
Access Anypoint Platform and click Access Management in the left sidebar menu.

Create an App:
In the Owned Apps tab, click the Create App button.
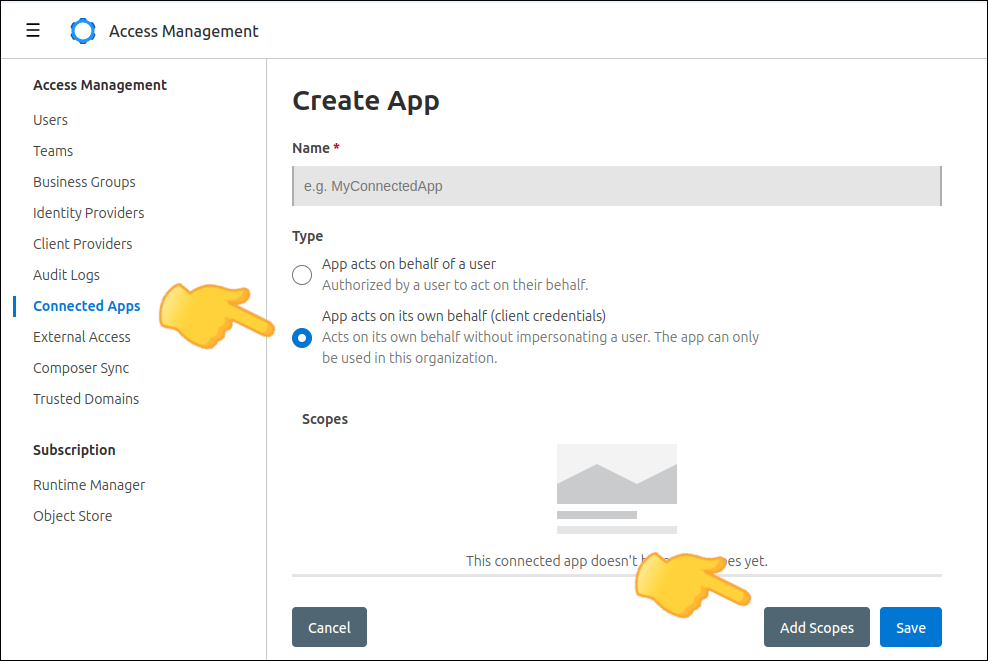
Enter a name to identify the application.
In Types, select App acts on its own behalf (client credentials).
Then, click Add Scopes.
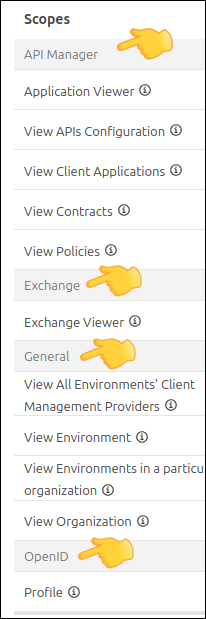
Select the scopes, specifying which actions the application will be allowed to perform.
Make sure to select the scopes:
API Manager,
Exchange,
General, and
OpenID
Then, click Next
Select the business groups that will be made available.
Select the environments that will be made available (this option is valid only for some scopes).
After configuring the App, click SAVE.
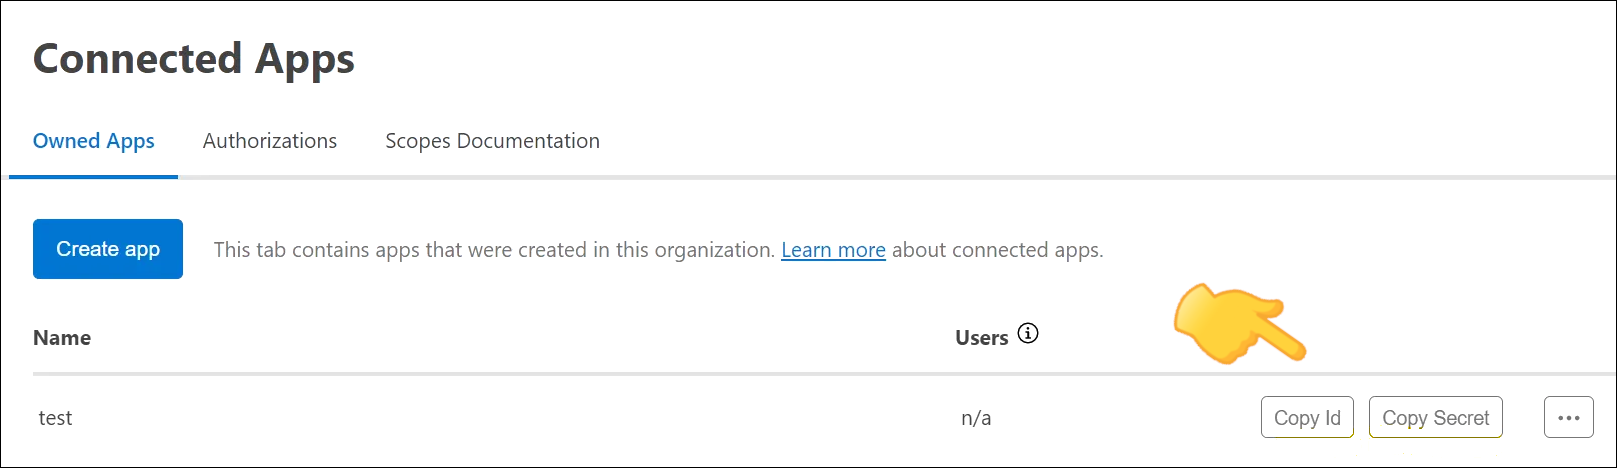
The newly created App will be listed in Connected Apps.
Click the Copy id and Copy secret buttons to copy the credentials.
Follow the steps below to create a new connection.
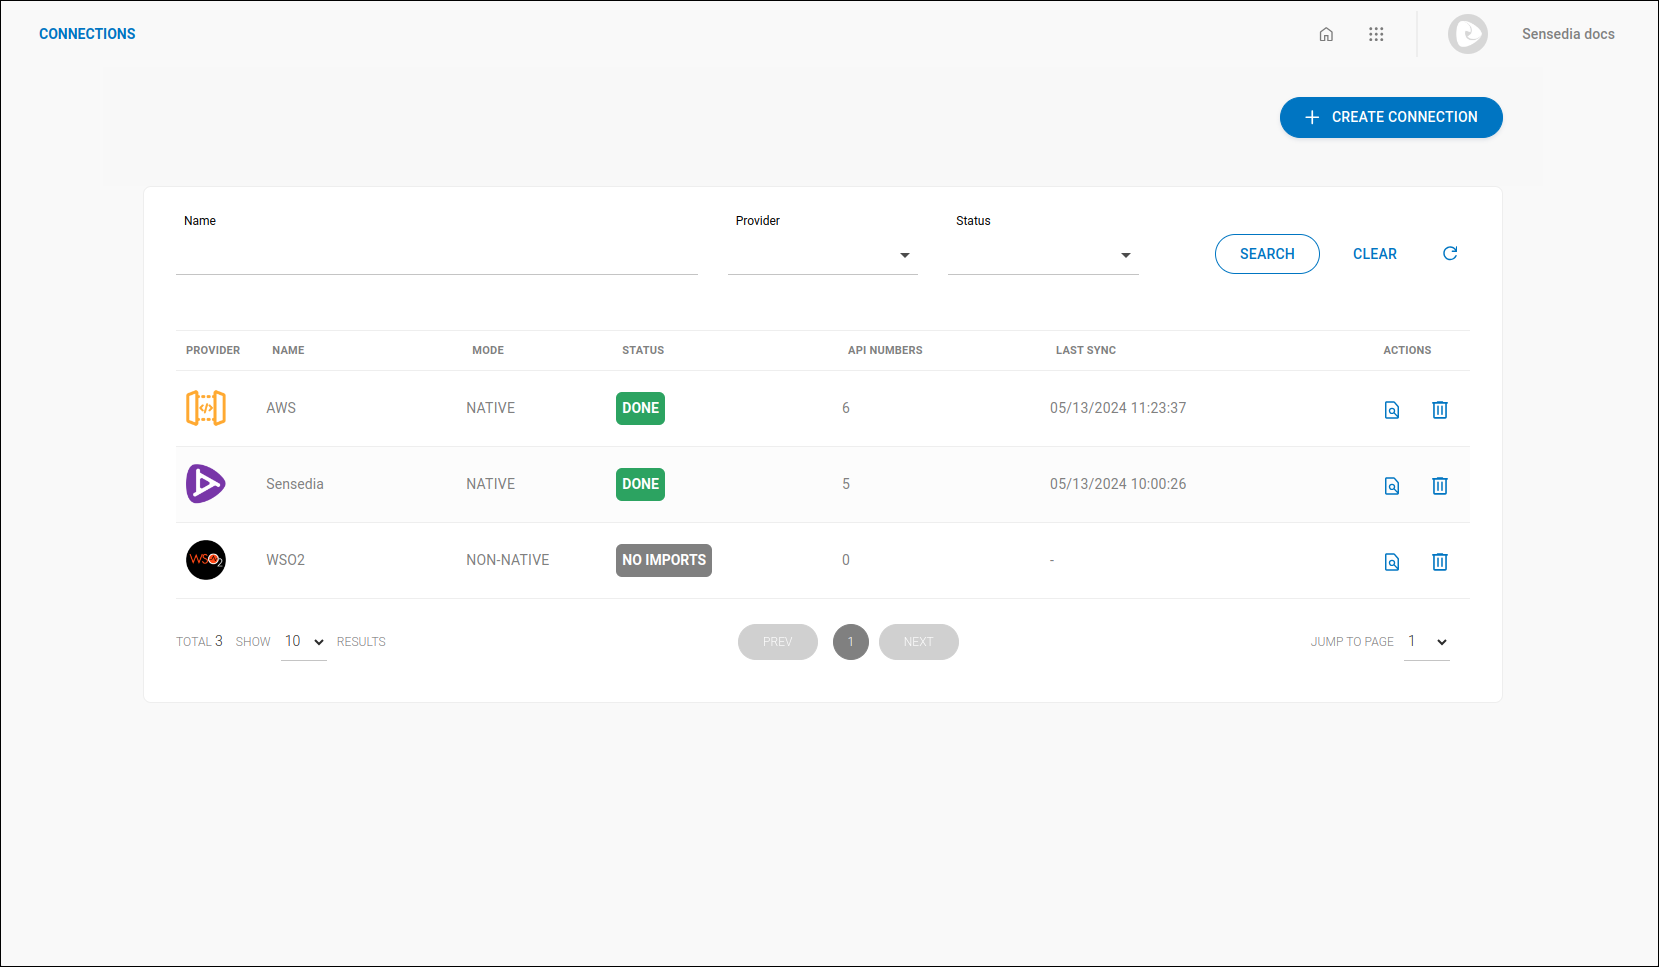
Open the Connections screen by clicking on the left sidebar menu or on the card on the home screen.
Click the + CREATE CONNECTION button at the top right of the screen.
In step 1 - PROVIDER, type or select MuleSoft.
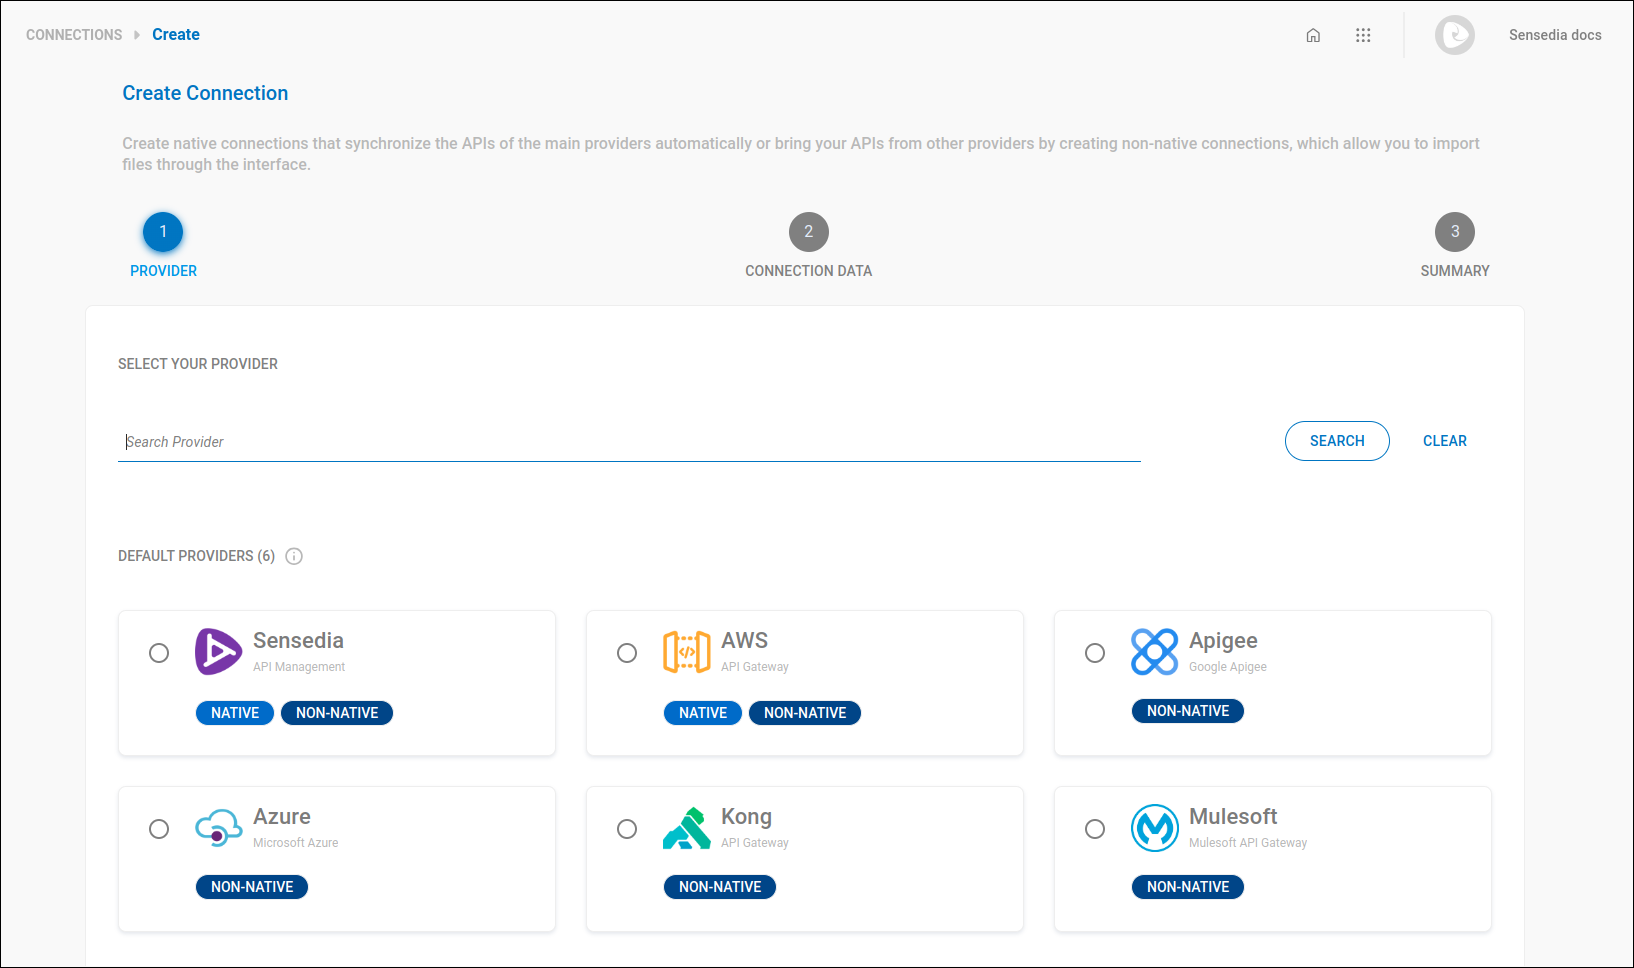
Click NEXT.
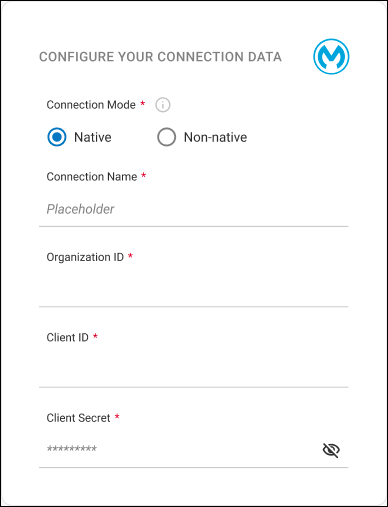
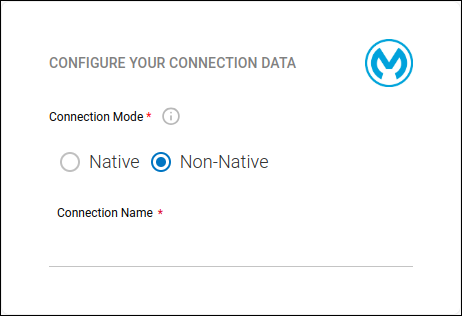
In step 2 - CONNECTION, choose between a native connection (data updated directly with the provider) or a non-native connection (manual upload).
For a native connection, provide:
Connection Name: identifier name for the connection.
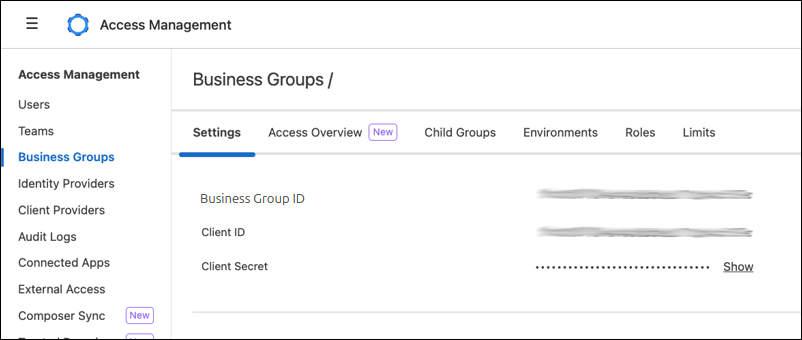
Organization ID: unique identifier code for Sensedia. See how to obtain it.
Client ID and Client secret. See how to obtain them.
For a non-native connection, provide:
Connection Name: identifier name for the connection.
In the final step, review the information. If everything is correct, click SAVE.
| In native connections, APIs are imported automatically. |
To import APIs manually, follow the steps below:
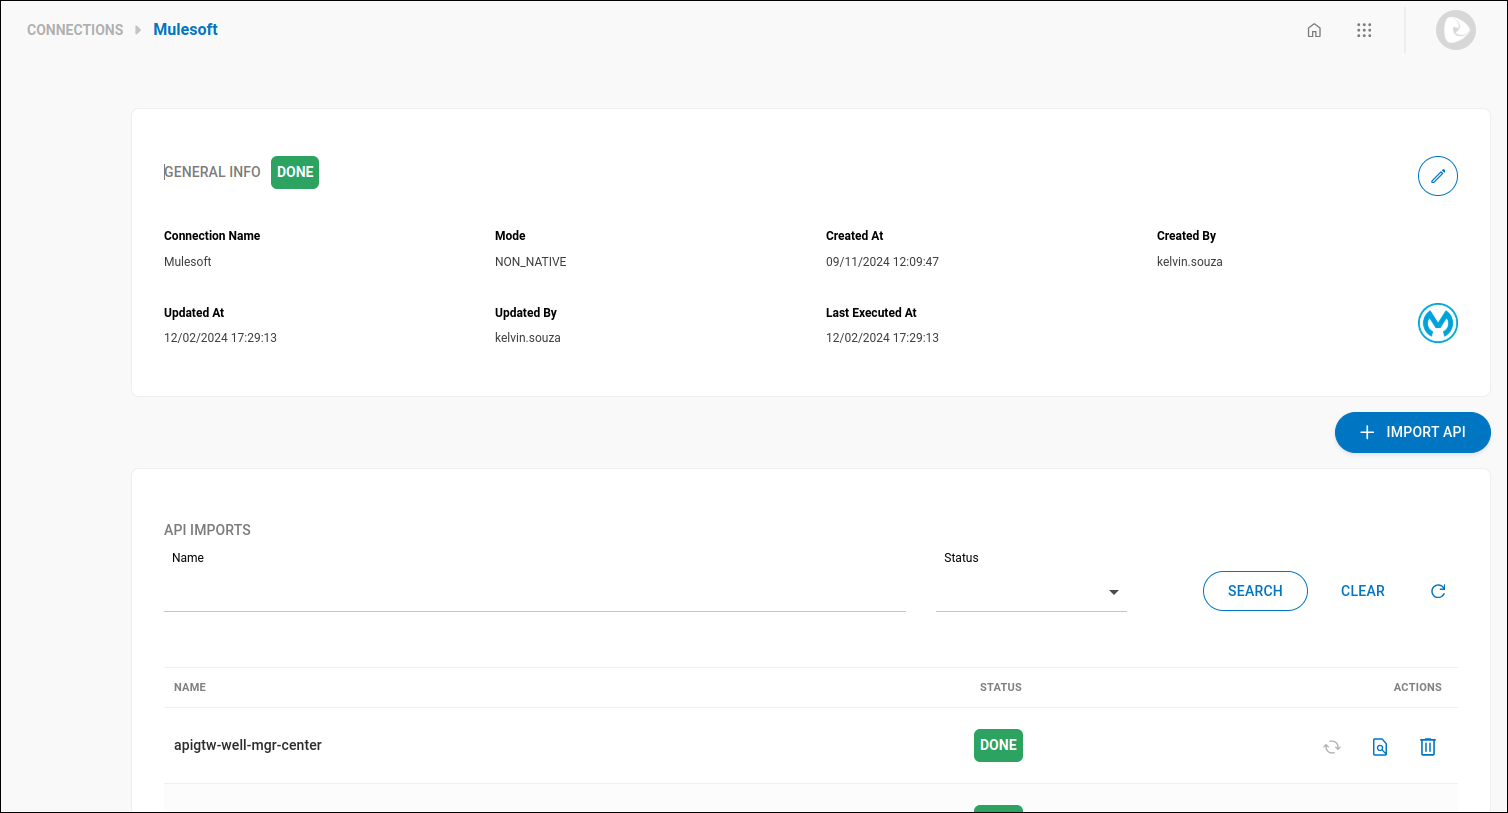
Open the Connections screen by clicking on the left sidebar menu or on the card on the home screen.
Find the connection you want to edit and click the ![]() icon.
icon.
If needed, use the search bar to locate the desired connection.
On the API Imports screen, click the + IMPORT API button, located just below General Info and above API Imports.
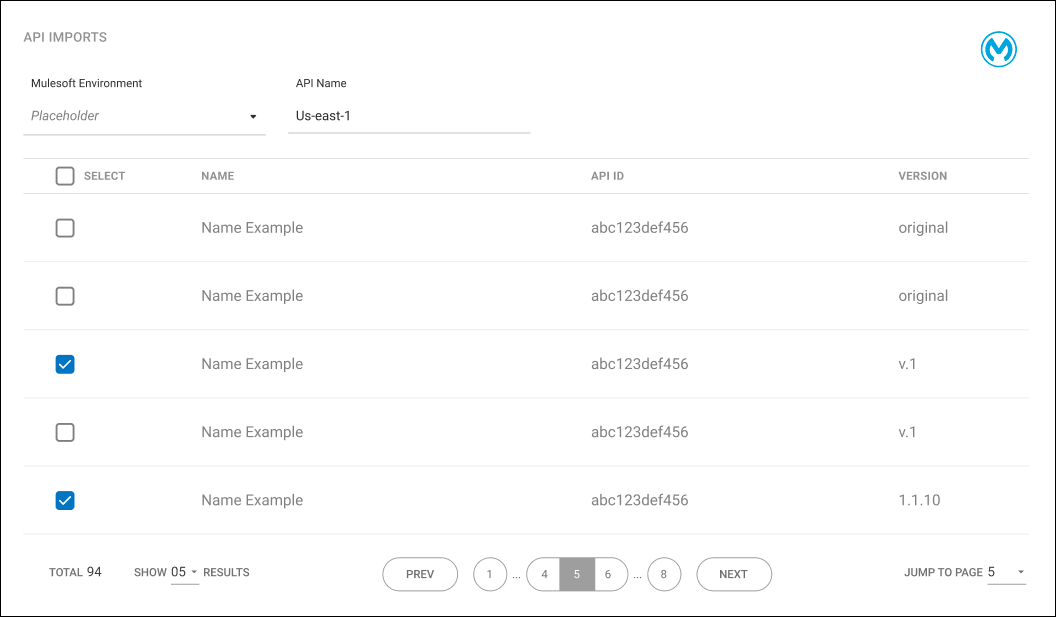
Select an environment to view the APIs associated with it.
Select the APIs you want to import. If needed, use the API name search.
Then, click SAVE.
Share your suggestions with us!
Click here and then [+ Submit idea]