Thanks for your feedback!
EDIT
This interceptor is responsible for validating requests made to an API. Requests must contain a digital signature — consisting of a token generated through an RSA key — which must be sent in the header or query parameter.
Before using the Digital Signature interceptor, you must first generate an RSA key. Then, a digital signature must be generated, using either your own application or the API Crypto available in your environment.
You will find below a step-by-step guide on how to enable the interceptor.
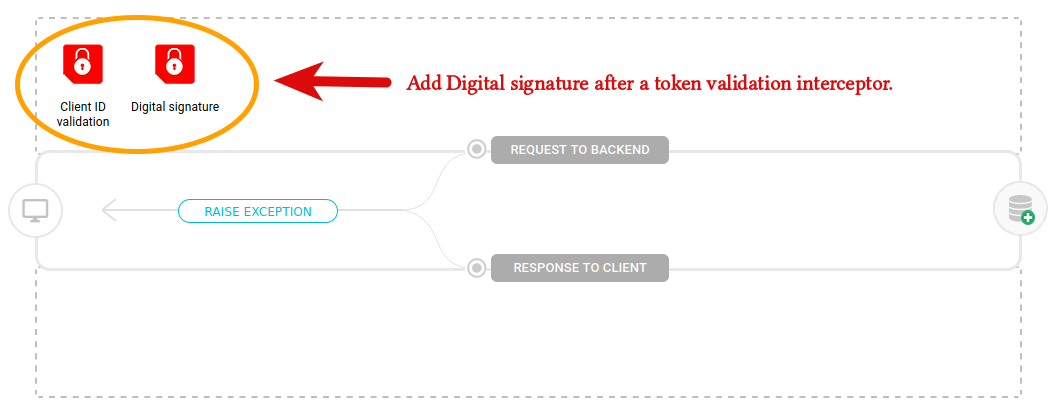
This interceptor can only be added to the request flow. For it to work, the API flow must identify an app and, for such, there must be an token-validating interceptor before Digital Signature (either Access Token Validation, Client ID Validation, JWT Validation, or OAuth).
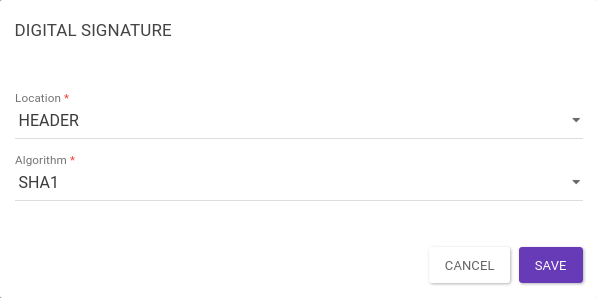
When the settings modal window opens up, you will need to select the Location of the signature and the Algorithm used. We support these encryption algorithms: SHA1, SHA224, SHA256, SHA384, SHA512, MD2, and MD5. This page contains reference on these algorithms.
In the example below, we are generating a signature with the SHA1 pattern and sent in the header.
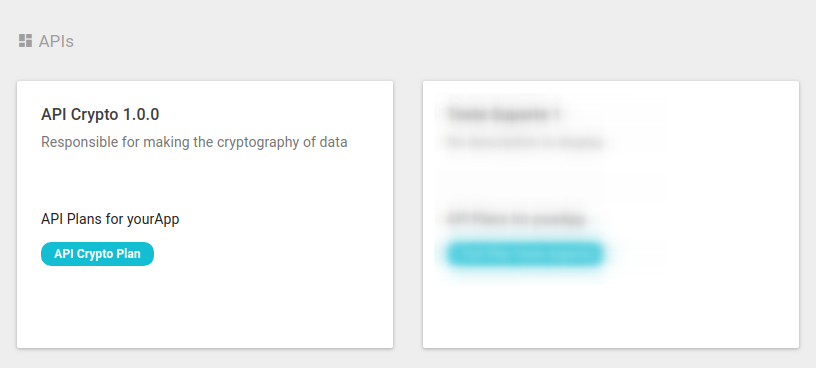
For the interceptor to work, it is necessary that the app is linked to the API to be consumed. The user can generate the signature with their own application or via the API Crypto available in their API Manager. In this case, the app must also be associated to the API Crypto, which will enable accessing the endpoints that will generate the signature.
To generate the signature, you must first generate the RSA key, by sending a POST request to http://<your-domain>/api-crypto/api/v1/keys.
The values that must be informed in the request header are:
Content-Type: application/json
Authorization: Basic client_id:client_secret in Base64
The client_id value informed must be the client ID of an app linked to the API whose calls will be signed.
|
The body must contain:
 {
    "type" : "RSA"
 }
Example of a request CURL:
curl --request POST \
  --url https://api-treinamento.sensedia.com/sandbox/api-crypto/api/v1/keys \
  --header 'authorization: Basic <client_id:client_secret base64>' \
  --header 'content-type: application/json' \
  --data '{
 "type": "RSA"
}'
Once the request is completed, the response will contain the following data:
| The public and private keys are returned in Base64. |
{
    "privateKey":"base64private",
    "publicKey":"base64public",
    "type": "RSA",
    "creationDate": 1557932655994
}
After the pubic and private keys are generated, the user can generate the signature through their own app or via the API Crypto available in their API Manager.
If the option is to generate it via API Crypto, a POST request must be sent to http://<your-domain>/api-crypto/api/v1/sign
The header must contain:
Content-Type: application/json
Authorization: Basic client_id:client_secret in Base64
The client_id value informed must be the client ID of an app linked to the API whose calls will be signed.
|
The body must contain:
{
    "type": "RSA",
    "data":<url_of_the_api>,
    "algorithm": "SHA1"
}
Example of curl:
curl --request POST \
--url https://api-treinamento.sensedia.com/sandbox/api-crypto/api/v1/sign \
--header 'authorization: Basic <client_id:client_secret base64>' \
--header 'content-type: application/json' \
--data '{
"type": "RSA",
"data": "api_url",
"algorithm": "SHA1"
}'
Pay attention to the "data" field at this stage, which will contain the endpoint to be called with the signature.
It is sensitive to "/";
therefore, an endpoint "example.com/test" is not the same as "example.com/test/".
In addition, as we are using SHA1 (following the settings informed when the interceptor was inserted in the API flow), "algorithm" has the value "SHA1".
|
After the request is completed, it will return a JSON containing the digital signature in Base64 format, as the example below.
{
  "signature": "k4OoVH9uiNjDpVPqTho17FBdgdROJyT2FD2ngoxSmo/vMPUye8fXZFO1fqj0iI23AXtliRnLxGgndNLAqEY0PAPMtNy0C8MGoQeSSCuRema9q36gNOgUFTtXz/2HiwGN8mbI5p8+CzyPoJvwAI9Xn3nrosSJh5+NIdHFhirQziU="
}
Now that the signature is generated, the user must send it on requests to the API that has the Digital signature interceptor.
The signature value must be sent in the header or query param — depending on what was selected when the interceptor was configured in the flow — to the URL defined on the "data" field of Step 2 above.
| A signature generated for a given API can’t be used in requests to a different API. |
| When using a signature token in calls to your API, remember to encode the signature using the correct format in case it is informed in the query parameter of the URL. You can encode it here. |
Share your suggestions with us!
Click here and then [+ Submit idea]