Thanks for your feedback!
EDIT
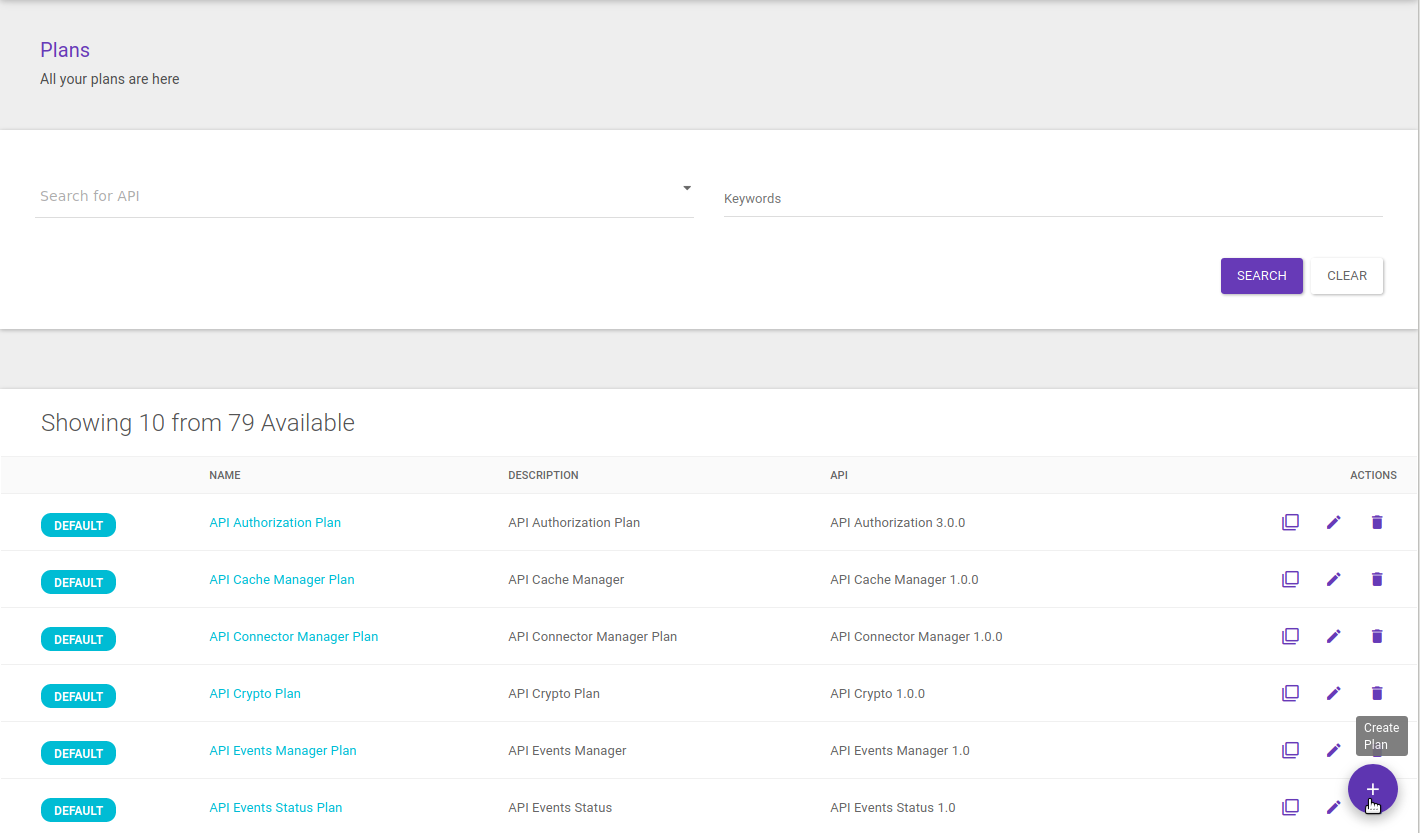
To add a new plan, click the Create Plan button, represented by the + icon on the bottom right corner of the Plans page.
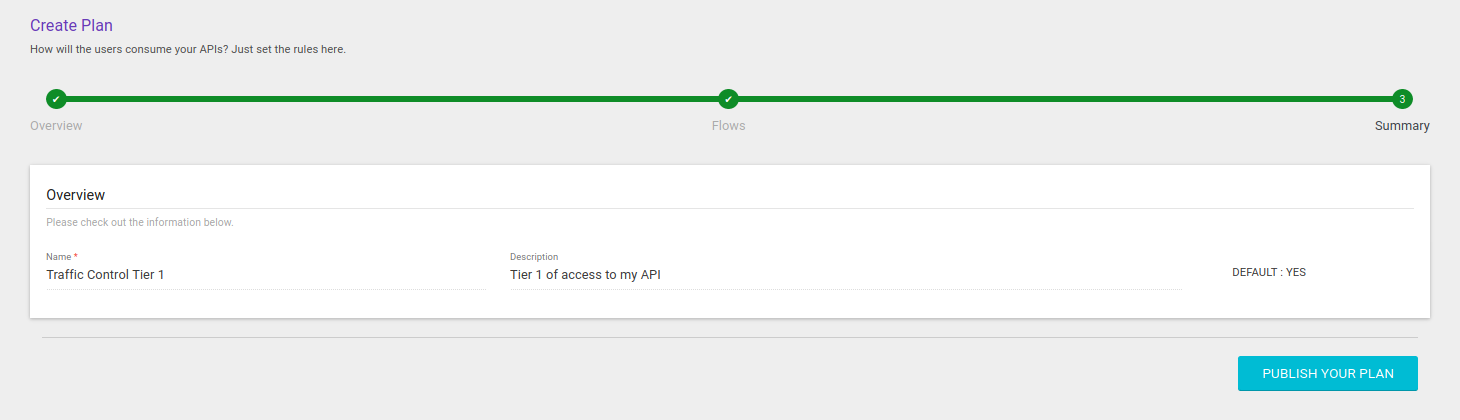
The registration is carried out over three stages: Overview, Flows and Summary.
The first stage comprehends the insertion of basic information, on the upper part of the screen, and linking the new plan to an API, on the bottom part (the Choose an API section), as the image below shows.
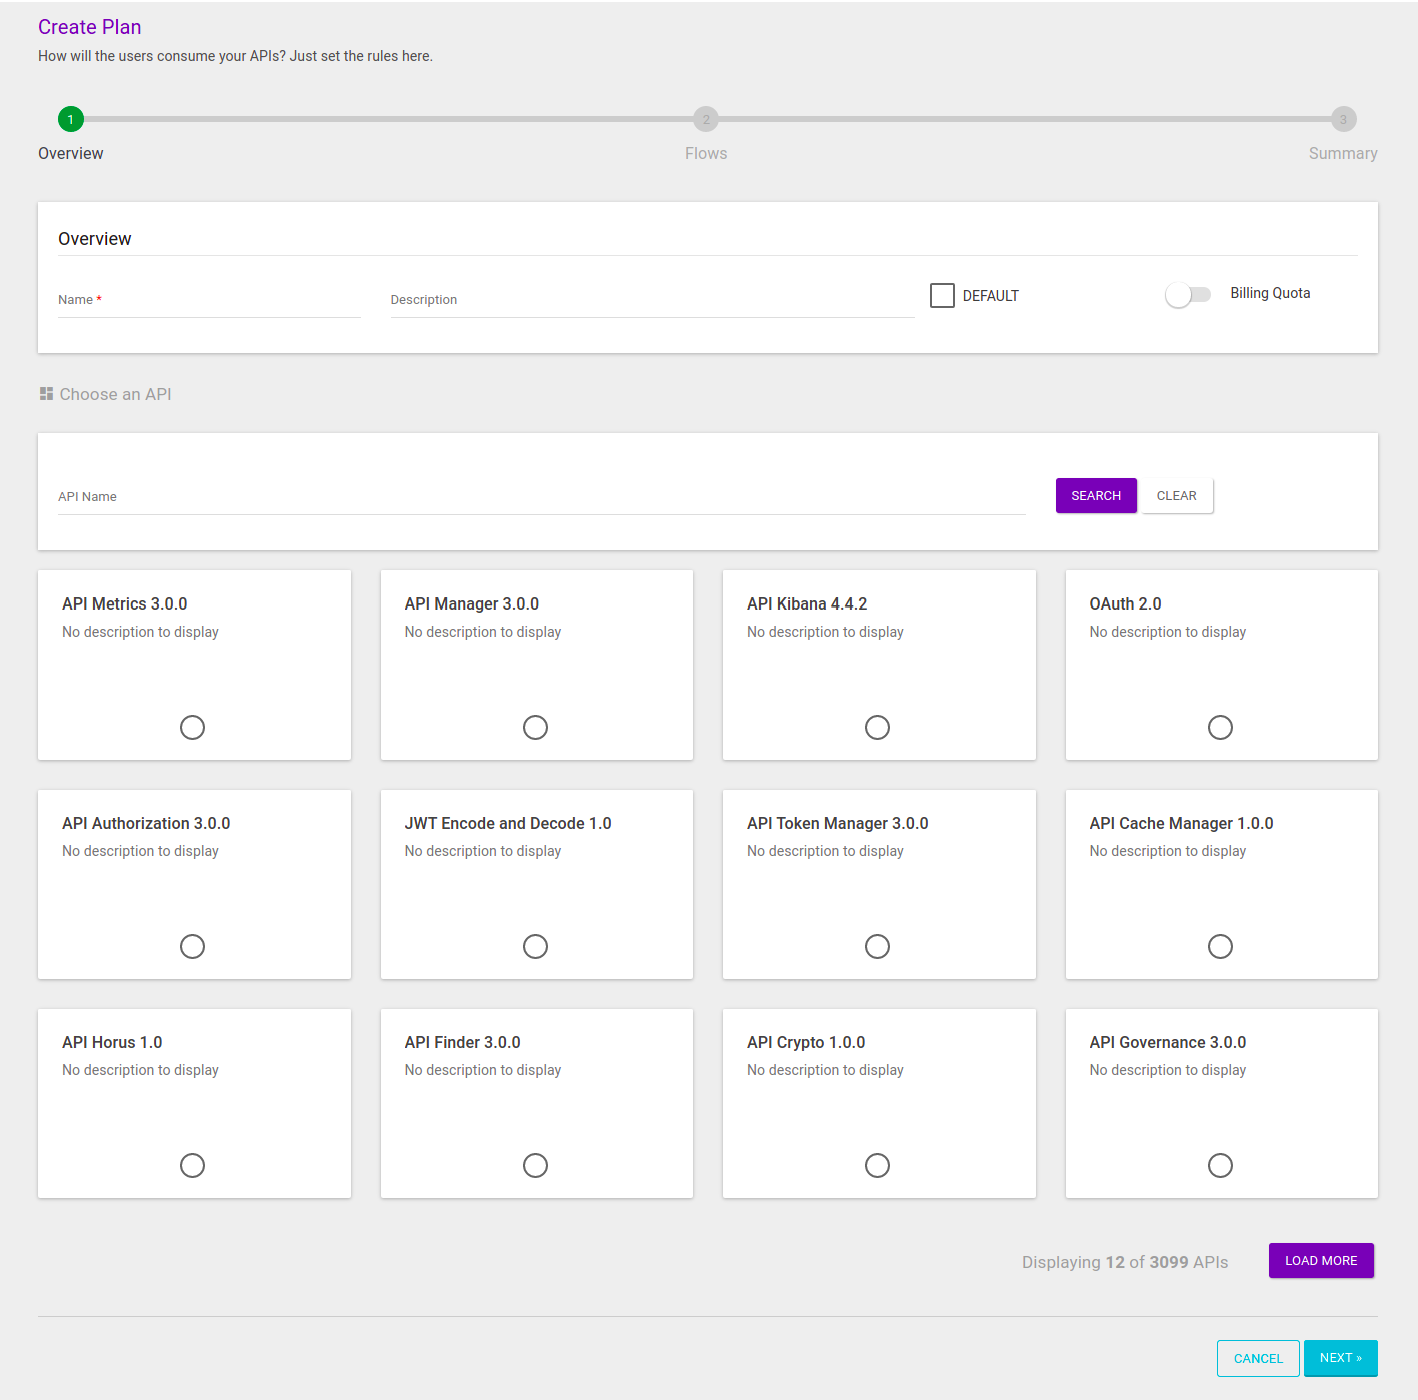
Name: include a unique name to the plan.
Description: non-required field, but useful to identify the plan more easily.
Default plan: when marked, the option determines that the plan will be the API’s default plan. If no plan is selected in the registration of an API, its default plan will be automatically attributed. Note that an API can only contain a single default plan.
Choose an API: every plan must be attributed to an API, which, in turn, can contain multiple plans.
Billing Quota: field to establish billing for the plan at hand. If the option is marked, new fields will be displayed for billing information to be entered. Read more about it here.
After filling in the fields above, you must choose an API to which the new plan will be linked (on the section Choose an API).
| Remember that you can only choose one API per plan (but an API can contain multiple plans, albeit only one will be its default plan). |
The APIs which are available on your Manager will be exhibited as cards, ordered by last modification. The screen will contain 12 cards at first, but you can load more APIs by clicking the Load More button, on the bottom right corner of the screen.
You can select an API from the list of cards or use the search field to filter APIs by name, which makes it easier to find the desired API if you there are many registered.
If you wish, you can clear the search by clicking the Clear button. In this case, the cards list will be reset.
On the example image below, we are filtering APIs by the name "Demo", which generated two results. From those, we selected "Demo API 2.0.0" to link our plan.
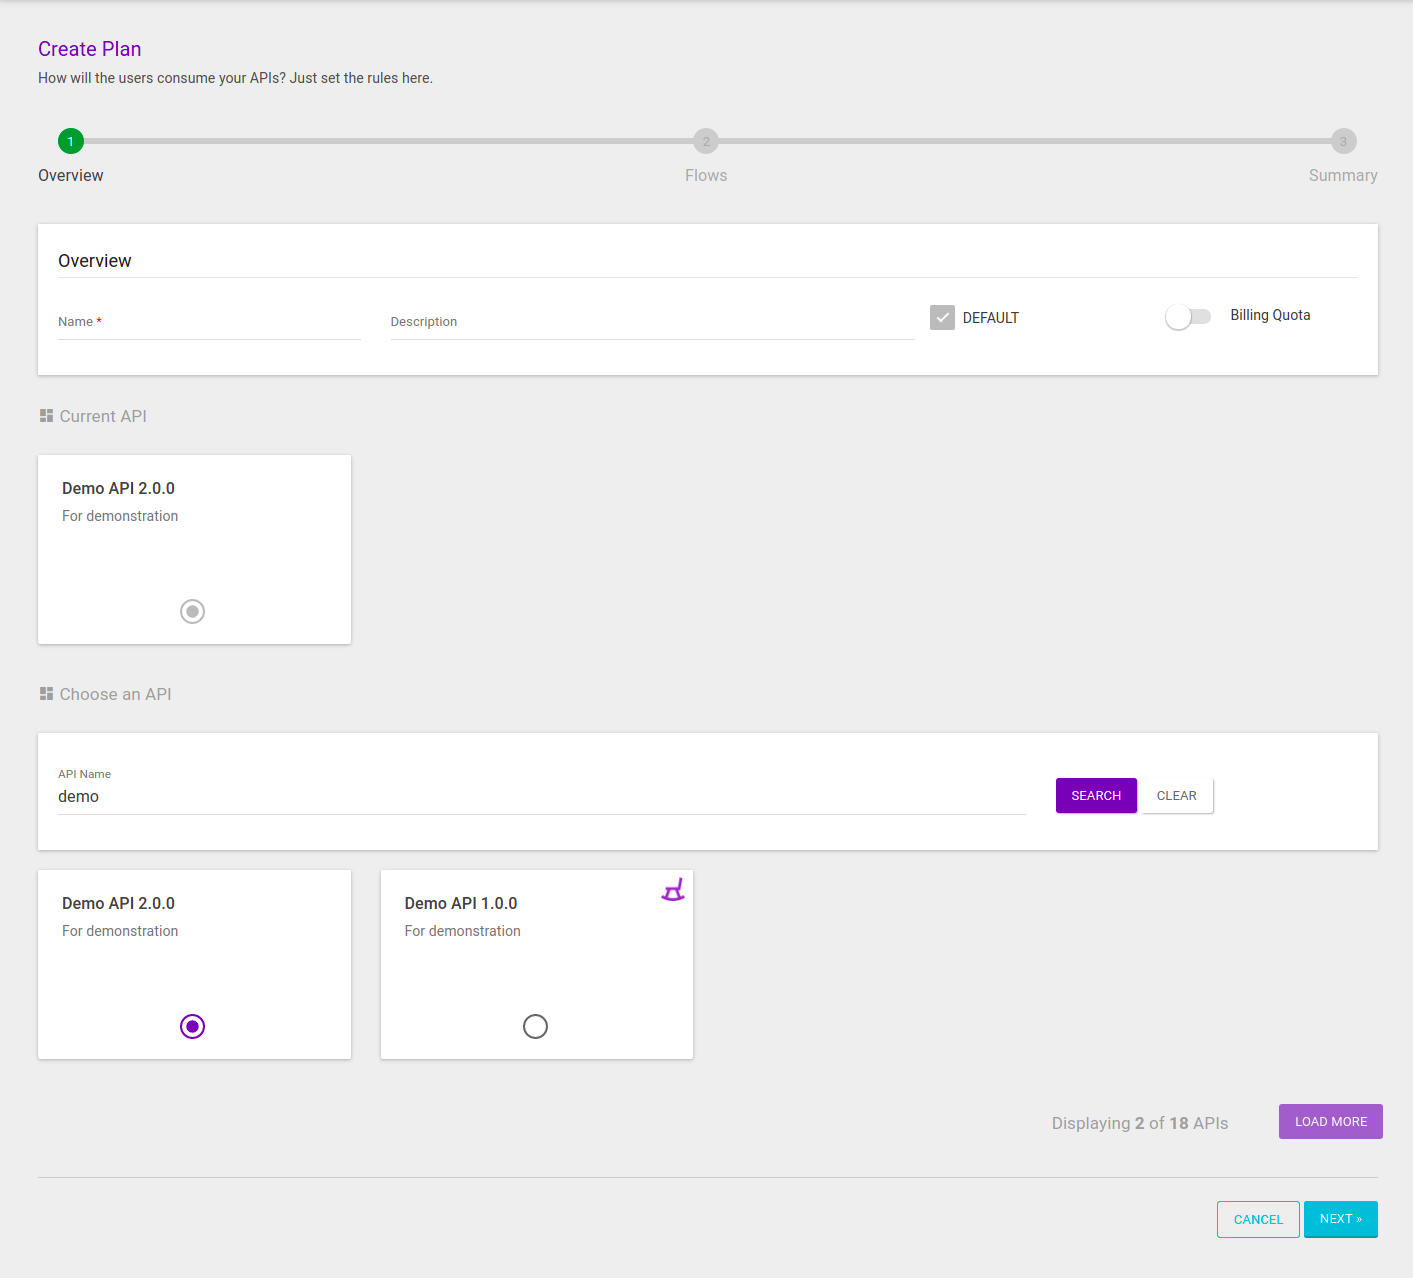
|
Note that there is an icon This icon is displayed to warn you that the API is an older version of another API, also registered. In this case, "Demo API 1.0.0" is an older version of "Demo API 2.0.0". Click here to read more about API versions. |
The selected API is then displayed on the section Current API.
If you need to change the selected API, just choose another card.
The following step in creating a plan is the Flows stage. You must now insert the desired interceptors in the request and/or response flows.
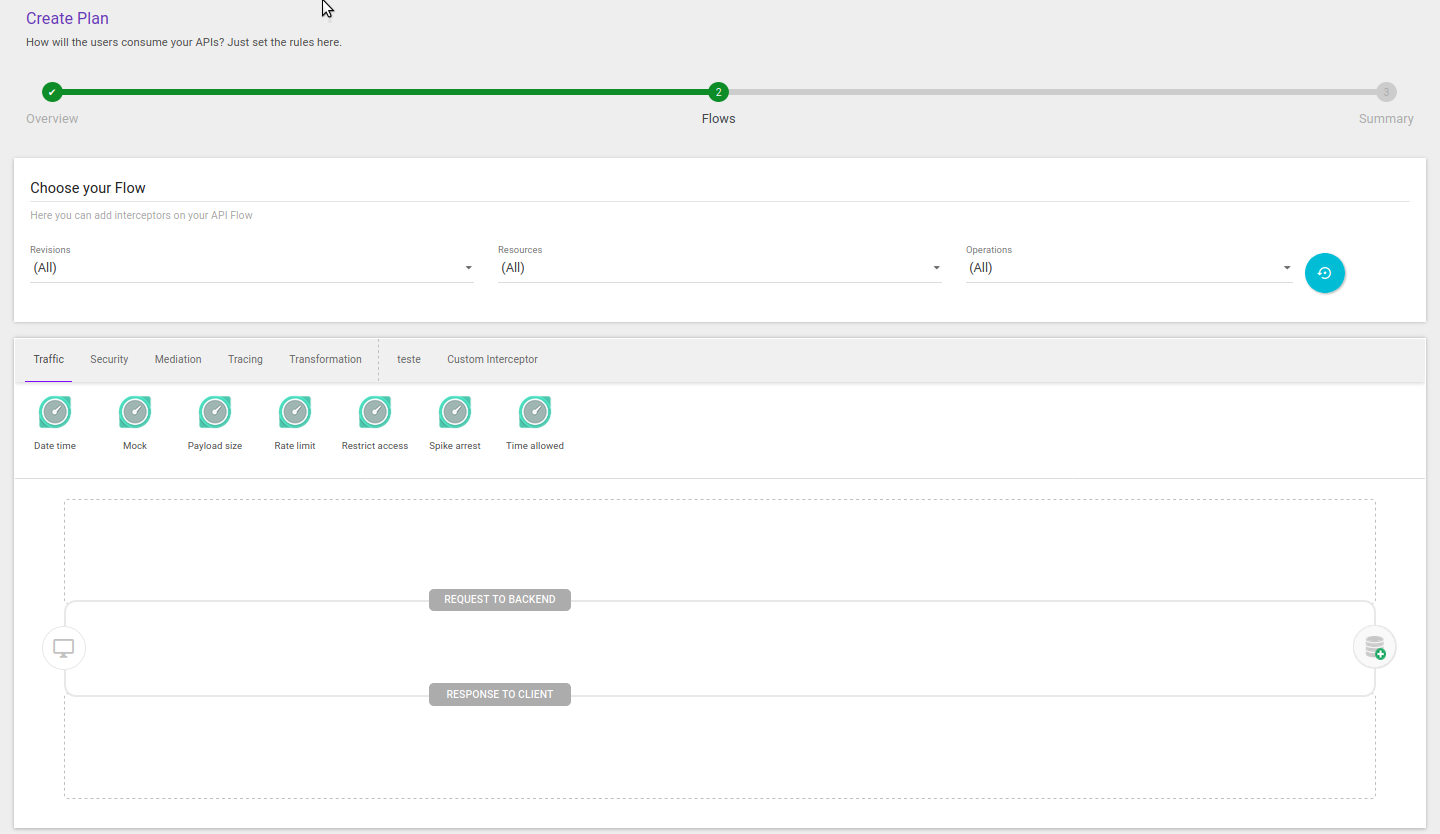
This stage follows the same interceptor-inserting rules of the flows of a regular API. Read more about API flows here and about the several available interceptors here.
A flow can be created for all API revisions or for a specific revision, which includes resources and operations. Read more about API revisions here.
| There is no inheritance for interceptors included for all revisions — inheritance applies only to the selected revision. Interceptors entered for all revisions will only be executed when there is no interceptor inserted for a specific revision. |
After including all desired interceptors, click Next to move on to the third step, the Summary stage.
Share your suggestions with us!
Click here and then [+ Submit idea]