Thanks for your feedback!
EDIT
You can find the connectors on the Manager’s API Design > Connectors menu:
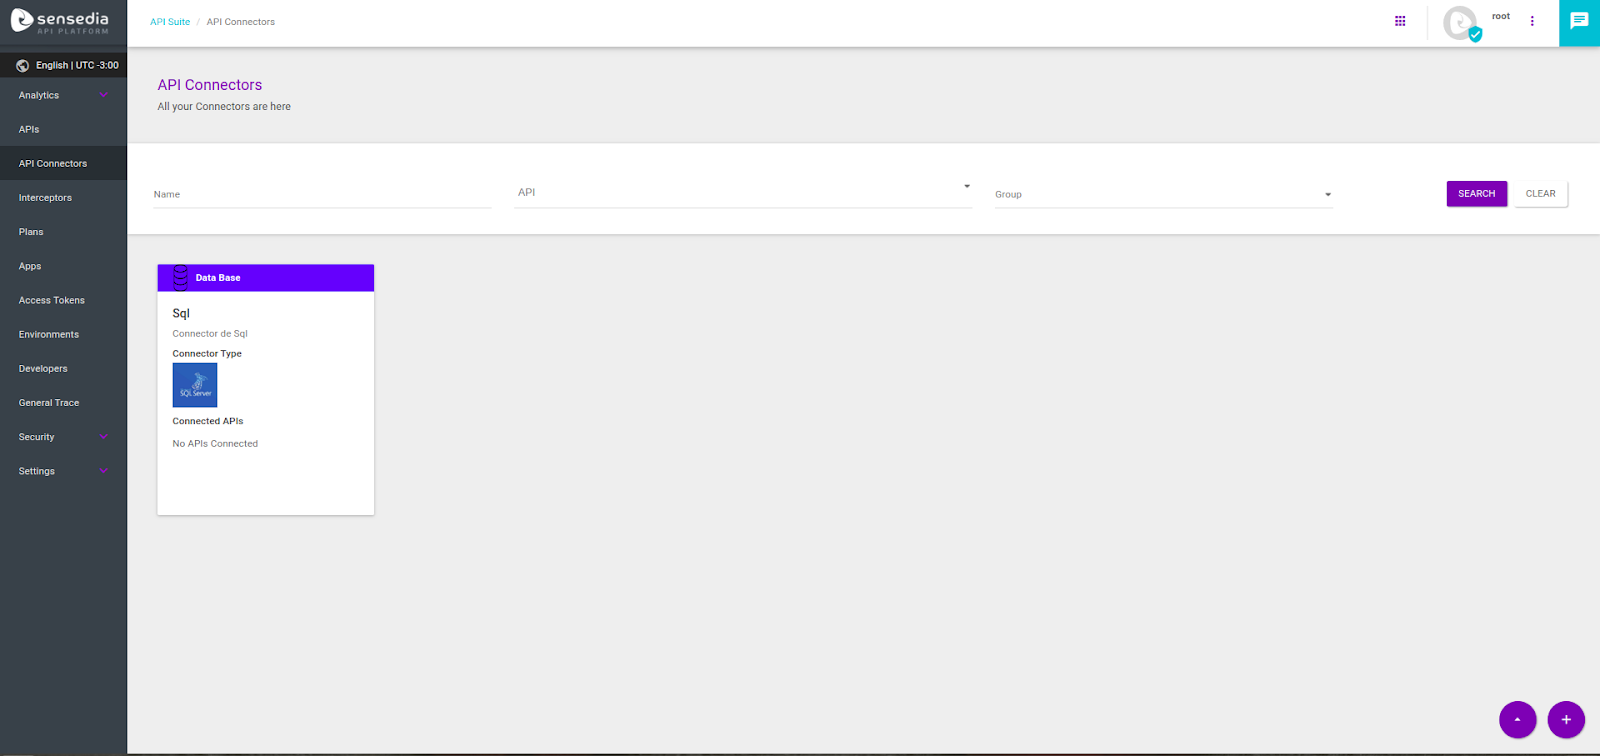
This screen may vary depending on the version of the Sensedia API Platform.
They are categorized by their type (which represents the protocol to which they allow access), e.g.: Oracle Connector, SQL Server Connector and AWS Lambda Connector.
Connectors are divided by groups, which share characteristics. Regarding the examples above, Oracle and SQL Server belong to the Database group, while AWS Lambda belongs to the Cloud Providers group. These groups make it easier to find the desired connector in the API Manager.
Connectors that are enabled in the Connectors menu are ready to be linked to an API, serving as a basis for new resources. Enabled connectors have the colour of their group, while disabled ones are greyed out.
When you link a connector to an API, you can define the operations for the resources like you would configure any other regular resource (read more about resources here). Each connector can be linked to multiple APIs and an API can have multiple resources from different connectors.
But, first of all, you need to know how to enable a connector.
To enable an existing connector on the Platform, it is necessary to fill in the mandatory information. Once enabled, you can link your connector to an API and create resources from it.
The first step to enable a connector is to configure the environment in which it will run, and you can do so on the Manager’s Environments menu.
Each connector has specific connection properties. These properties are intrinsic variables for each connector type, and they represent the distinct configurations which are needed for connection to take place.
For instance, a Database connector must contain values informing the database name, user and password to grant access, database schema to be used, address of the database, among others.
The values of these properties must be previously specified as environment variables in the Environment Variables section of an environment, in the Environments menu.
As each connector type has different environment variables, we listed the fields you need to inform for each type. When you access the technical information page, you can select the connector group and find data on the specific connector type you need.
In the example of the image below, we are establishing the environment variables for a MySQL connector.
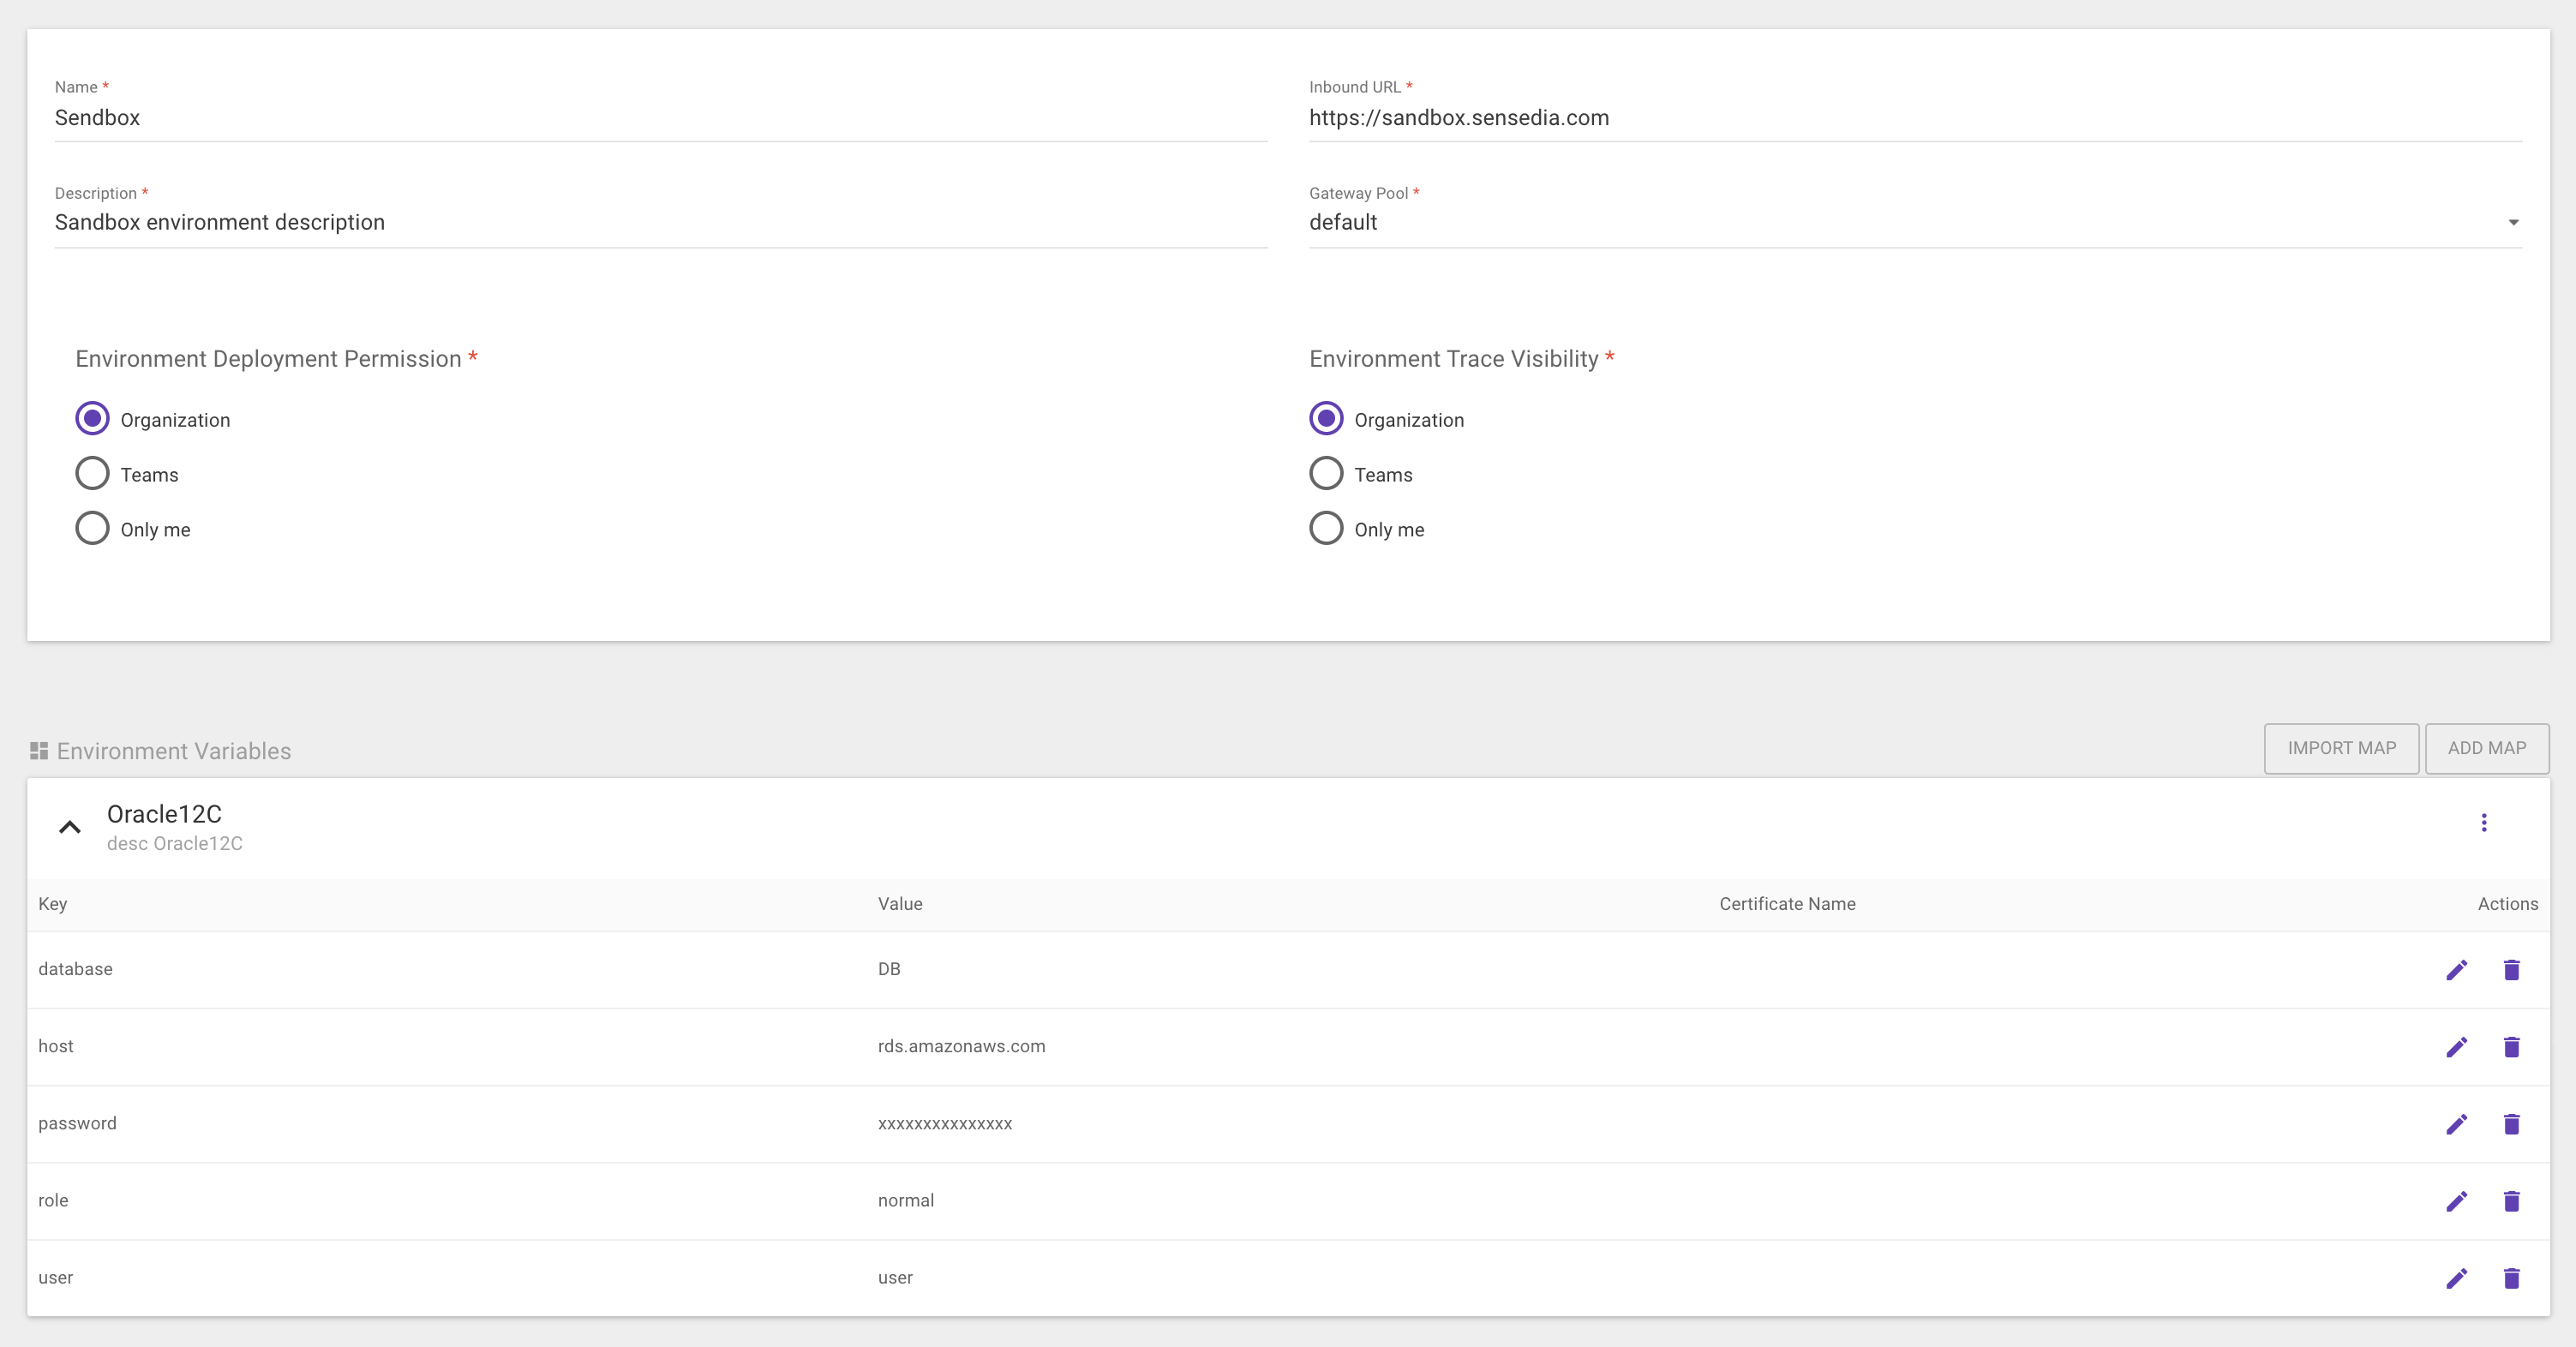
This screen may vary depending on the version of the Sensedia API Platform.
|
The variables must have unique names — that is, there can’t be two variables with the same name.
|
The new connector can now be registered on the Connectors screen.
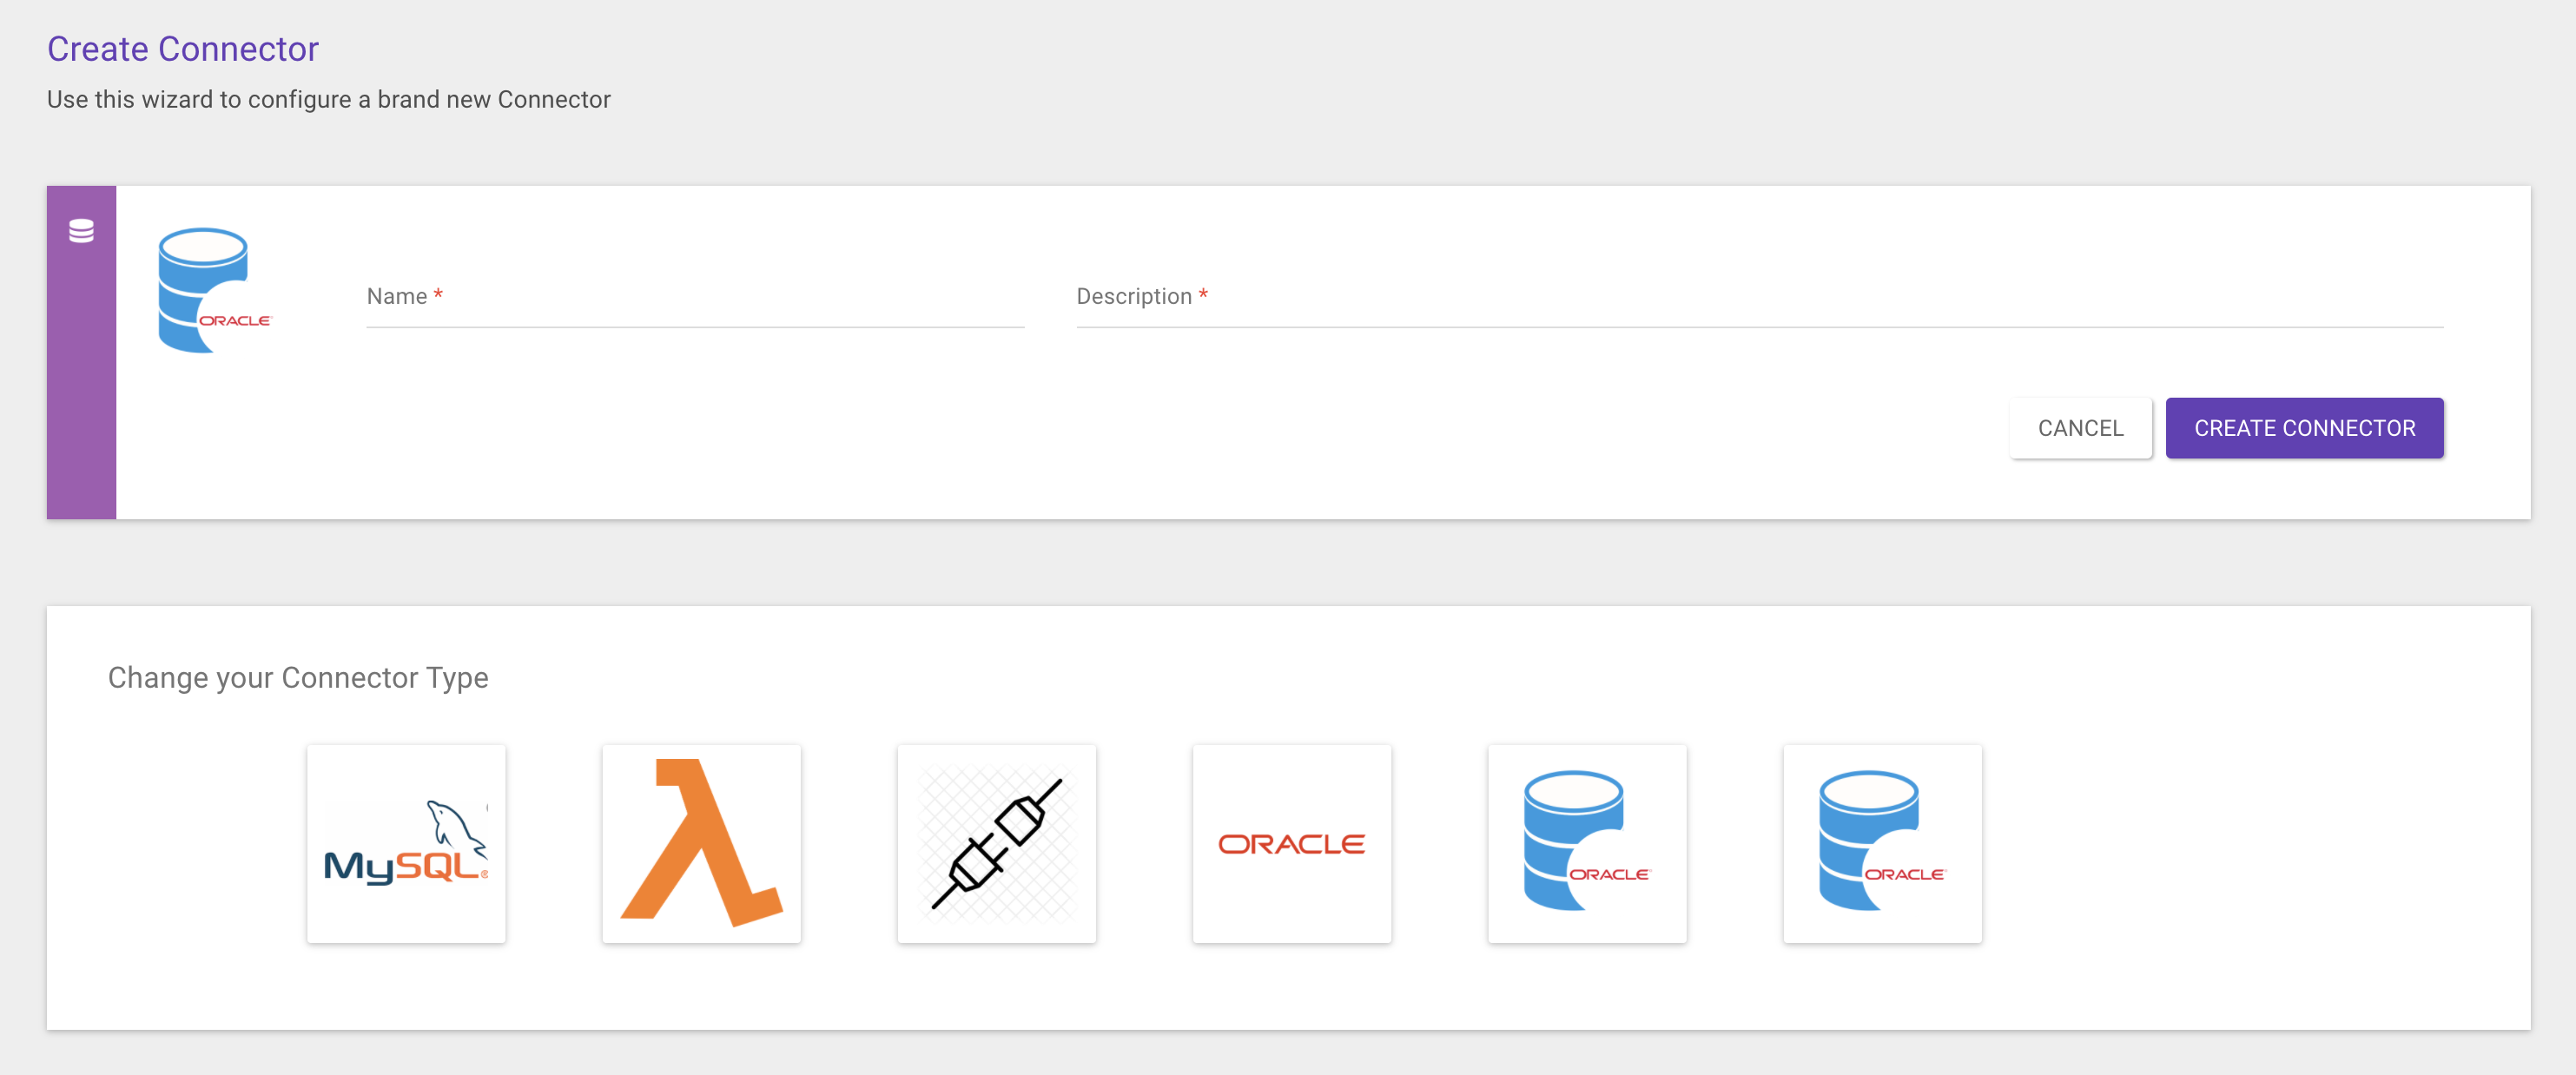
To make a new connector available to create resources from, click the + floating button and select the type of the new connector.
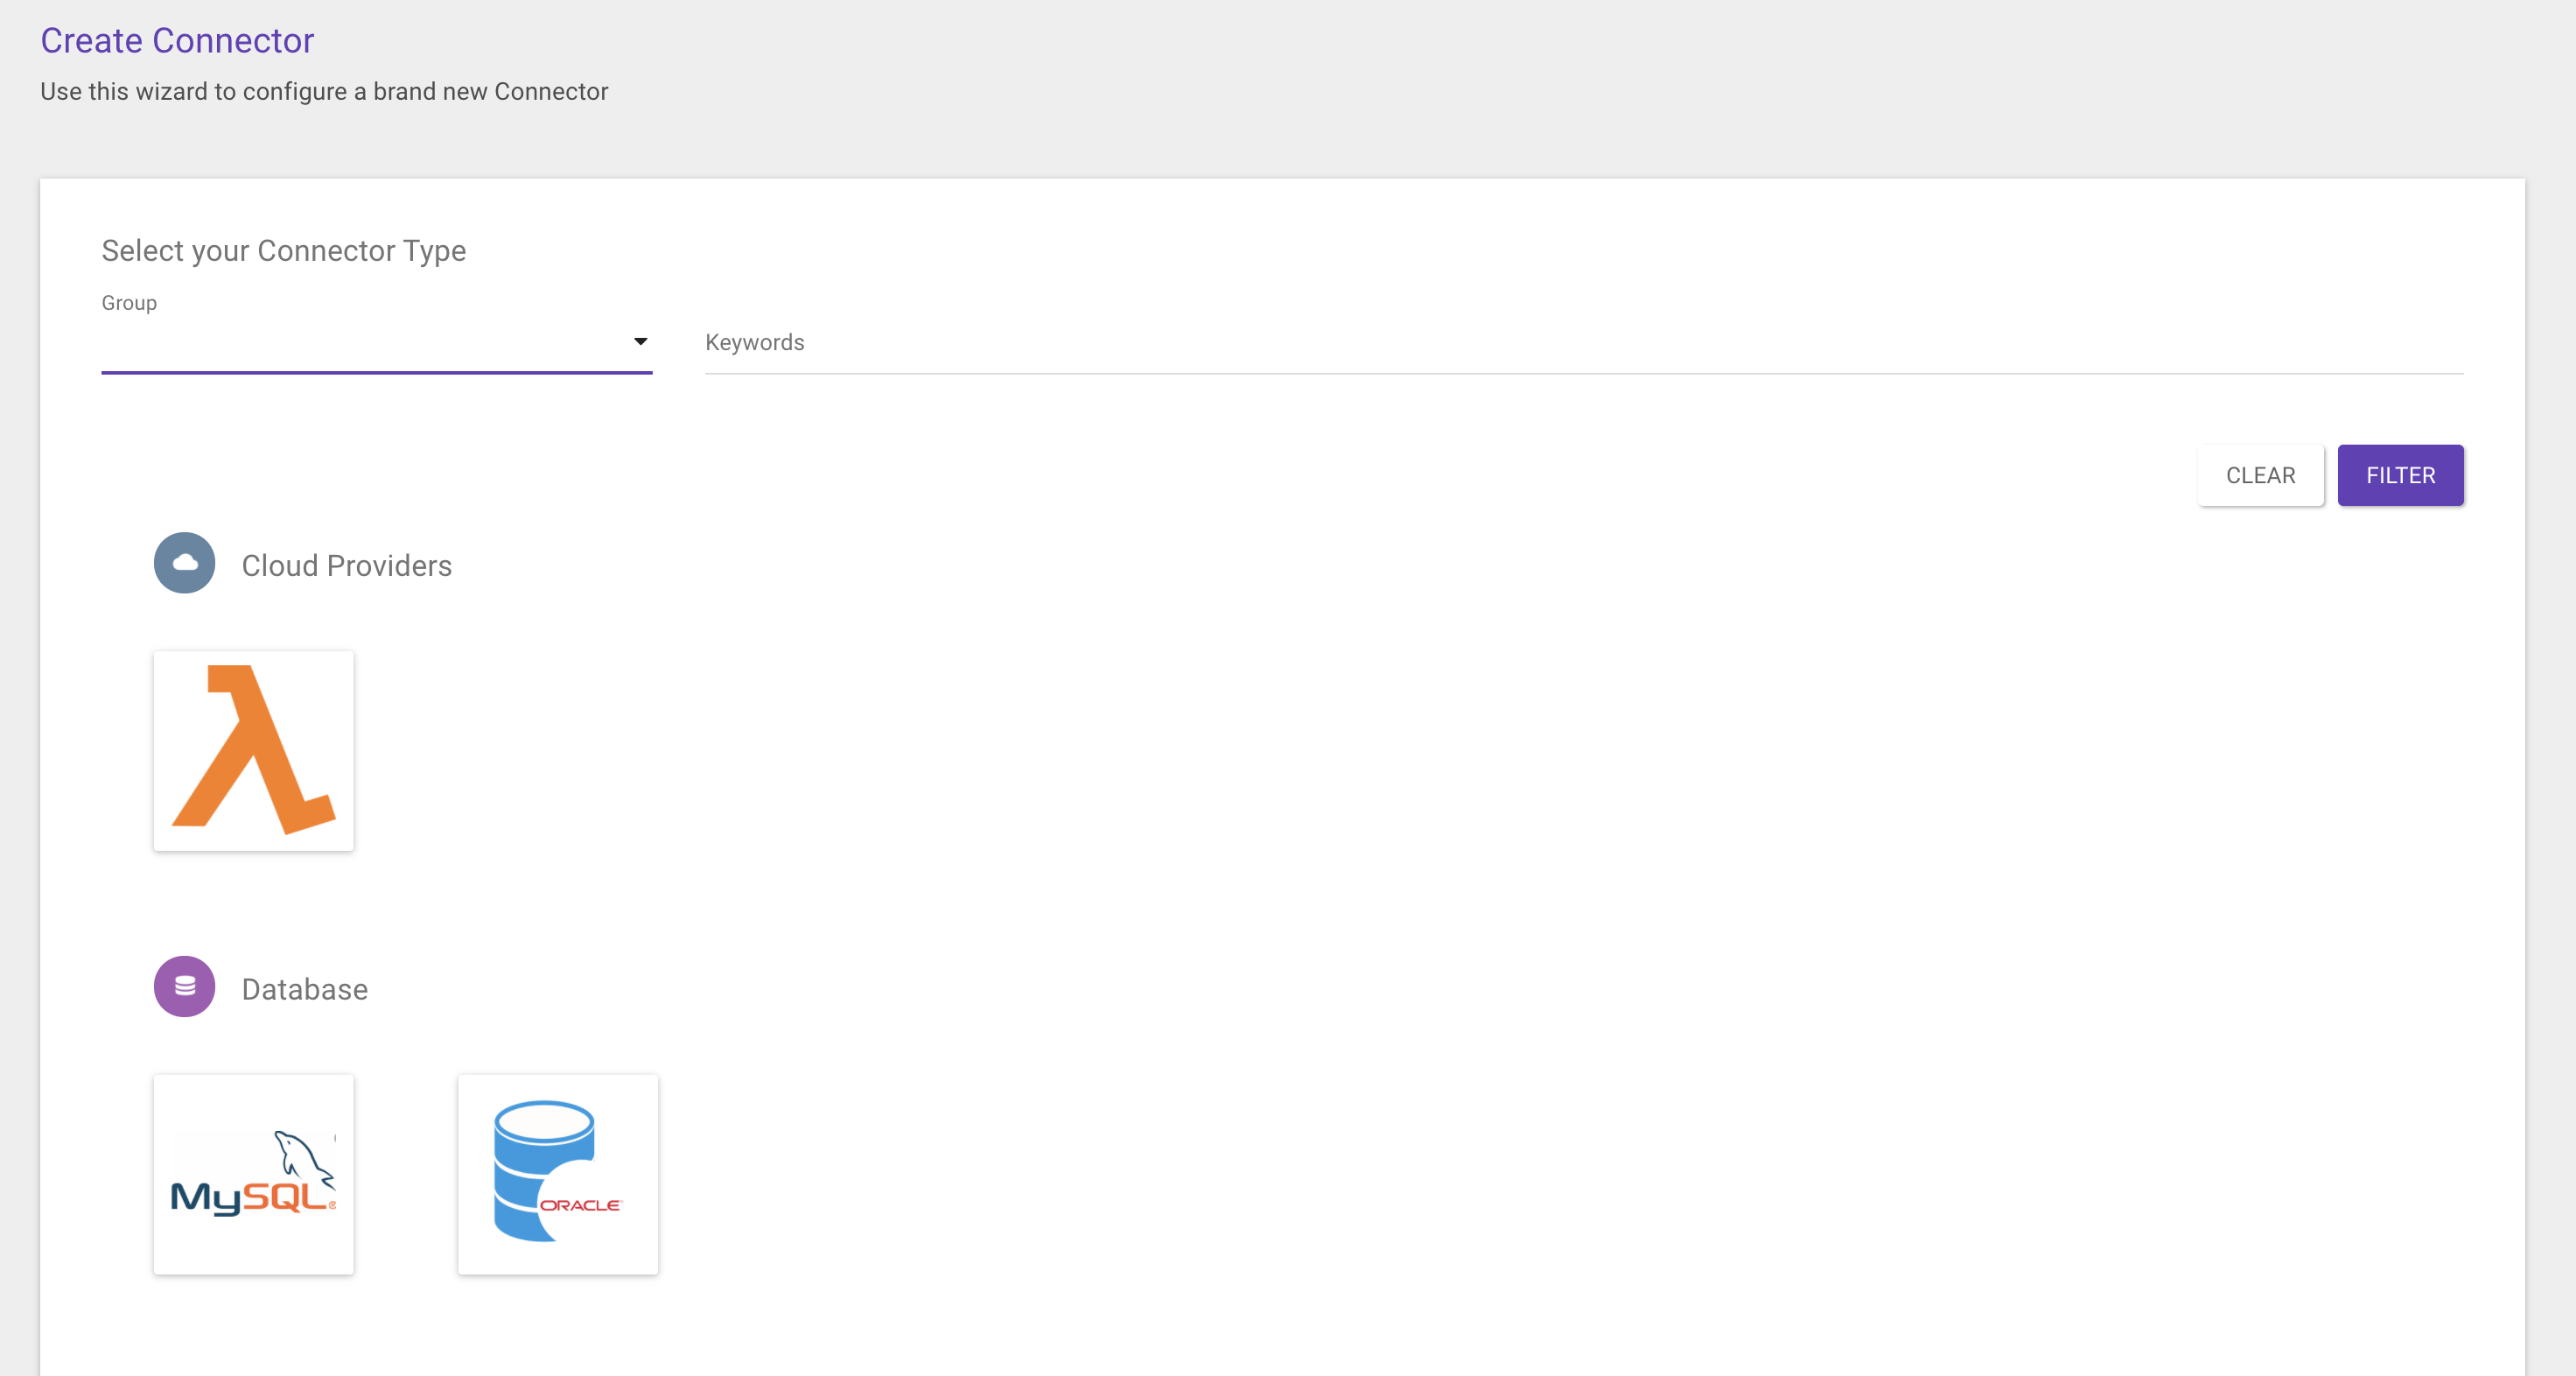
This screen may vary depending on the version of the Sensedia API Platform.
Upon selecting the type, two required pieces of information must be informed: Name and Description.
This screen may vary depending on the version of the Sensedia API Platform.
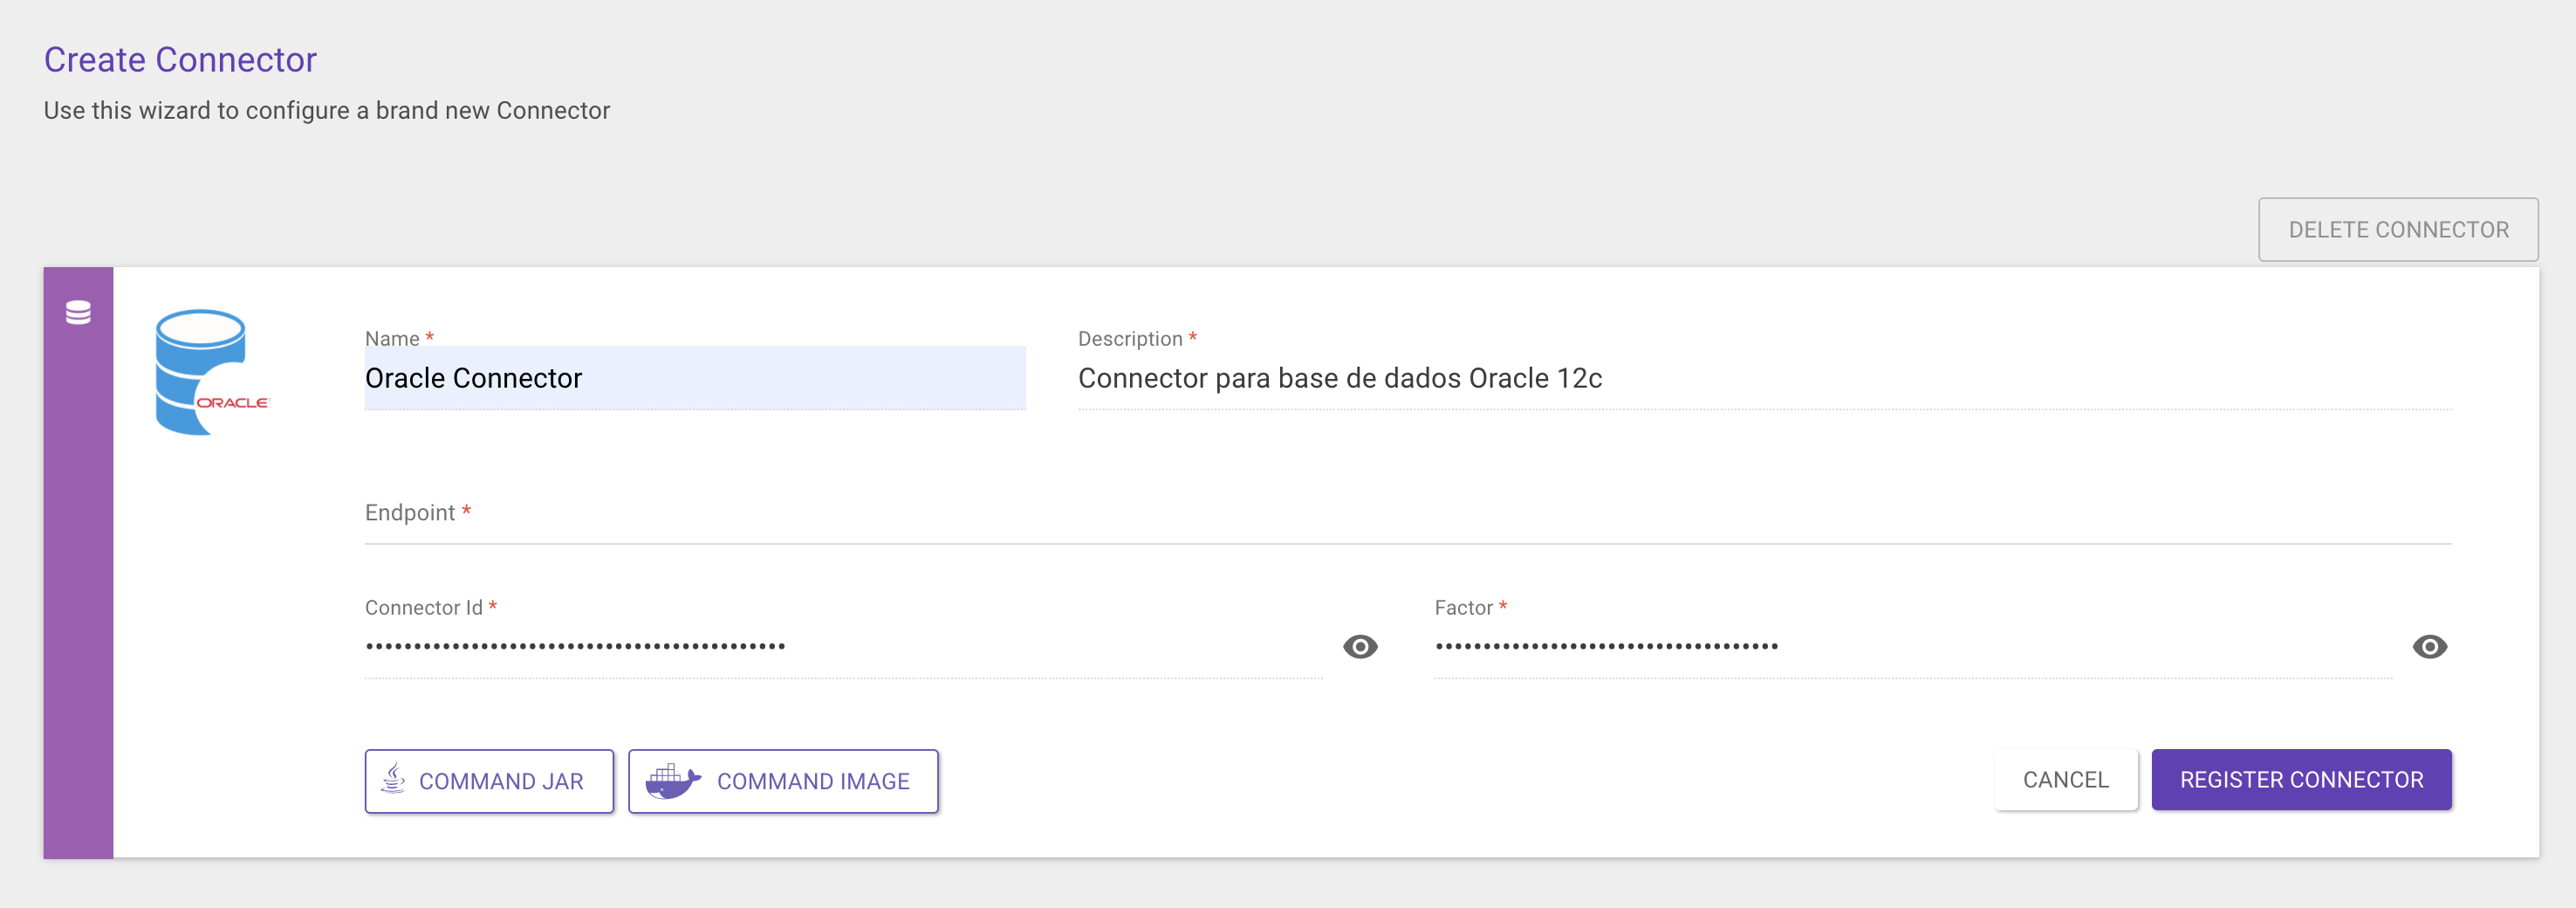
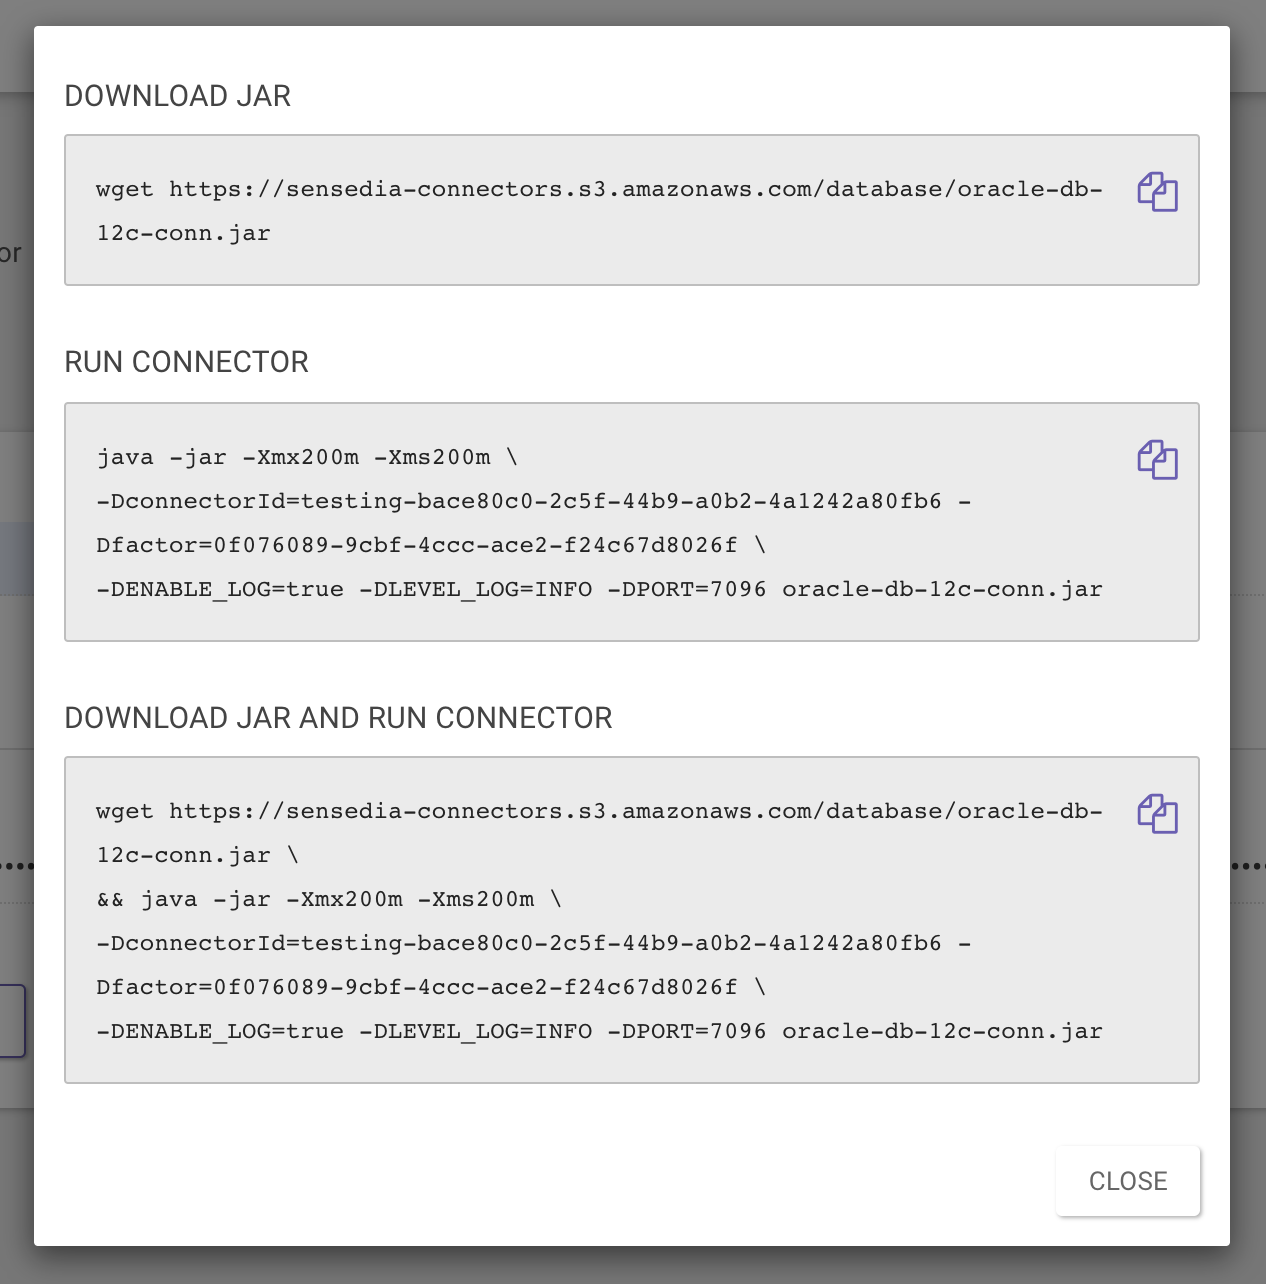
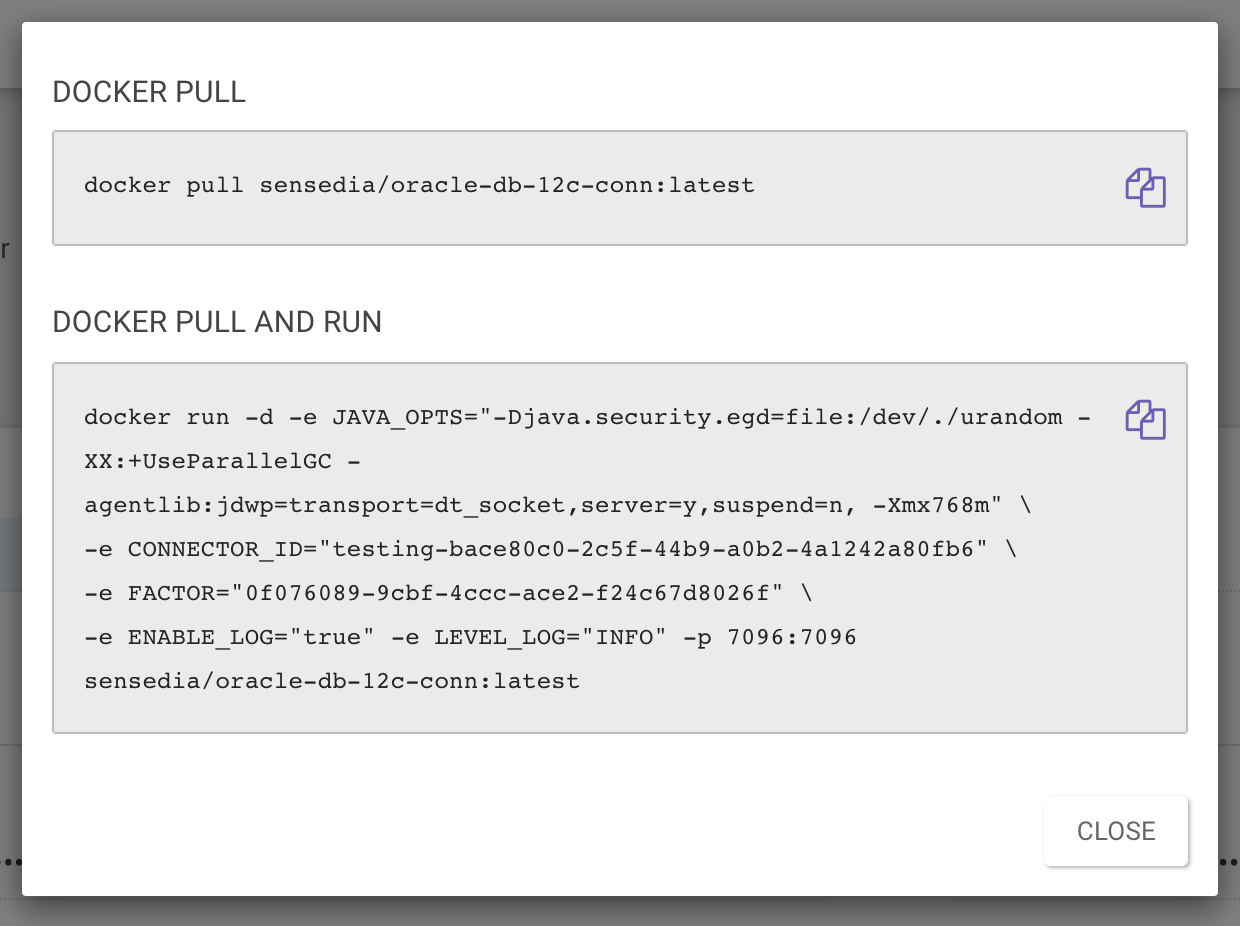
After filling these out, the data Connector ID and Factor (necessary for the application to start) are generated.
This screen may vary depending on the version of the Sensedia API Platform.
To execute the connector, it is necessary to download it into the machine. For such, you must have Java 17 (or higher) or Docker installed. On the same screen, you see instructions to download the connector from the command line. Two options can be used: Command JAR (in the case of Java) and Command image (for Docker).
These screens may vary depending on the version of the Sensedia API Platform.
With the application running, it is necessary to fill in the missing information on the Manager screen (endpoint) to register the connector (click on Register Connector), as the image below shows. On this page, the endpoint is the address of the machine where the connector is running.
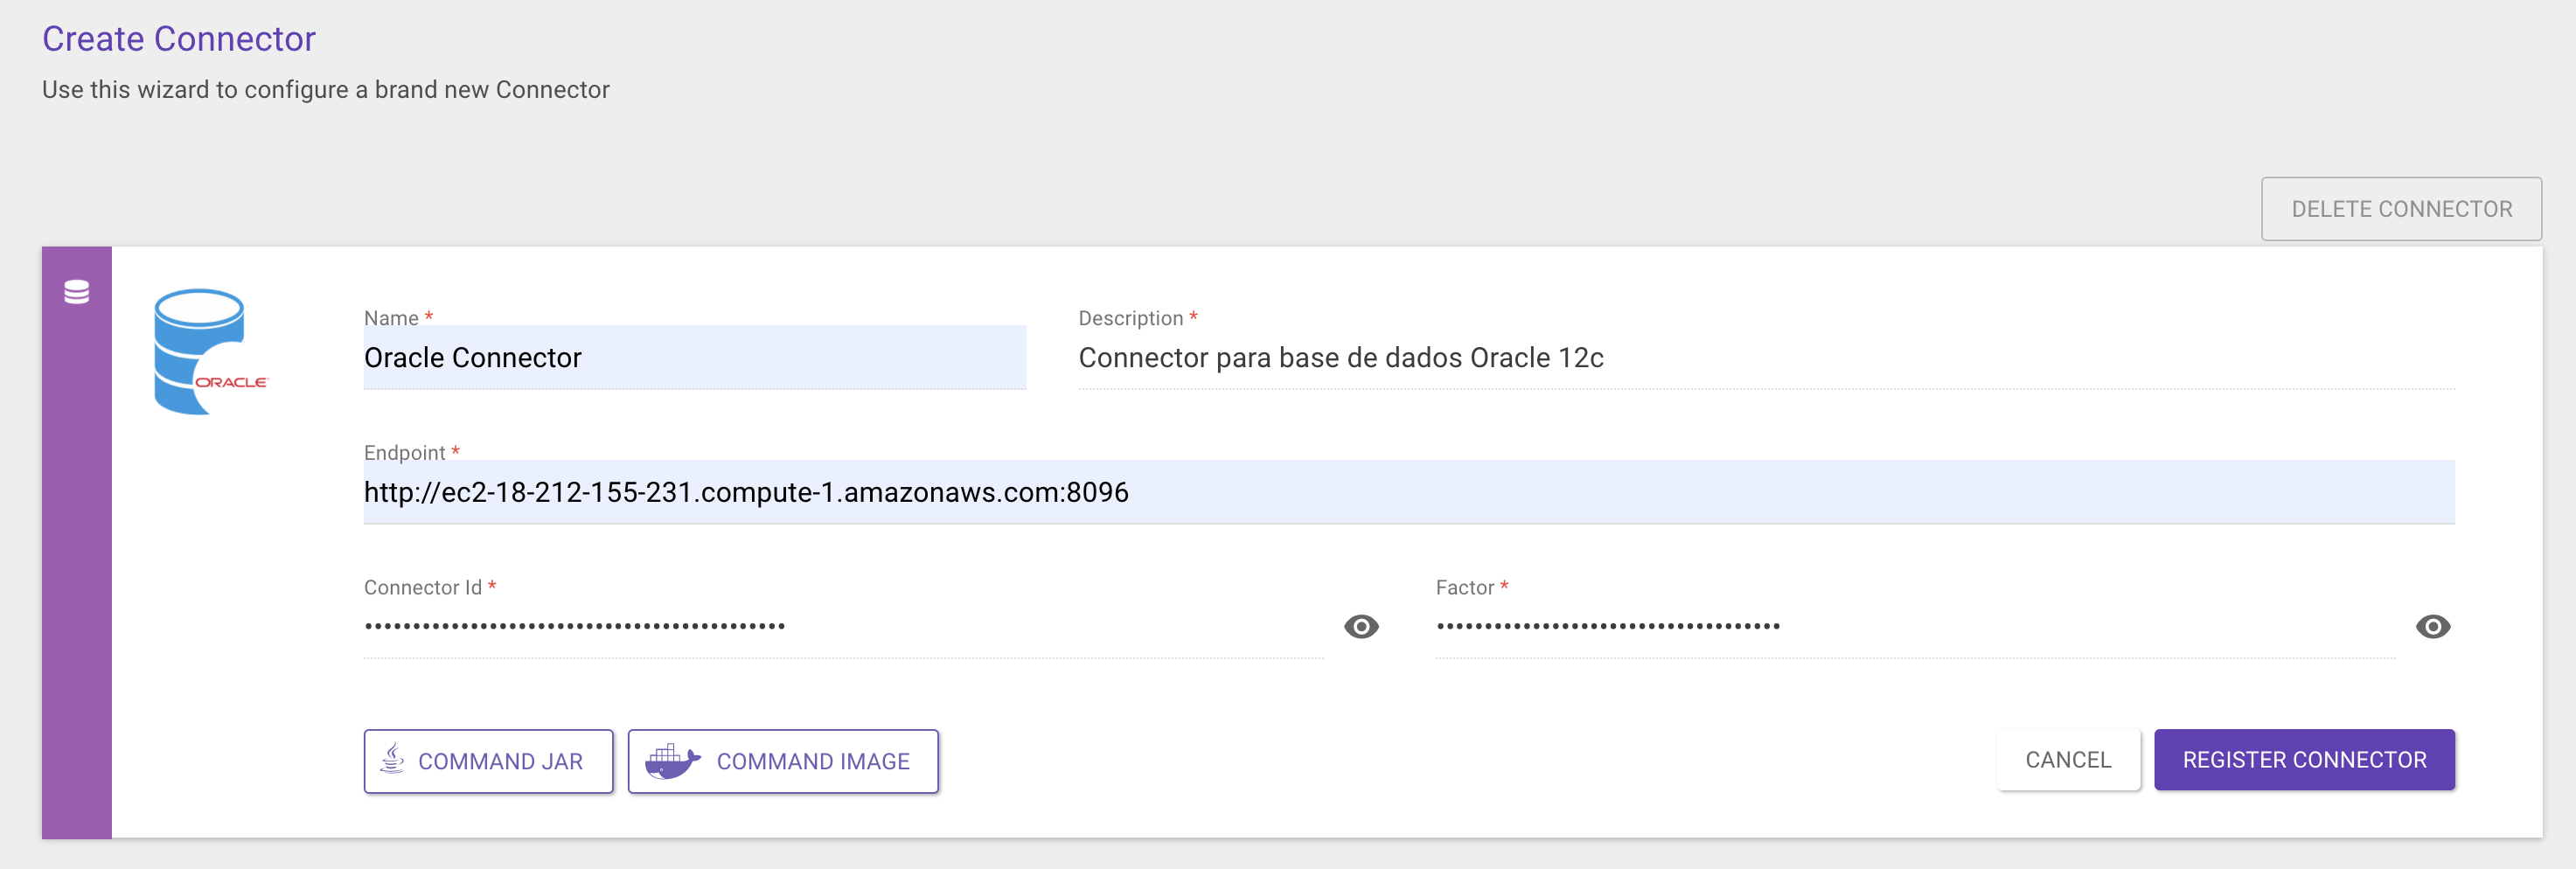
This screen may vary depending on the version of the Sensedia API Platform.
After the successful registration, the remaining configuration information will be displayed:
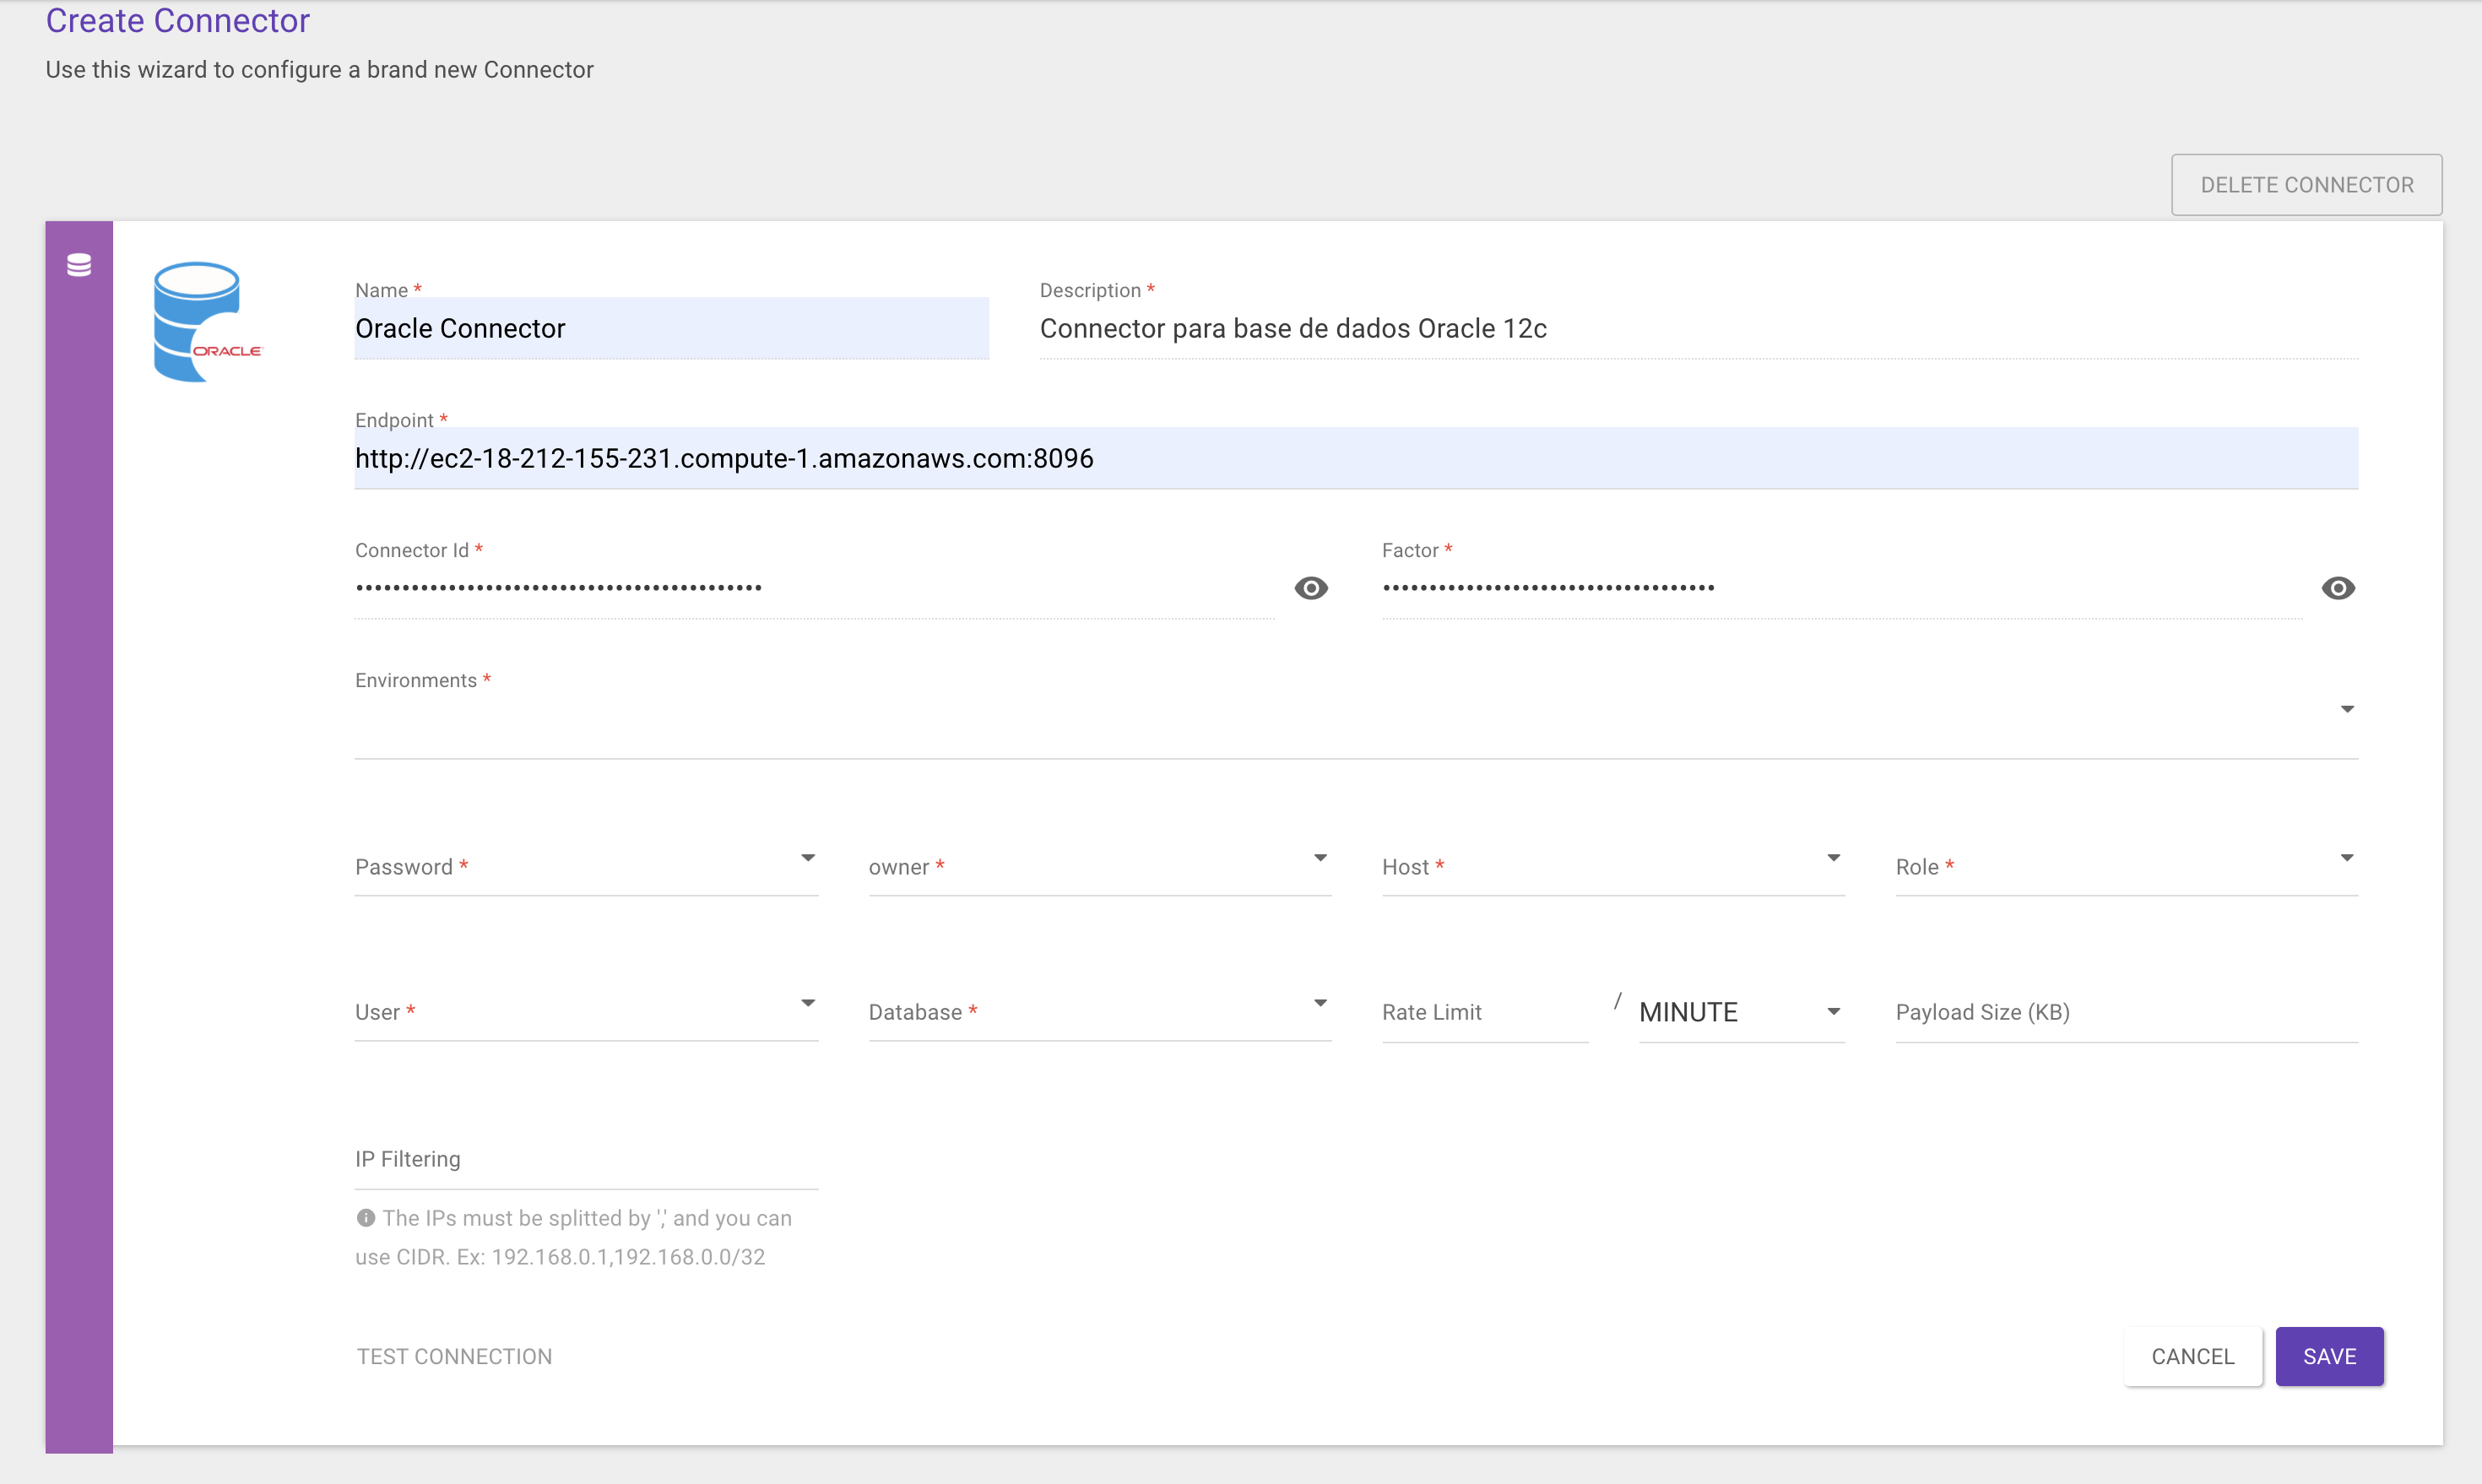
This screen may vary depending on the version of the Sensedia API Platform.
It is necessary to point out which environment will be configured, and it is possible to choose one or more environments. In the case of multiple environments, all variables of all environments must have the same name. For example: if we choose "environment 1" and "environment 2", the variable "user" must be registered in both.
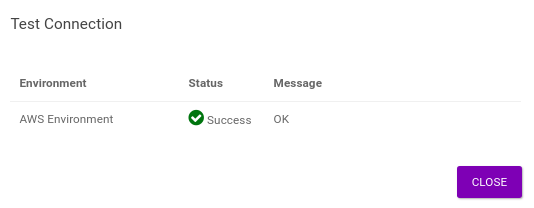
When at least one environment is chosen, the variables will be available for selection on the fields. After they are filled, the option Test Connection to validate the information will be enabled.
If there is more than one environment for the same connector, the connection status of each one will be displayed sequentially, with a connection error message if there is any failure. The connector can be saved now and it can be used to create API resources. Read more about it here.
This screen may vary depending on the version of the Sensedia API Platform.
You can also define extra security configurations for the connector, such as Rate Limit, Payload Size and IP Filtering interceptors. The connector will only use these settings if they are correctly filled in — that is, they are not required.
To configure the Rate Limit interceptor, you must inform the number of requests allowed for a given interval in seconds, minutes, hours, days or months. In Payload Size, the information is expected in kB, enabling a request payload that is lighter than the amount configured. IP Filtering obeys both the manual configuration of IPs and the CIDR standard — requests will be answered only if the source IP is configured.
As a security requirement in the communication between connectors and the gateway, a short-lived JWT token (2 seconds) is generated and validated at each request that is made using a connector. For this process to run smoothly, time of the machine running the connector must matches the gateway’s time exactly — synced through NTP (network time protocol), for example.
As there may be cases in which it’s difficult to sync the time, you may add configuration properties when you download and execute the connector — as described above — to create extra time when the JWT token is validated in the connector:
-DTOKEN_LEEWAY_BEFORE: this property adds time in seconds to the verification of the moment from which the token can be used.
-DTOKEN_LEEWAY_AFTER: this property adds time in seconds to the verification of token’s expiration time.
| We suggest that you only use the properties above if you really can’t keep synchronism between the machine and gateway times. To follow the security implementation, it is desirable that there is synchronism and that the token is validated in the default manner. |
The examples below show the commands to download and run a Lambda Connector using the properties above (but they are applicable to any connector). The time in seconds (which is set to 0, the default value) can be adjusted to the reality of the machine that will run the connector.
Command JAR:
java -jar -Xmx200m -Xms200m \
-DconnectorId=staging-e3d26a58-503c-4e47-9126-564bbfef30f7 -Dfactor=97de049b-7a25-4a91-a15d-2a8e2d9f19cd \
-DENABLE_LOG=true -DLEVEL_LOG=INFO -DSERVER_PORT=7096 -DTOKEN_LEEWAY_BEFORE=0 -DTOKEN_LEEWAY_AFTER=0 aws-lambda-conn-4.1.0.0.jar
Command image:
wget https://sensedia-connectors.s3.amazonaws.com/cloud-providers/aws-lambda-conn-4.1.0.0.jar \
&& java -jar -Xmx200m -Xms200m \
-DconnectorId=staging-e3d26a58-503c-4e47-9126-564bbfef30f7 -Dfactor=97de049b-7a25-4a91-a15d-2a8e2d9f19cd \
-DENABLE_LOG=true -DLEVEL_LOG=INFO -DSERVER_PORT=7096 -DTOKEN_LEEWAY_BEFORE=0 -DTOKEN_LEEWAY_AFTER=0 aws-lambda-conn-4.1.0.0.jar
Share your suggestions with us!
Click here and then [+ Submit idea]