Thanks for your feedback!
EDIT
There are three ways you can deploy APIs to your Manager’s environments (described over the next sections of this page):
deployment from the API Catalog screen ();
mass deployment on Environments ();
scheduled deployment on Environments ().
The APIs deployed to an environment will be displayed in the environment information screen, in the section Deployments (which you access by clicking on the icon to edit an environment: ![]() ).
In addition to the API’s names, the list will include the revisions deployed, as in the example below:
).
In addition to the API’s names, the list will include the revisions deployed, as in the example below:

| For more information on how to undeploy a revision, click here. |
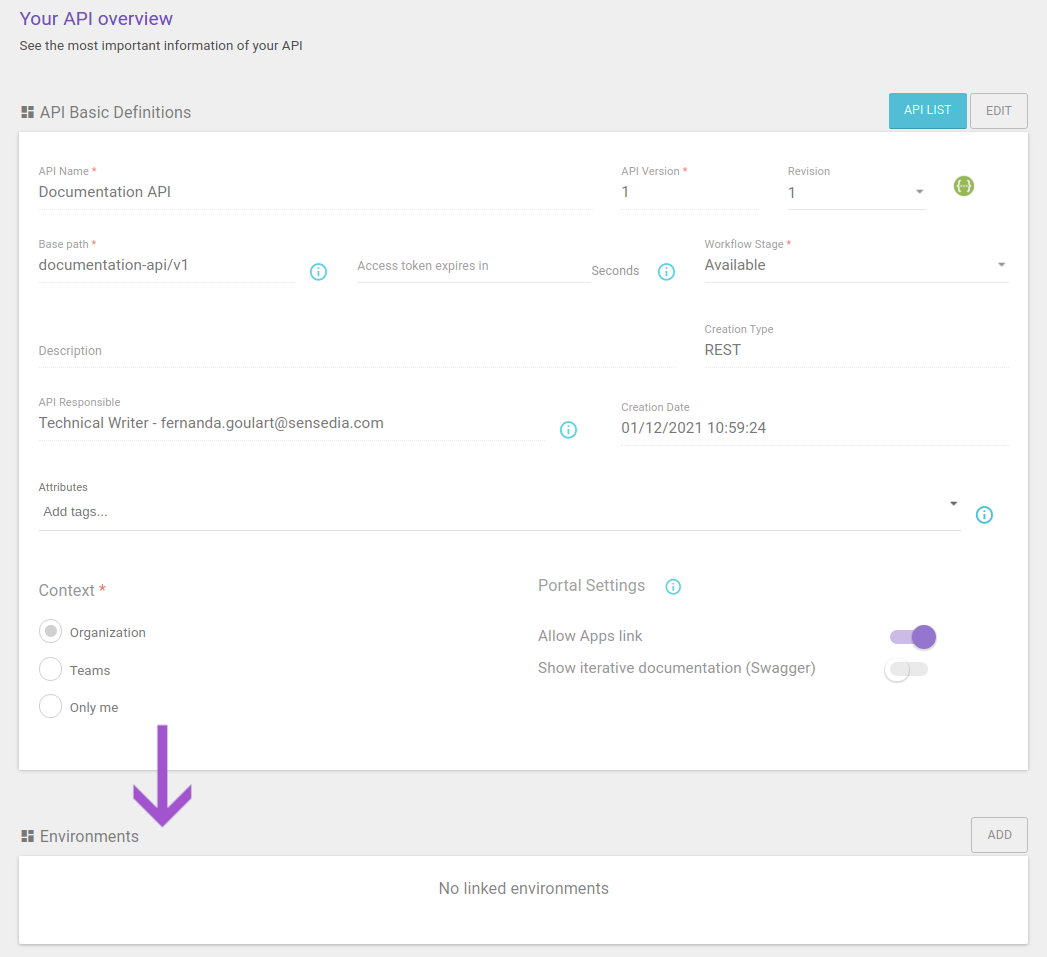
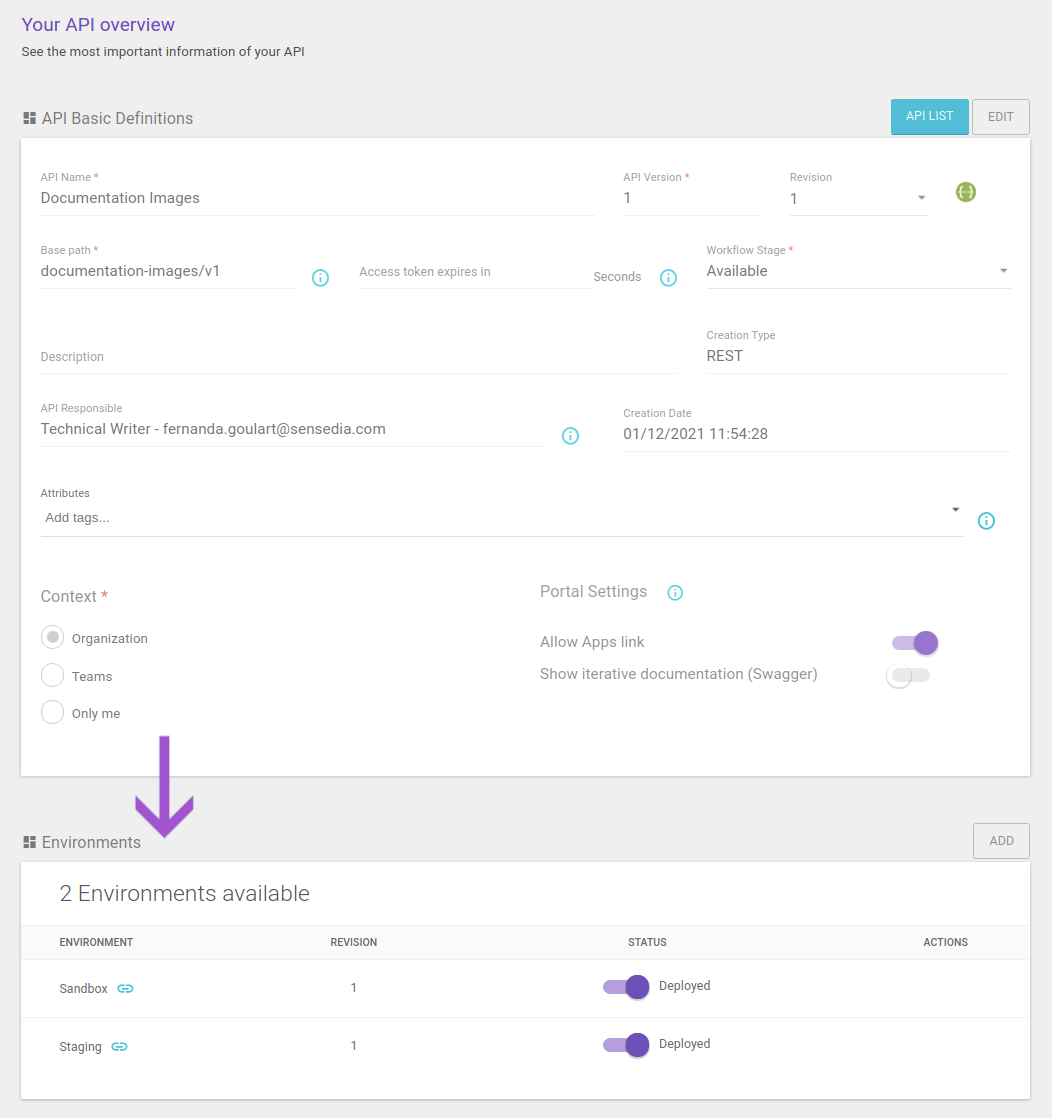
When registering a new API, the environments you set up on your Manager will be displayed in the section Deployable Environments, in the first stage of API creation (where you enter the API’s basic information):
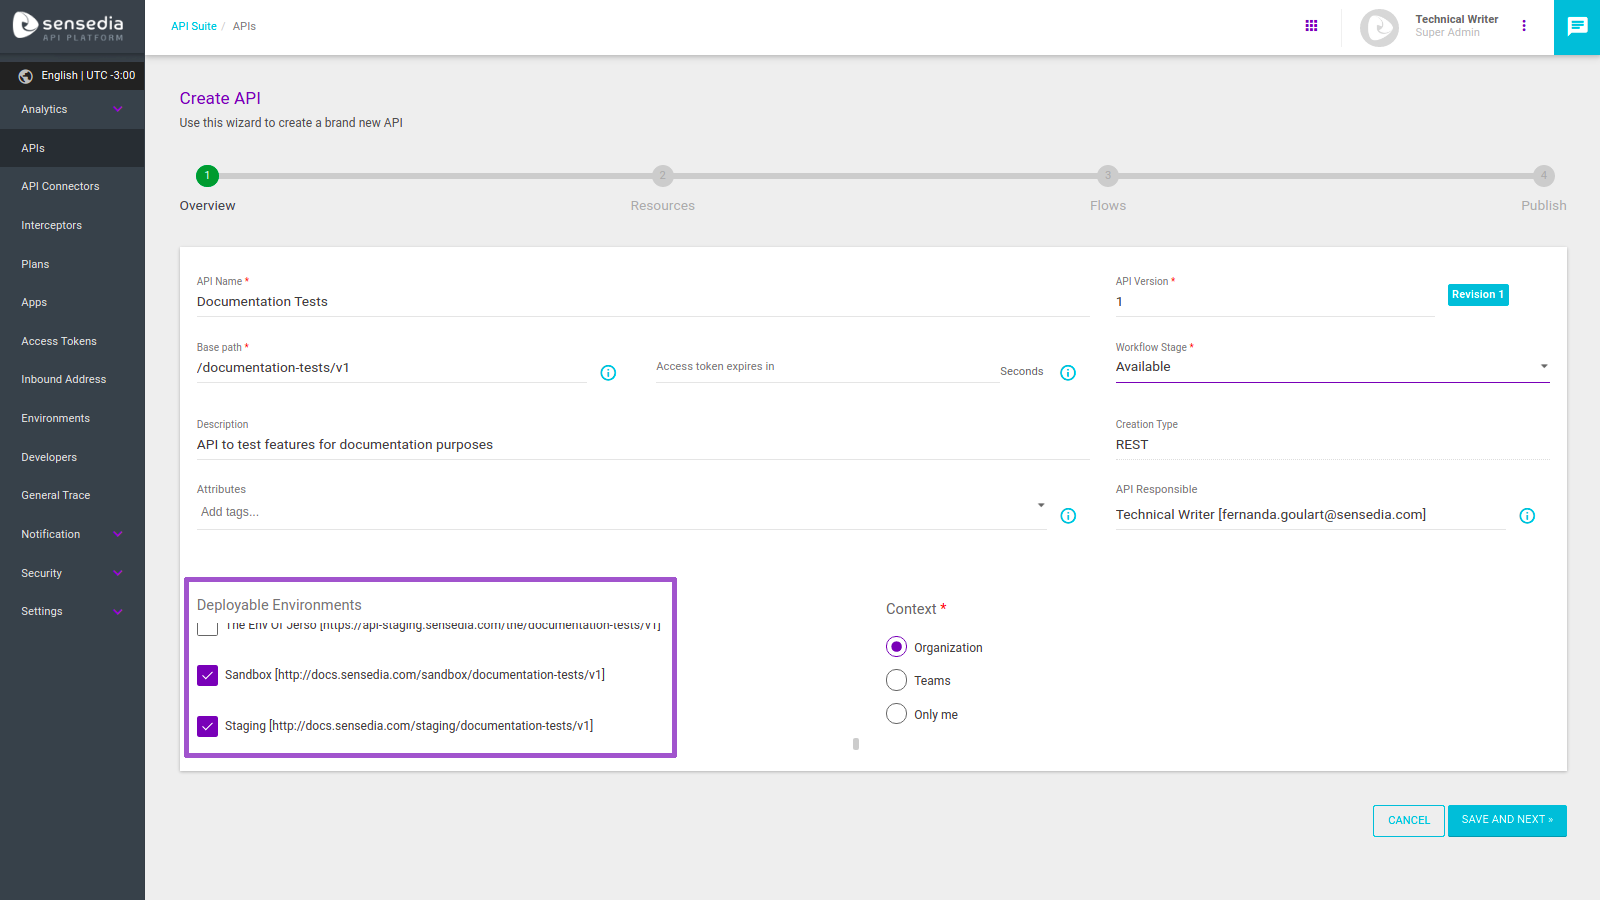
After selecting the environments you want, they will be listed for deployment in the Environments section of the screen (accessed by clicking the API’s card):
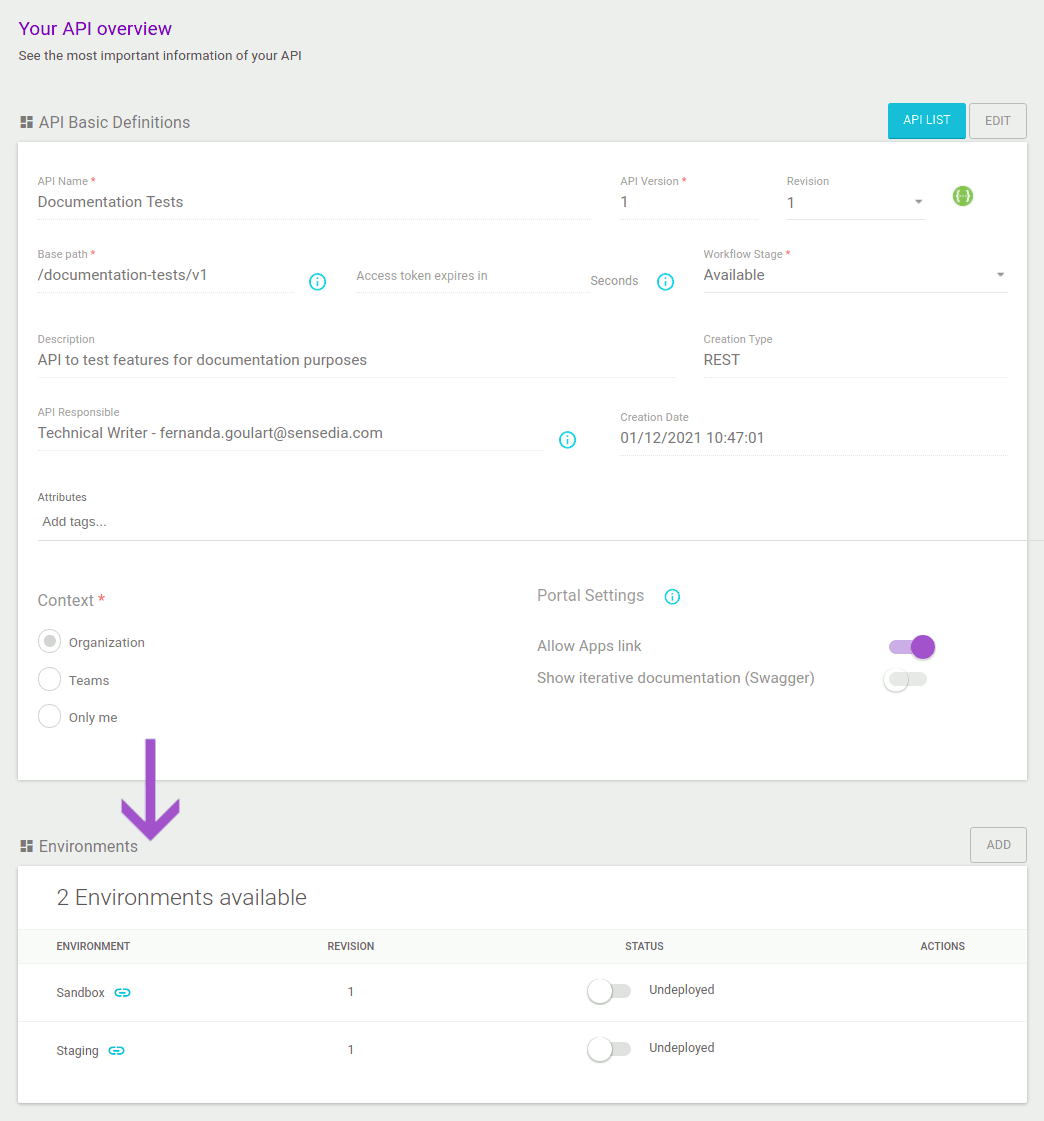
At this time, the API is not yet deployed (that is, it’s not possible to send requests to it). To deploy it, enable the button in the column STATUS. The button will be coloured and the text shown next to it will be "Deployed" (see the image below). Next to the environment’s name, you can copy the URL to which requests to the API should be sent.
If you did not include environments for deployment when you created your API, you can add them to the Environments section of the same screen (accessed by clicking on an API’s card):
To include environments, click the ADD button. A modal window will appear, containing the environments for you to select:
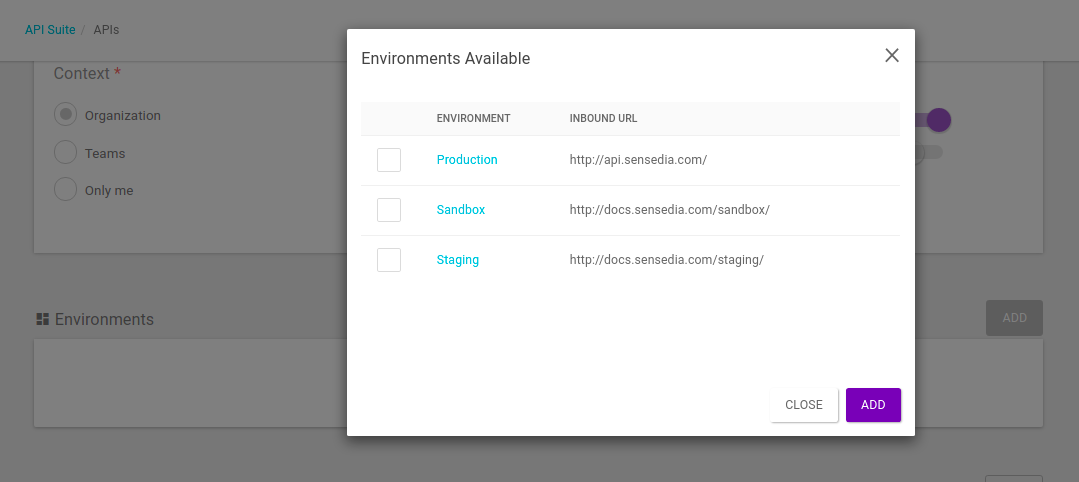
After selecting the environments you want and clicking on ADD, they will be listed in the Environments section and you’ll be able to enable the deployment, as described above.
You can always add new environments by clicking the ADD button again.
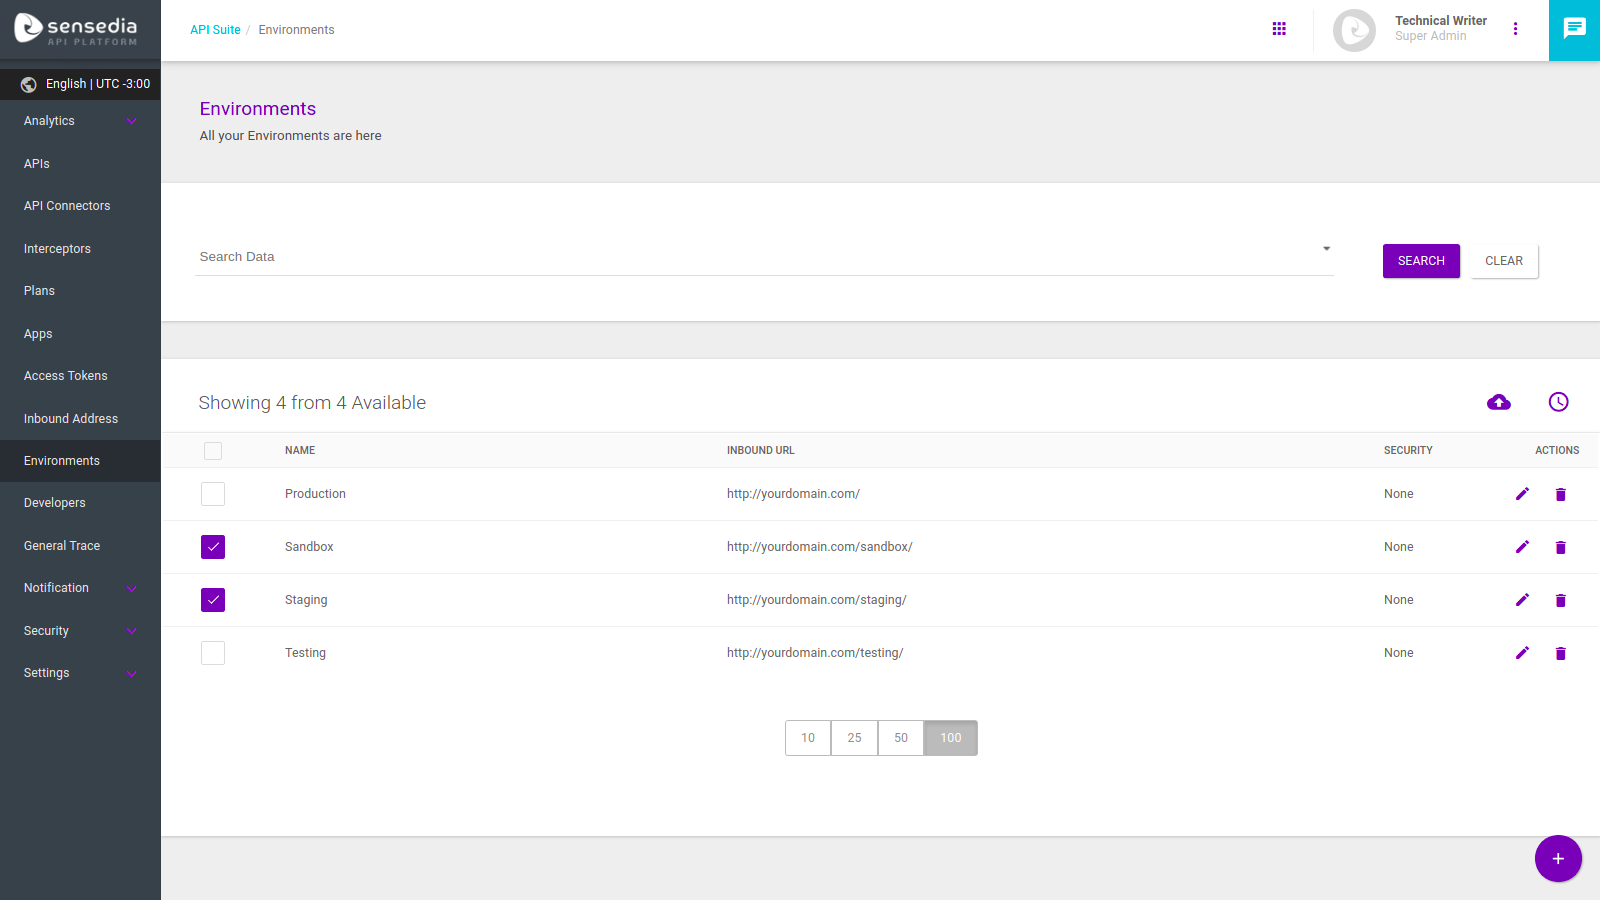
You can also deploy APIs on the Environments screen. Although you can also deploy only one API at a time on this screen, the advantage of deploying here is that you can:
deploy multiple APIs at the same time — including to more than one environment at once, if you want to;
schedule the deployment of one or more APIs to one or more environments.
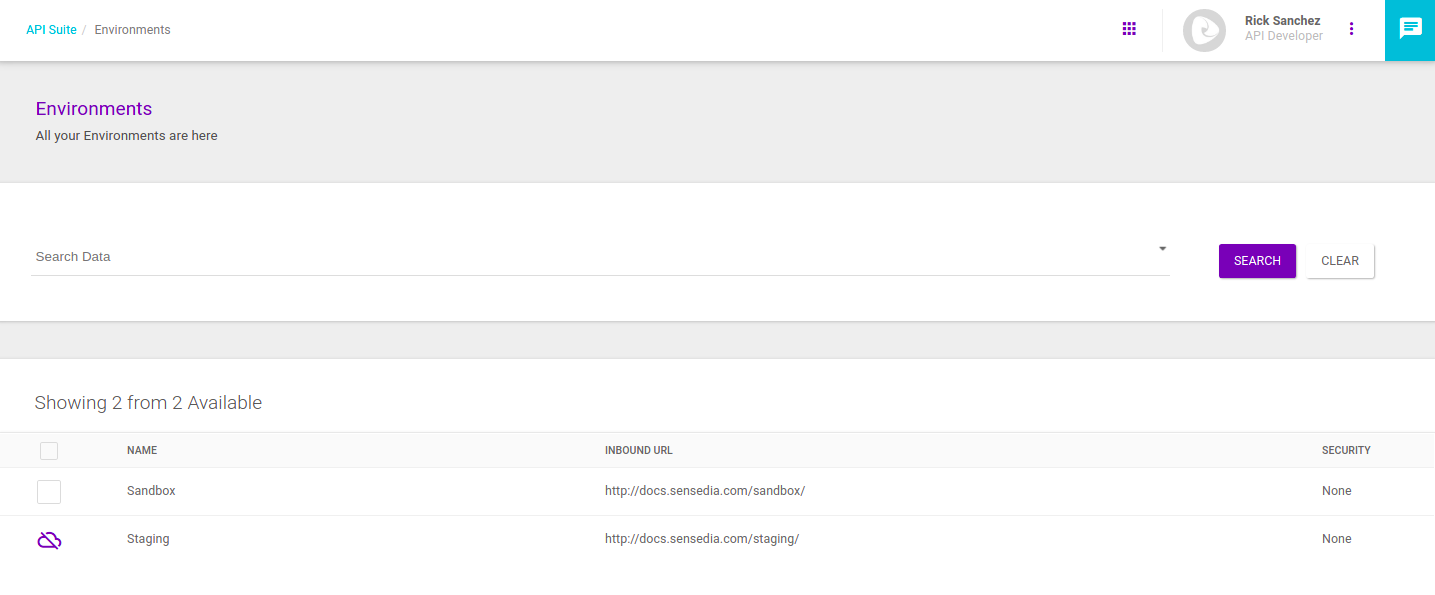
To make deployments, select at least one environment from the list (). In the example below, we are selecting two environments, "Sandbox" and "Staging":
When you select at least one environment, two new icons appear on the screen:
![]() to deploy APIs to the selected environment(s).
to deploy APIs to the selected environment(s).
![]() to schedule the deployment of APIs to the selected environment(s).
to schedule the deployment of APIs to the selected environment(s).
|
If your user doesn’t have permission to deploy APIs to an environment in the list, you won’t be able to select it — instead of the checkbox, there’ll be a forbidden deployment icon, as in this image: |
| This method is not influenced by the Adaptive Governance deployment restrictions. |
After selecting the environment or environments in which you want to deploy APIs, click on ![]() .
This will open a modal window for you to add the APIs you want to deploy:
.
This will open a modal window for you to add the APIs you want to deploy:
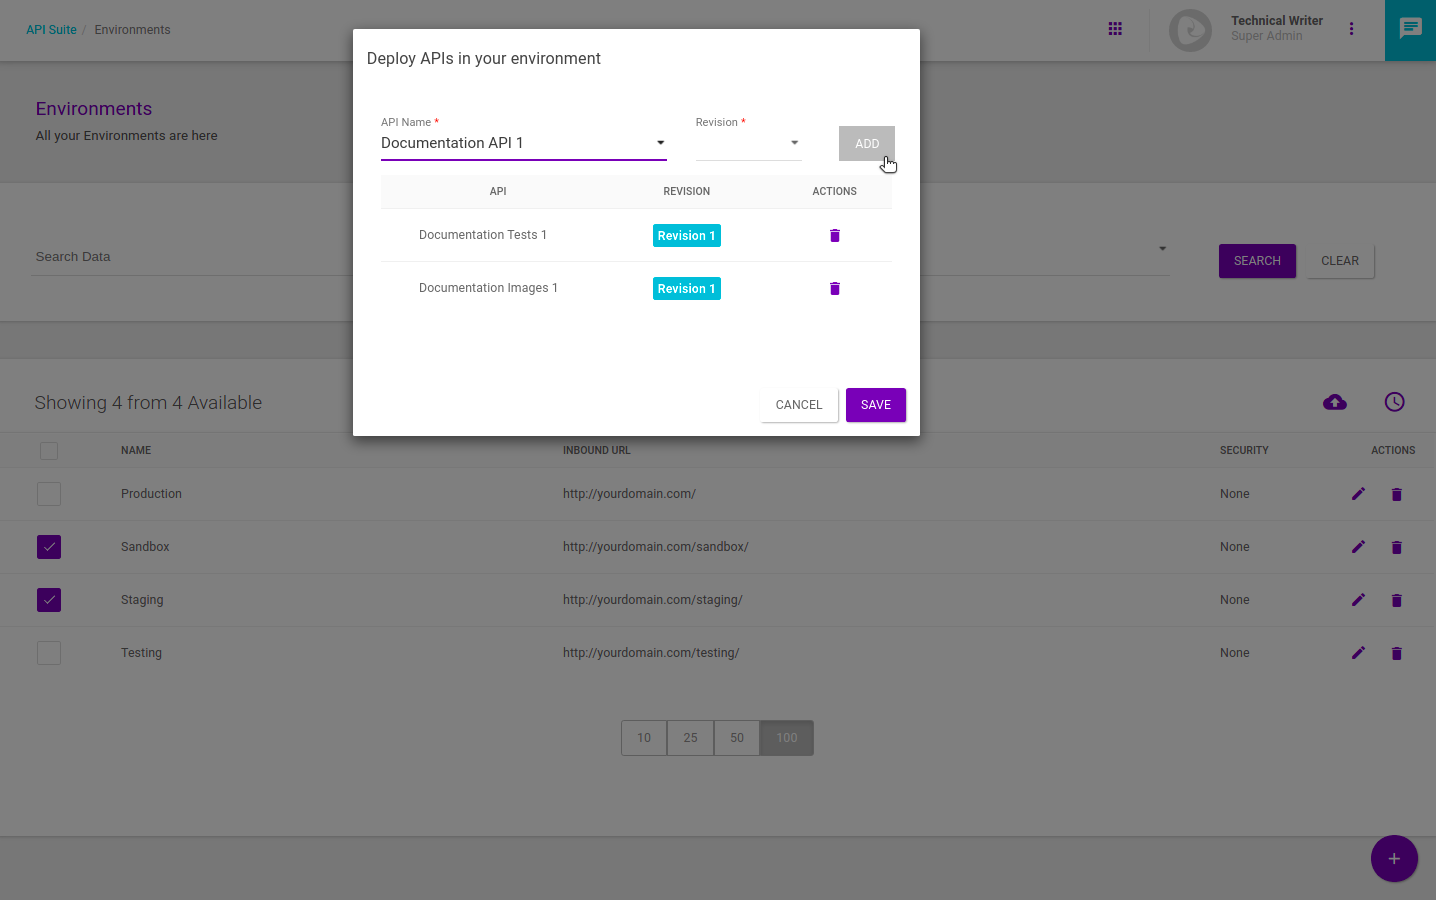
For each API, you need to choose the revision that will be deployed and click on the ADD button to add it to the list of APIs selected.
If you want to remove an API you have selected, click on the ![]() icon.
icon.
| You can only add one revision per API. |
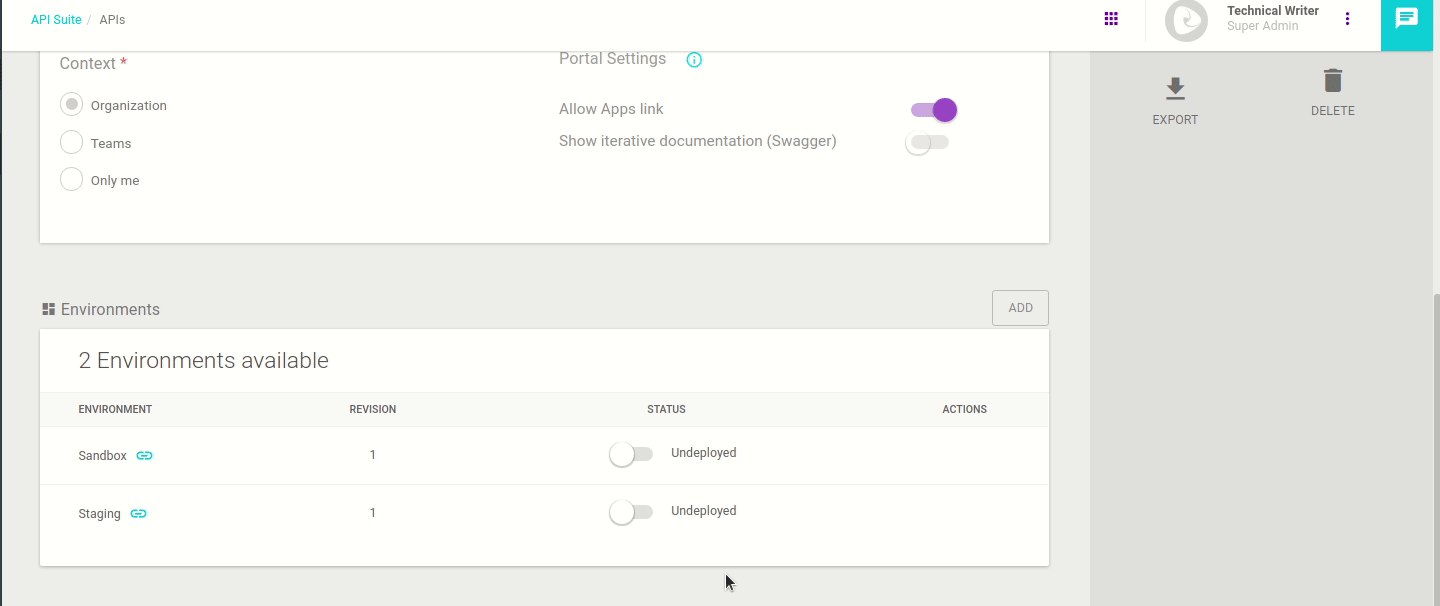
After selecting all the APIs you want to deploy, click on SAVE. The environments you selected will be listed in the Environments section of the screen (accessed by clicking an API’s card), with the deployment enabled (that is, the API is effectively deployed):
After selecting the environment or environments to which you want to schedule the deployment of APIs, click on ![]() .
This will open a modal window for you to add the APIs you want to deploy and set the deployment date:
.
This will open a modal window for you to add the APIs you want to deploy and set the deployment date:
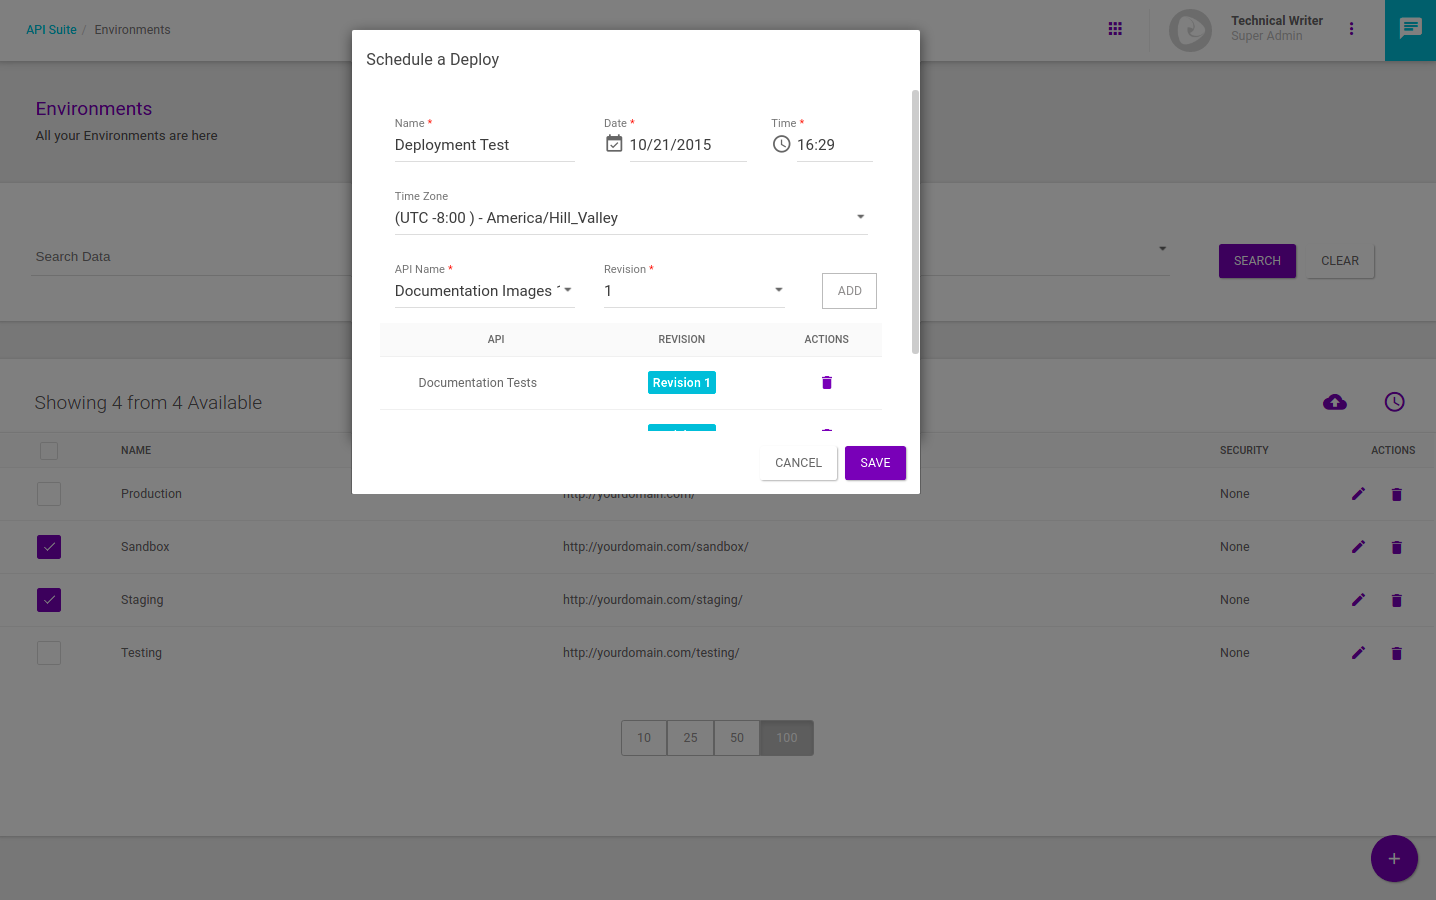
To schedule a deployment, you need to define a name for it and set the deployment date and time, including the time zone.
You add APIs as in the mass deployment described above.
You can see the deployments scheduled for an environment on the environment’s information screen (which you access by clicking on the icon to edit an environment: ![]() ).
The info will be under the Scheduled Deployments section, as in the example below:
).
The info will be under the Scheduled Deployments section, as in the example below:
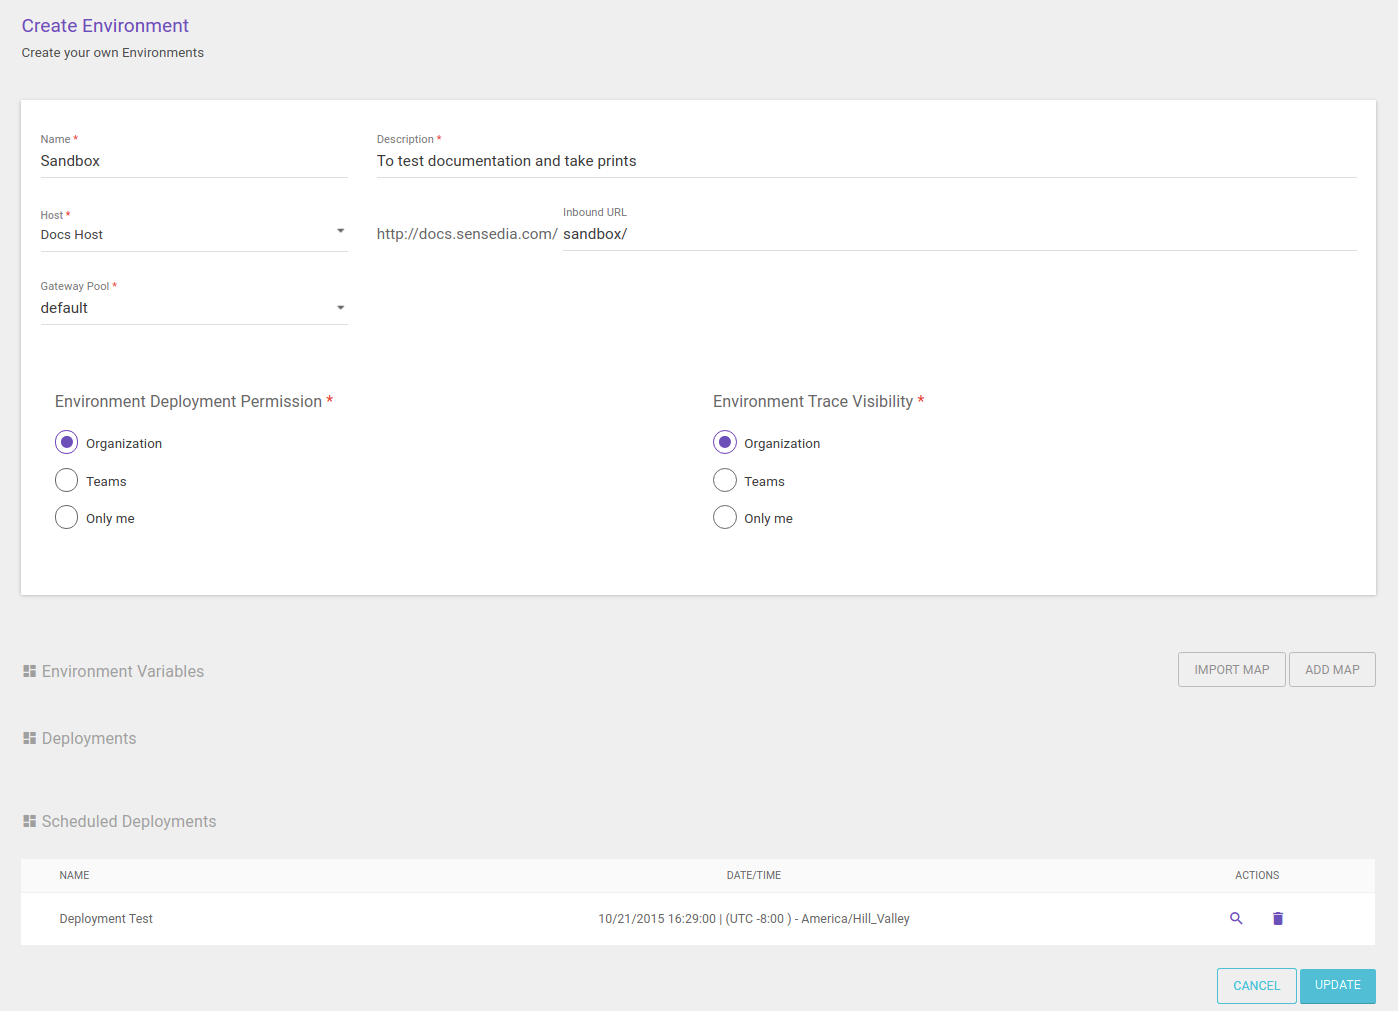
To see the APIs that will be deployed, click on ![]() .
To cancel the deployment, click on
.
To cancel the deployment, click on ![]() .
.
Share your suggestions with us!
Click here and then [+ Submit idea]