Thanks for your feedback!
EDIT
You can establish a connection via SAML with an identity provider so that users are able to log in to the API Manager using their credentials from that provider. The chosen provider must support the SAML 2.0 standard.
You can set up the connection on the Integrations screen.
| See below some useful tips to configure the integration with the API Manager on your provider. |
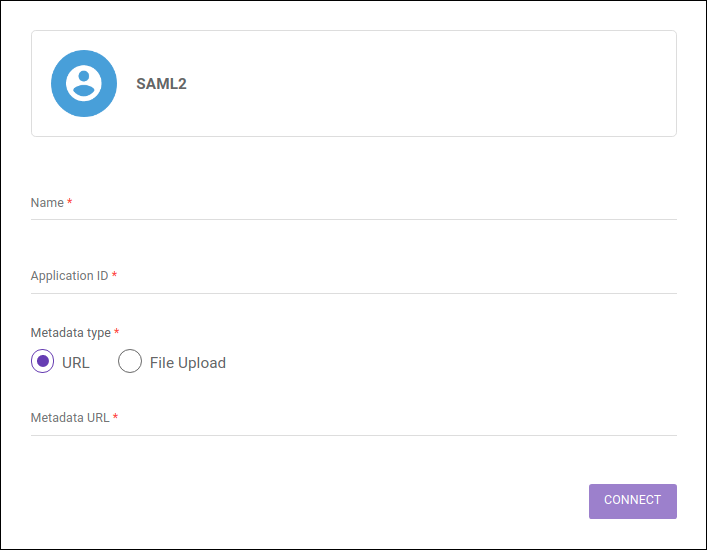
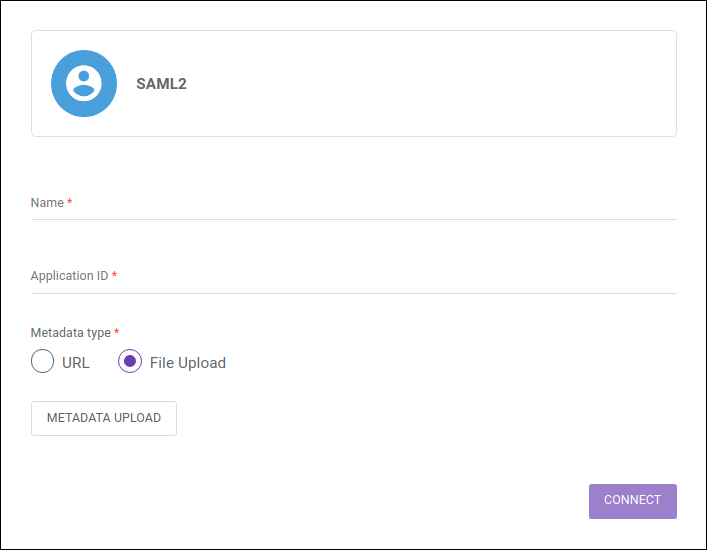
To set up a connection with an identity provider, complete these fields:
Name: include the name of your SAML provider.
Application ID: include the unique identifier of the API Manager within your SAML provider. It’s usually referred to as Application ID or Service Provider Entity ID. Check your provider’s documentation for more information.
Metadata Type: select if the metadata will be accessed via "URL" or "File Upload". To locate the Metadata URL or download a valid SAML file, check your identity provider’s documentation.
If "URL" is selected, type in the address in the field Metadata URL.
If "File Upload" is selected, click on METADATA UPLOAD and choose a metadata document from your machine.
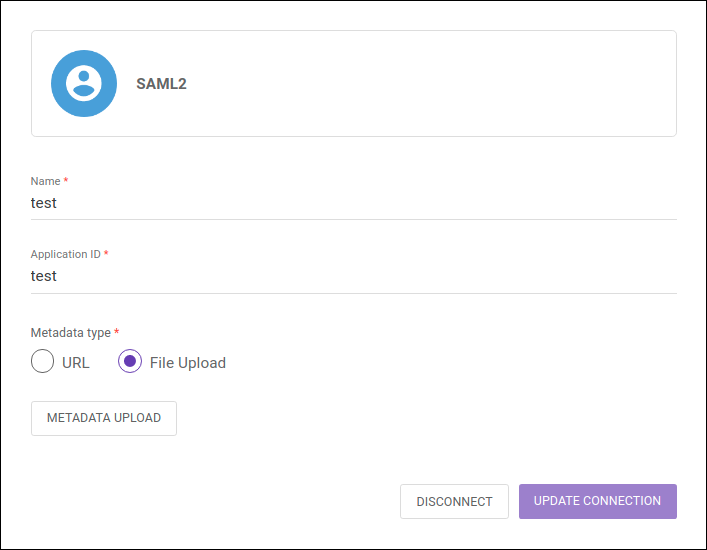
Once active, the connection with the identity provider can be updated at any time. To do so, click any field you wish to edit, make the appropriate modifications and click on UPDATE CONNECTION.
To disable an active connection, click the button DISCONNECT. Users from the identity provider (regardless of whether they have been registered before or after the integration has been activated) will not be deleted from the Manager, but will have their access blocked until a password is created/reset — which can be done through the link Forgot your password? on the login screen.
Once a connection with an identity provider has been activated, the Manager login screen will change:
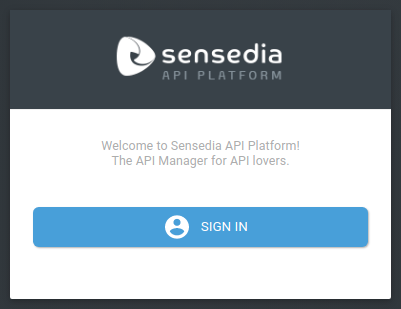
Upon clicking the button SIGN IN, the users will be taken to the login screen of the chosen identity provider and must enter their credentials for access. Users who had been registered on the Manager before the connection was active will no longer be able to log in using the username and password registered on the Manager, only their credentials from the identity provider.
In case it’s the user’s first access, they will automatically be included as a federated user in the Users screen and assigned the role "API Operations". The role can be changed later by editing the user on the Users screen.
| "API Operations" is a role that comes with your Manager. If it has been or is deleted, it will be recreated automatically whenever a new federated user is added. |
If a user that had already been created on the Manager (by the usual user registration process) logs in through the identity provider, their status on the Users screen will be changed to "Federated" but the role they already had will be kept (i.e., a Manager Admin user will be turned into a federated user but will keep the Admin role with all the role-specific permissions). See more about federated users here.
To enable a SAML 2.0 connection, an API Manager application must be registered in your identity provider. Your provider’s official documentation should help you with the necessary configurations, but some specific tips are helpful to ease the process:
Configure the callback URL
You must include the callback URL (Single Sign On URL), which is based on your API Manager’s URL: <MANAGER-URL>/api-manager/api/v3/saml/callback.
Set the email attribute
The provider must send to the Manager the users' email info as a SAML attribute.
The name of the attribute must be http://schemas.xmlsoap.org/ws/2005/05/identity/claims/emailaddress and its type must be Basic.
There may be small variations in the settings of each provider, so you might want to check their official documentation.
Configuration example
The connection via SAML 2.0 can be done with the ISP of your choice. There are several providers, one of them is Okta. To configure it, follow the steps listed below.
If you don’t already have one, create an Okta account.
Click https://developer.okta.com/signup/ to access the Okta Developer page.
Create a SAML 2.0 app.
For that, click and then Create App Integration button, as illustrated in the figure below.
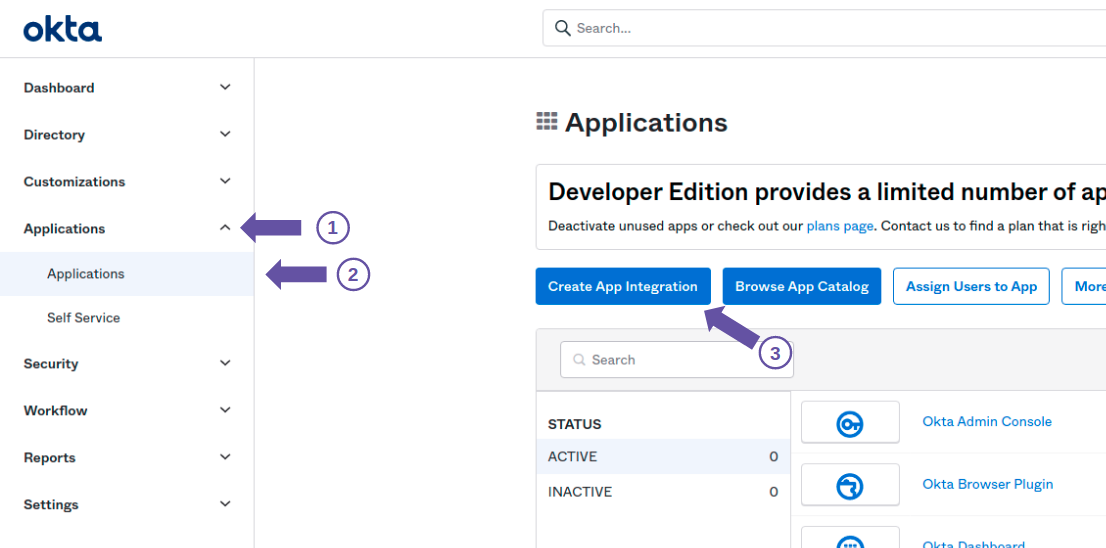
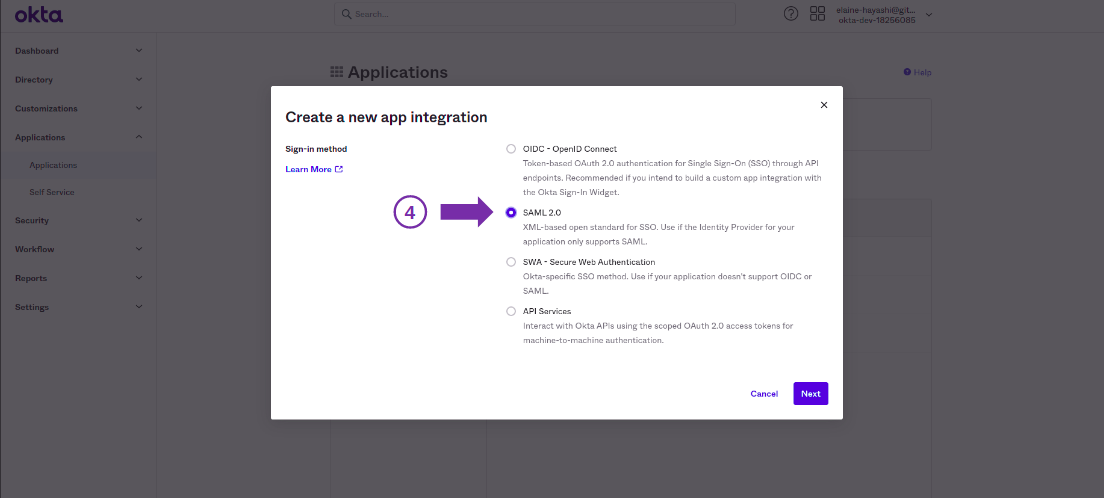
Then, in the modal screen that will open, select the SAML 2.0 option and click Next.
Configure the app by providing the following information: a name for your integration, icon or logo (optional), and visibility options. Then click Next.
On the next screen, fill in the fields:
Single sign on URL: Callback URL, which is based on your API Manager address: <MANAGER-URL>/api-manager/api/v3/saml/callback;
Audience URI (SP Entity ID): the value informed in this field will be used in the API Manager as "application ID";
Default RelayState: this field is not mandatory;
Name ID format: select EmailAddress.
Further down on the same page, in Attribute Statements (image below), fill in:
Name: http://schemas.xmlsoap.org/ws/2005/05/identity/claims/emailaddress ;
Name format: select basic ;
Value: select user.e-mail ;
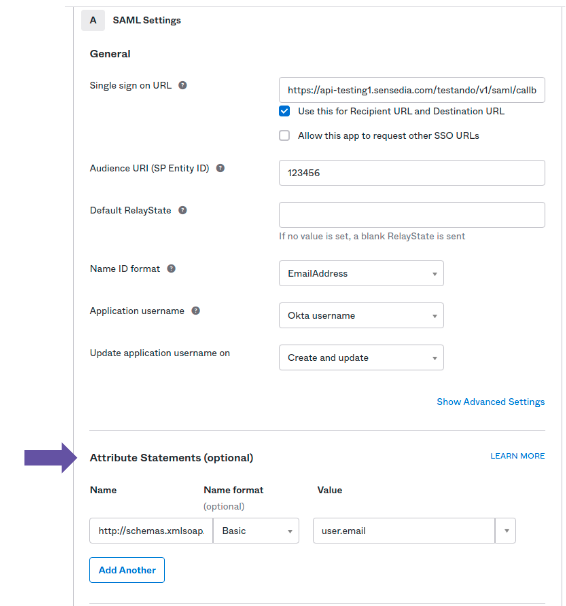
Click NEXT to complete the registration.
On the screen that appears when you click NEXT, export the metadata by clicking Identity Provider metadata is available if this application supports dynamic configuration (check the image below to see where to find it).
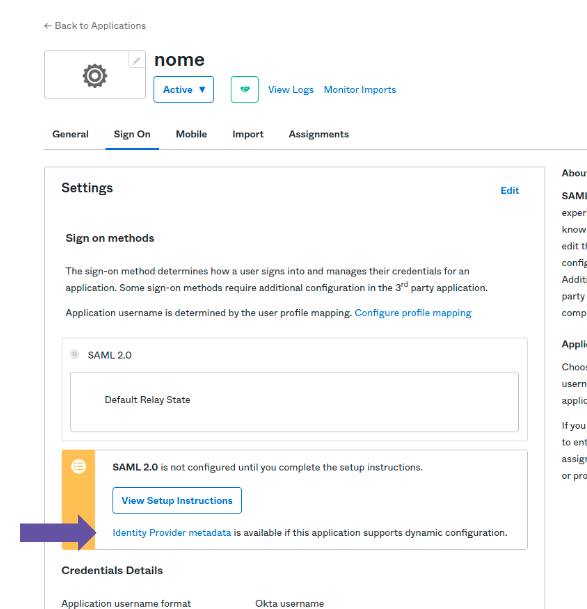
The screen that opens will show the content, which can be saved as metadata.xml.
Take note of the URL. It will be used to configure your API Manager.
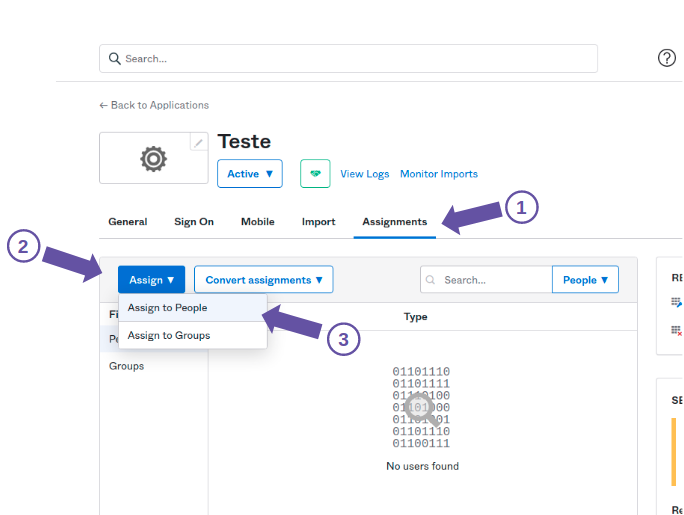
Link the Okta user to the created app.
Click the Assignments tab and then click , as shown in the image below.
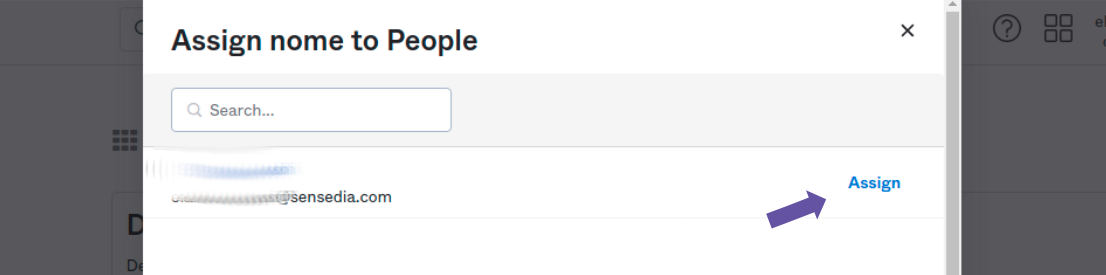
On the screen that opens, click Assign, next to your name and email, as shown in the image below.
On the next screen, click the Save and Go Back button.
| The user must be linked to the created app to be able to log in. |
After configuring Okta, open your API Manager.
Return to the top of this page for more details on configuring an integration in API Manager.
In summary, under , fill in the fields:
Name: name you registered in step 3;
Application ID: name entered as Audience URI (SP Entity ID) in step 4;
Metadata type: select URL;
URL metadata: inform the URL from step 5;
Click CONNECT.
Share your suggestions with us!
Click here and then [+ Submit idea]