Thanks for your feedback!
EDIT
On the Environments screen, you can set up new environments.
You will see below that one of the required pieces of information is the Inbound URL, which is the URL that will receive requests and forward them to the backend. By default, your Manager comes with an existing environment containing a random Inbound URL, which must be changed later to a valid value.
| Configuring a valid URL is crucial for the environment to function correctly. If you configure a URL forwarding the call to a different domain, the API resource to be consumed will not be found. |
You can set up a new environment by clicking the Create Environment button, represented by the + icon on the bottom right corner of the Environments page.
There are two distinct sections to be filled out: the required data fields and the environment variables area.
In this area, you must fill out the required fields, comprising basic information and permissions to view environment logs and deploy APIs.
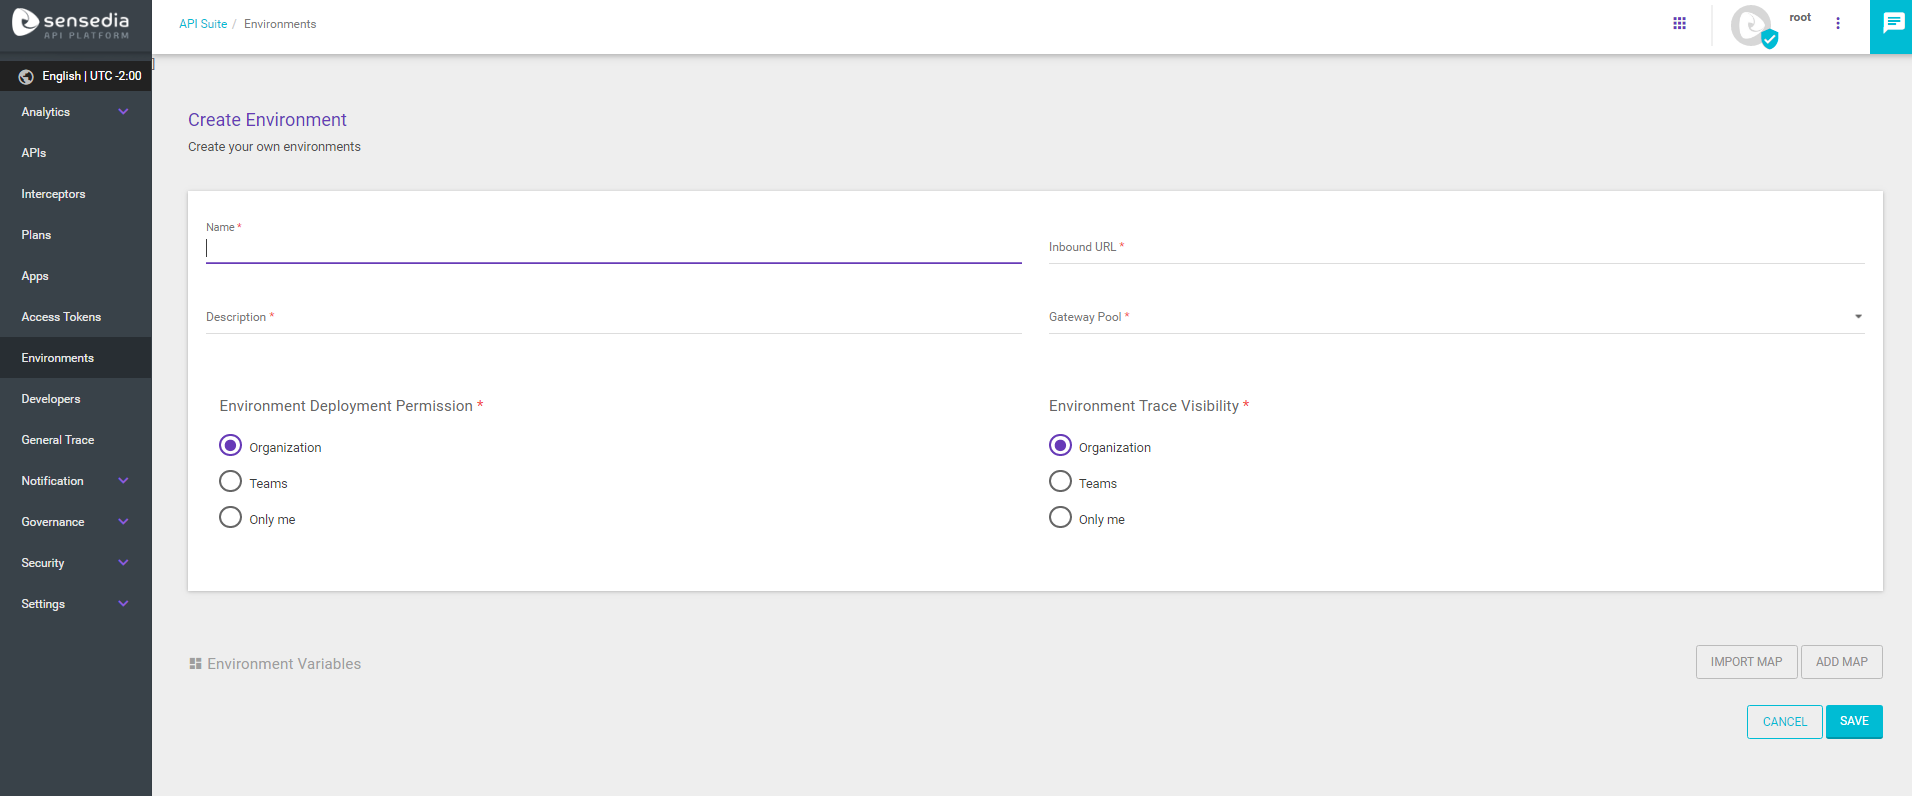
Name: name that identifies the environment.
Inbound URL: it must contain the URL that will represent the environment and receive requests made to the APIs deployed to it.
Remember to add the prefix http:// or https://
Description: description that helps to identify the environment.
Gateway Pool: field to select which gateway pool in your contracted plan will attend the environment.
| You can always talk to your Business Partner if you want to acquire more gateway pools. |
The Environment Deployment Permission field is related to the permission to deploy APIs to the environment. The Environment Trace Visibility field, in turn, allows restricting visibility access to the Trace (that contains the list of calls to the APIs deployed to the environment at hand).
| The visualisation constraints managed here are applied both to the General Trace (which refers to all APIs) and the API Trace (referring to a specific API and accessed via API card). |
| You can read more about visibility rules here. |
For both fields, these are the permission options:
Organization: it will allow access to all the company’s users;
Teams: it will allows access to the team selected. Click here to learn more about creating teams.
Only me: it will allow access only to the user who created the environment.
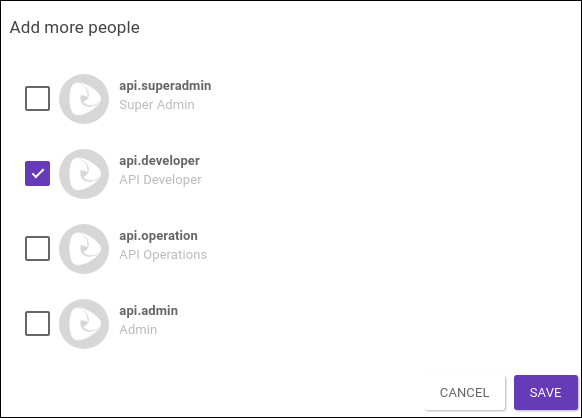
Selecting the Teams or Only me option will enable the Add users button. Through it, you can add individual users to give them access as well (see the image below).
Environment variables are variables with unique values describing a specific environment. They are used as extra configuration for each environment, allowing customising requests so as to easily alternate between different contexts. They are not required, but their use makes the process of designing and managing APIs easier.
The API Manager allows creating environment variables to be used in API flows and in some interceptors, such as the Rate Limit interceptor.
To register environment variables, you must create a variables map or import an existing one from another environment.
To add a map, click the Add Map button. A screen like the image below will pop up. You must insert a name to the map and may add a description, if you want.
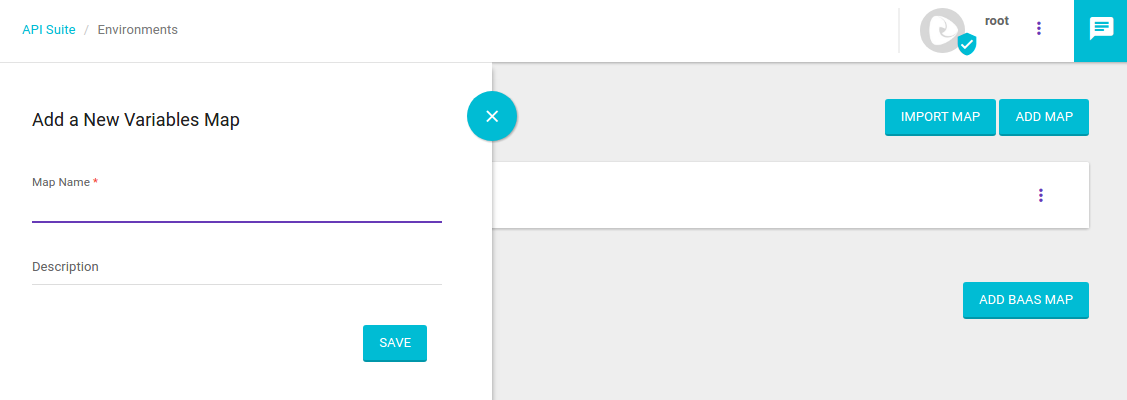
Now you can create environment variables, as a character chain comprised of a key-value pair.

To import a map from another environment, click the Import Map button. When you start typing the environment name, the system will load the necessary information. Then, select the desired map and click on Import Map.
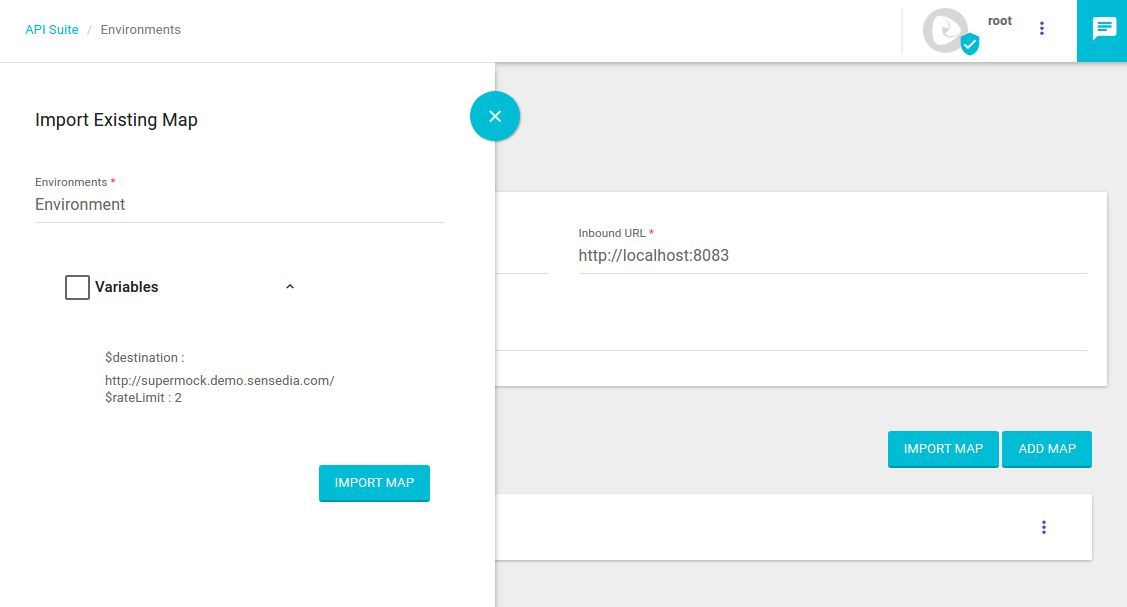
Te environment variables will be loaded.
You can view them by clicking the icon to extend the tab next to the map’s name.
You can edit or delete the variables by clicking the respective icons (![]() or
or ![]() )
)
To add more variables, click the ![]() icon and, when the tab opens, click the + icon.
On this same tab, you can click to edit the name and description of the map (
icon and, when the tab opens, click the + icon.
On this same tab, you can click to edit the name and description of the map (![]() ) or delete it altogether (
) or delete it altogether (![]() ).
).

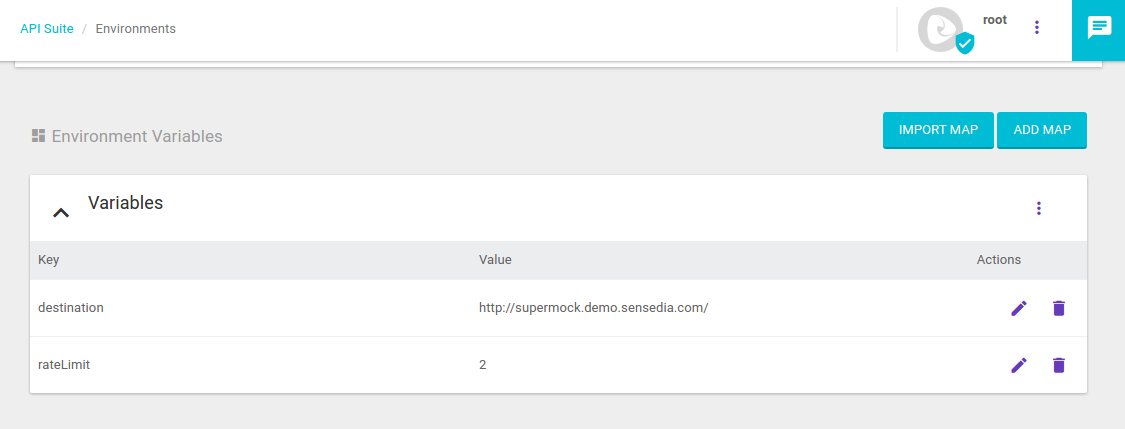
As we mentioned before, an environment variable is a character chain comprised of a key-value pair.
In the example below, two variables were created: one named destination, with a valid address, and one named rateLimit, with value 2.
The environment variable $destination can be used, for example, an API endpoint.
Then, when a request is made to that API, the Gateway will direct the call to the address informed.
To set this up, you only need to reference this environment variable as the API’s target destination, as shown in the image below.
|
The target destination of an API is found on the Flows section of an API’s editing or creating process, by clicking the |
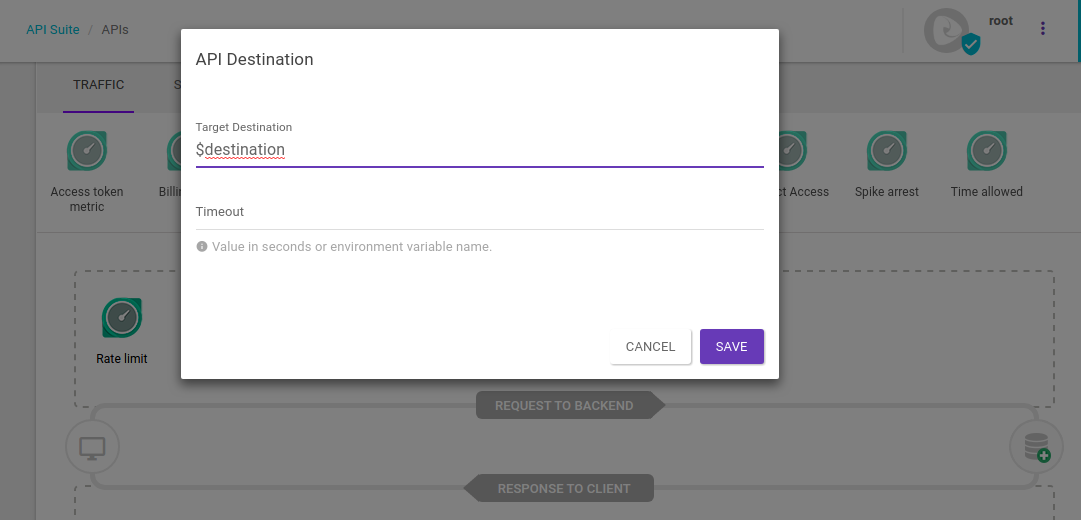
All environment variables, when referenced in APIs or interceptors, must be preceded by the $ symbol.
|
In the image below, we have an example of the $rateLimit environment variable being used in the Rate Limit interceptor.
In this scenario, when a request is made to the API, the Gateway will replace the number of calls with the value configured in the variable (in this case, the value 2).

The environment editing button is found on the list of existing environments, in the Actions field.
To edit the data, click the ![]() icon.
You will be redirected to the editing screen.
icon.
You will be redirected to the editing screen.
To delete an environment, click the ![]() icon in the Actions column of the existing environments list and confirm the action by clicking the Ok button.
icon in the Actions column of the existing environments list and confirm the action by clicking the Ok button.
Share your suggestions with us!
Click here and then [+ Submit idea]