
Thanks for your feedback!
EDIT
In Products, you can organize the documentation for your APIs according to each product’s own functionalities.
When you import an API, its documentation is automatically loaded. You can also add documentation manually. To learn more details, see API Catalog.
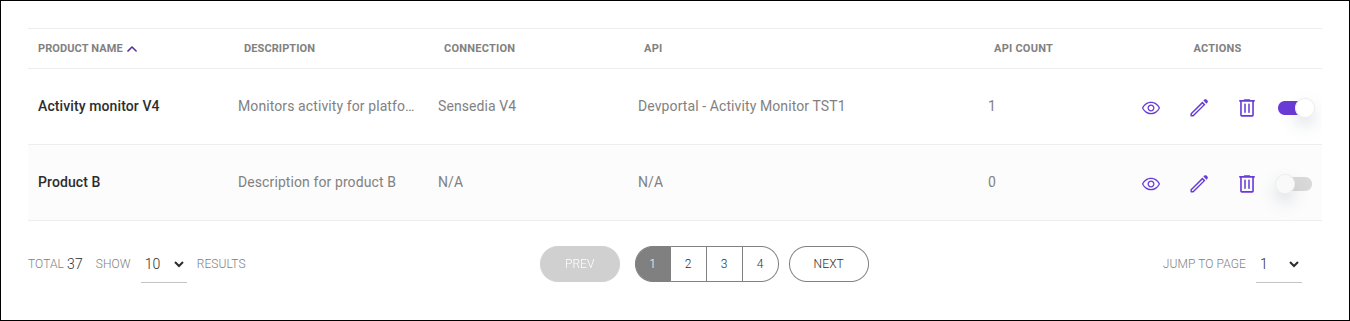
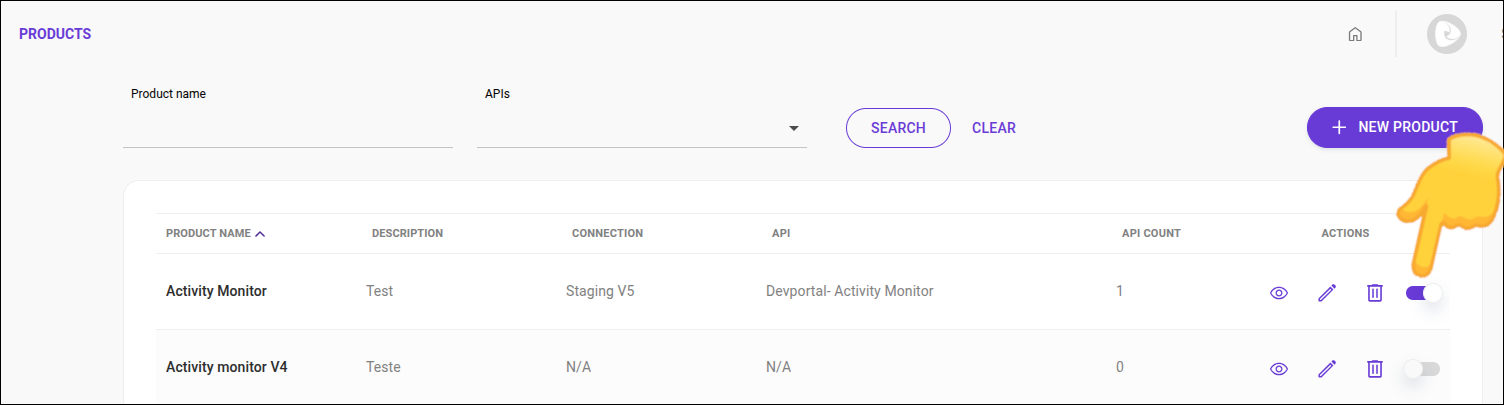
In the list of registered products, you will find the following columns:
Product Name: name given to the product;
Description: descriptive text for the product;
Integration: informs which of the integrations is used for the product;
API: APIs associated with the product;
API Count: number of APIs associated with the product;
Actions: click the respective icon to edit, delete, or view a product.
To check your product and ensure the corresponding APIs are properly listed, follow the steps below:
Access the screen or click the Products card on your Dev Portal home screen.
Locate the product you want to view and click the ![]() .
.
The next screen will display the product’s main information, description, and its APIs.
When finished, click CANCEL.
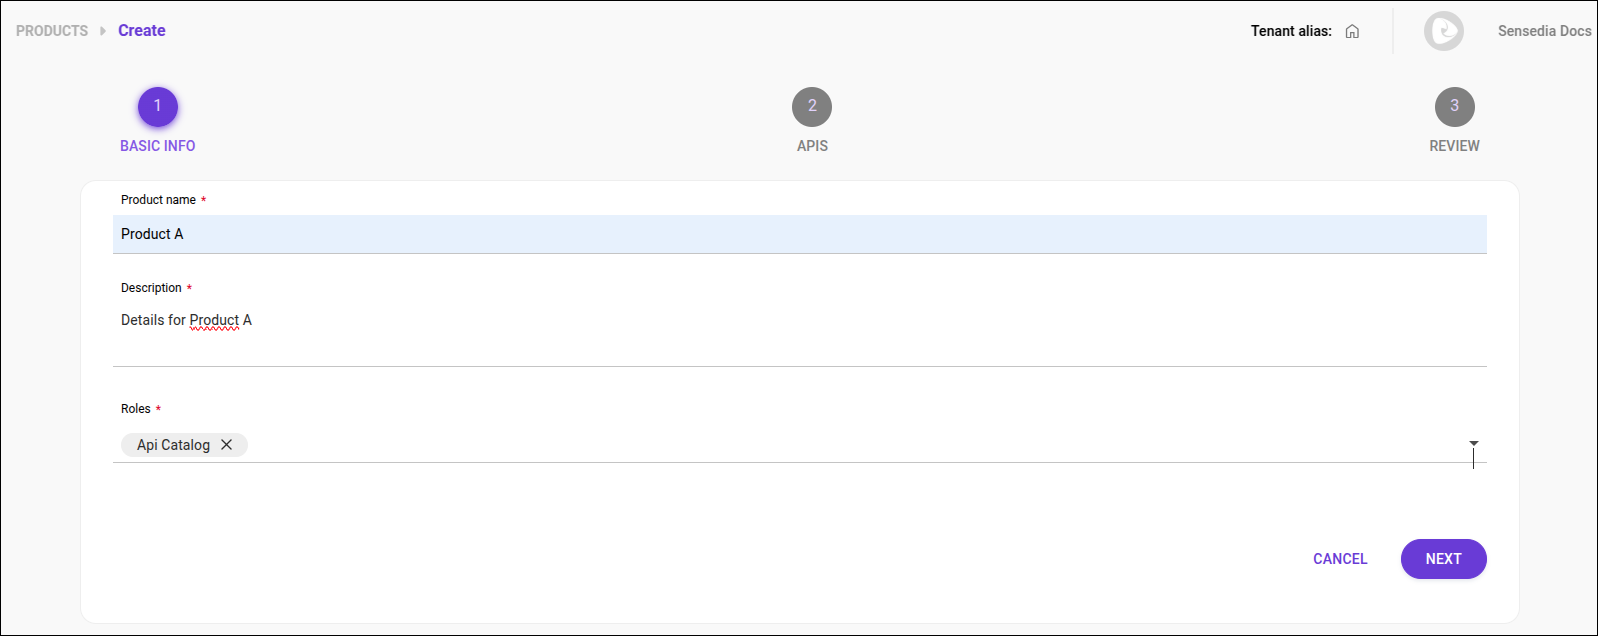
Follow the steps below to register a product:
Access the screen or click the Products card on your Dev Portal home screen.
Click the + NEW PRODUCT button.
In 1 BASIC INFO, fill in the fields:
Product name: define a name for the product.
Description: write a description.
Roles: establish one or more roles.
Click NEXT.
|
To have access to the product, the user will need to have one of the roles listed in this field. A user who has a role that is not listed in the roles field will not be able to access the API. |
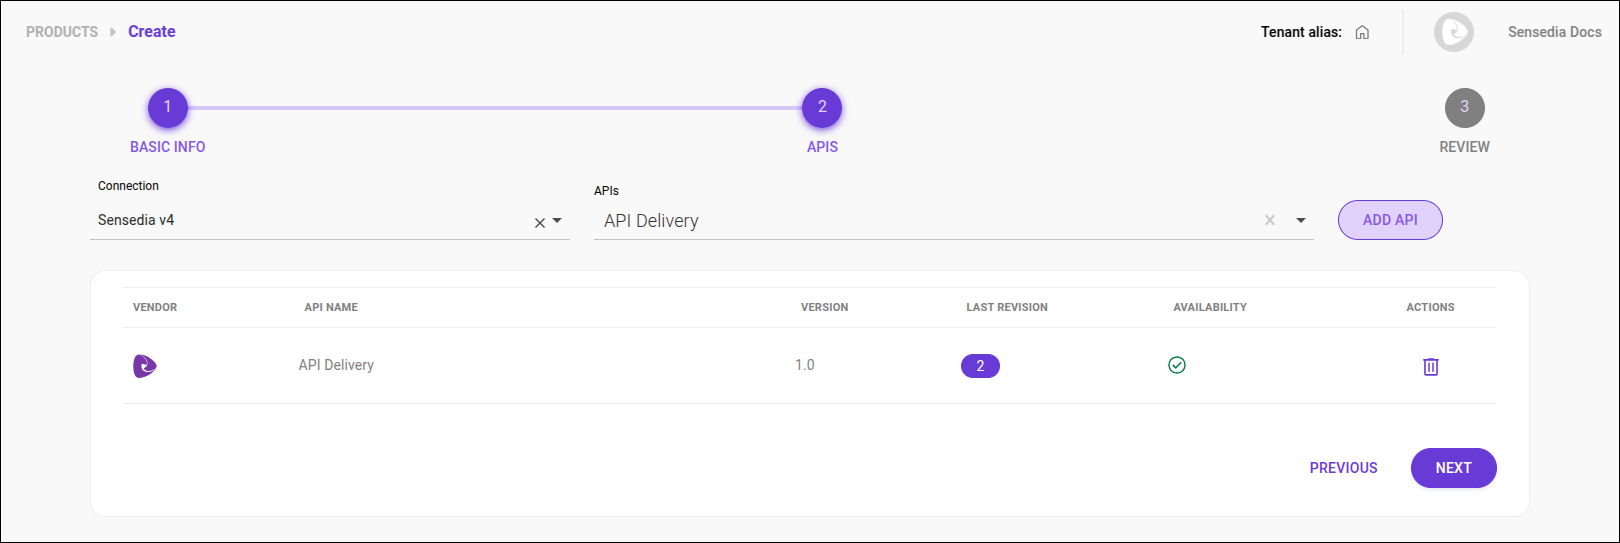
In step 2 APIS, choose an integration and add one or more APIs.
To choose the integration, select one from the available list.
Select the desired API and click ADD API.
Repeat until all APIs for the product have been added and click NEXT.
| Start typing the API name to see the available options. |
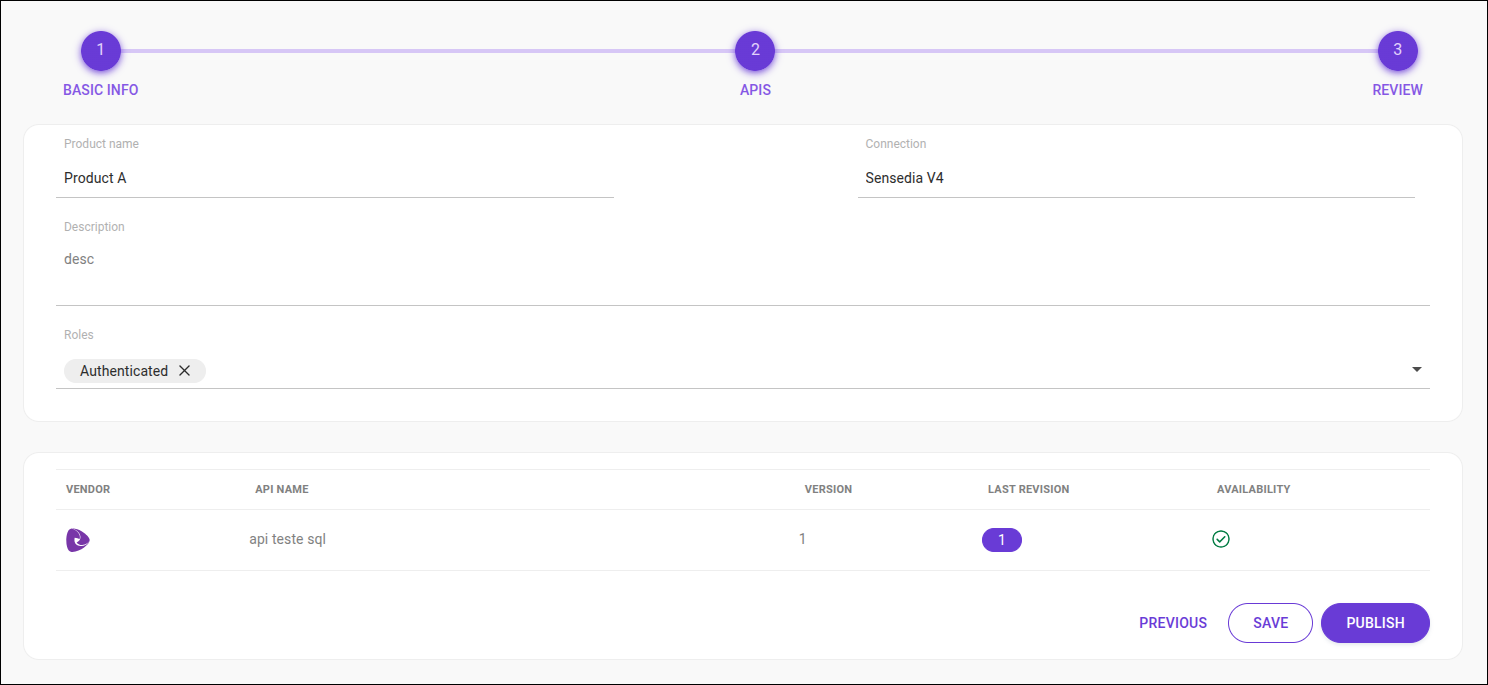
Step 3 REVIEW: confirm the information and click SAVE.
If you need to edit something, click PREVIOUS.
To publish or unpublish a product, simply:
Access the screen or click the Products card on your Dev Portal home screen.
Locate the product you want to publish or unpublish.
If the toggle button in the ACTIONS column is on, the product is published.
Click the button to turn it off and unpublish it.
To change a product, follow the steps below:
In Products, locate the product you want to edit and click the ![]() .
.
In 1 BASIC INFO, you can (but are not required to) edit the product’s name and description and the roles that can access it.
Click NEXT to continue.
Step 2 APIS: here you can change the integration and add or delete one or more APIs.
To add an API, start typing its name, select it, and click ADD API.
To delete, locate the API in the table and click the ![]() . Click REMOVE to confirm.
. Click REMOVE to confirm.
Click NEXT.
Step 3 REVIEW: review the information and click the SAVE button to save or PREVIOUS to go back to editing.
Share your suggestions with us!
Click here and then [+ Submit idea]