Thanks for your feedback!
EDIT
When you click a card in the API Catalog screen, you access the Overview screen, where you can view a complete summary of the API, including basic information, revisions, resources, flows, and usage statistics.
|
To make any configuration changes, open the edit screen by clicking the Edit API button located at the top of the page. Only from the edit screen can you modify settings, adjust resources, or access the Swagger file. For detailed instructions on editing APIs, see the following documentation: Editing or deleting an API. |
The Overview screen organizes the API information into the following structure:
Navigation tabs:
|
Click any tab to explore specific details about the API. |

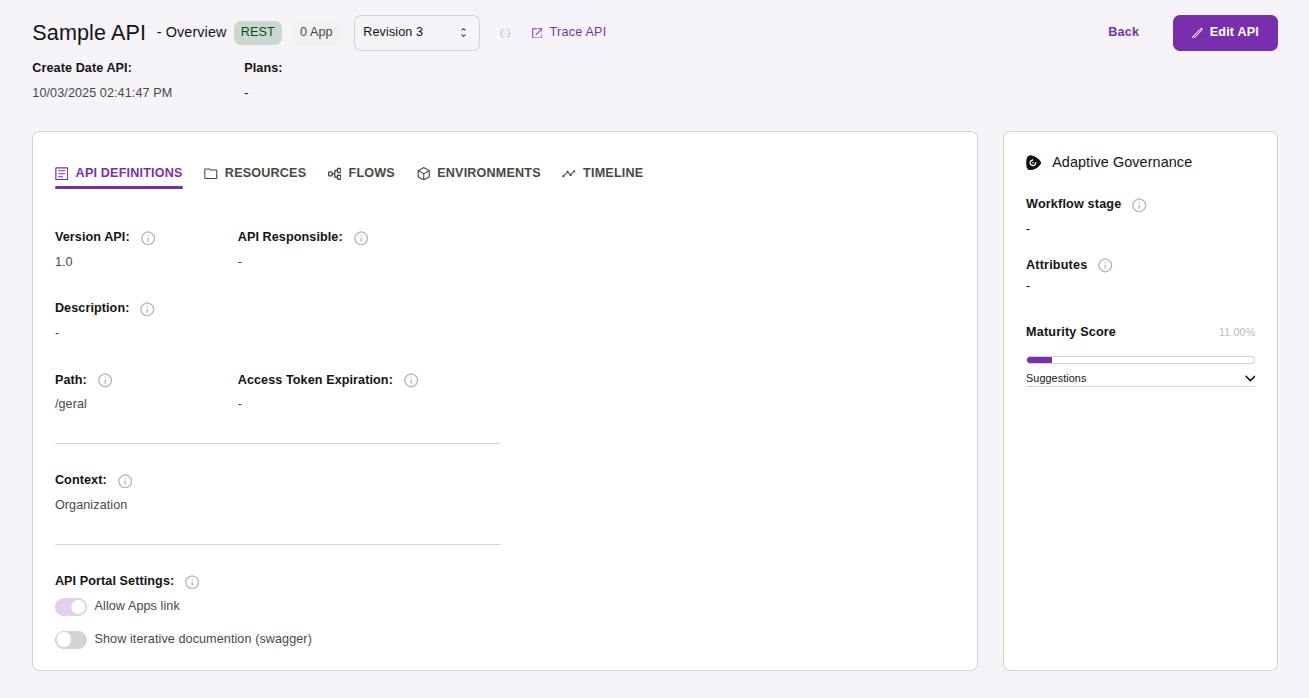
At the top of the Overview screen, you can quickly view the API’s main details, such as its type, Revision number, total linked Apps, creation date, and associated plans.
In this same area, there is a shortcut to API Trace, which redirects you to the page where all requests made to the selected API are displayed.
|
In the Overview screen, the Swagger icon is disabled. To view the file, open the API in edit mode and click the icon next to the Revision field. |
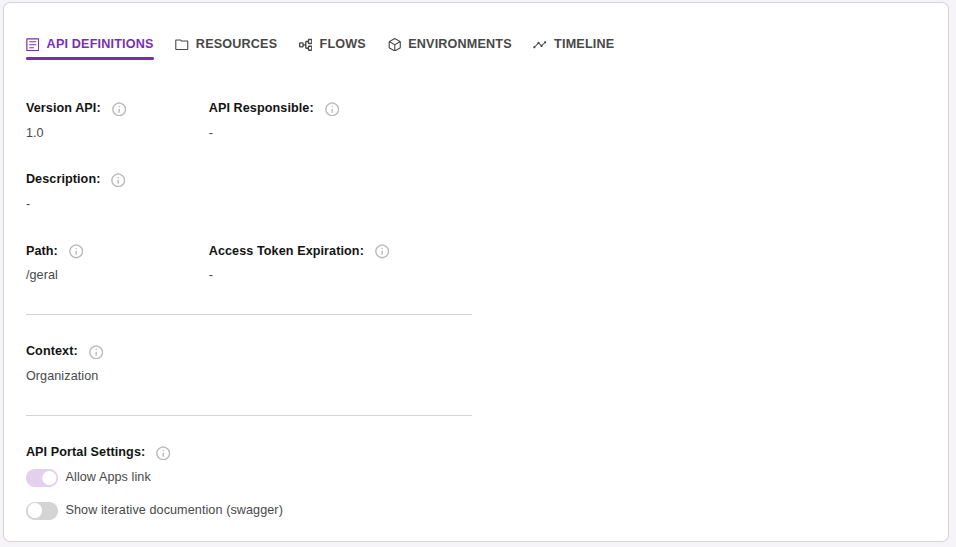
The API Definitions tab displays the API’s general information.
|
The Portal Settings subsection is disabled in this Overview tab. To access it, open the API in edit mode. |
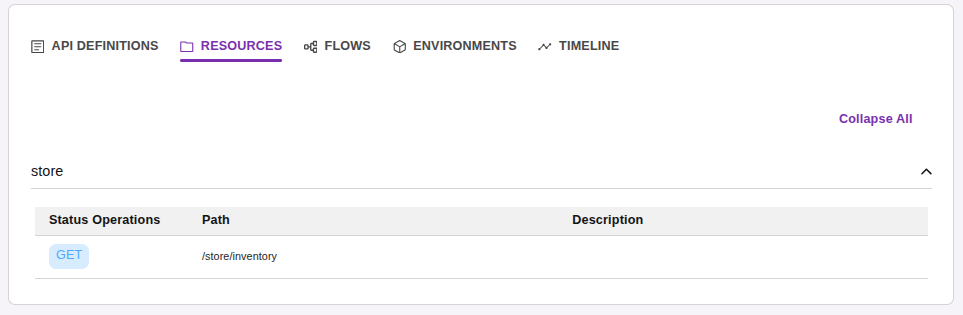
In Resources and Operations, you can view all API resources and operations.
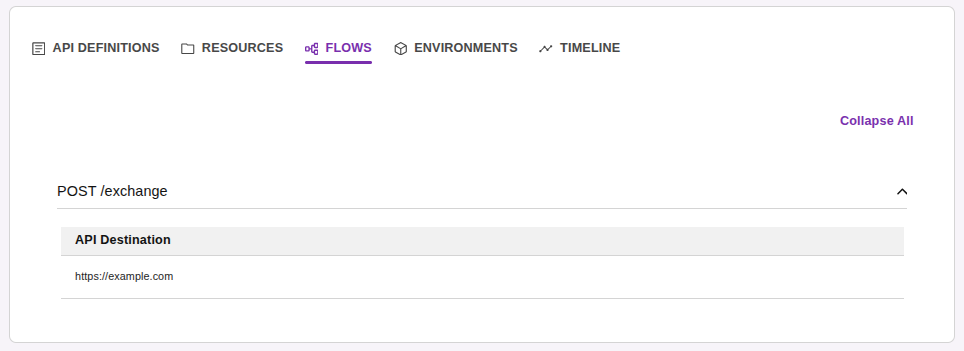
In Flows, you can track the interceptors applied at all points of the API’s resources and operations.
In the Environments tab, you can view the environments where your API is deployed. These environments must be registered in advance.
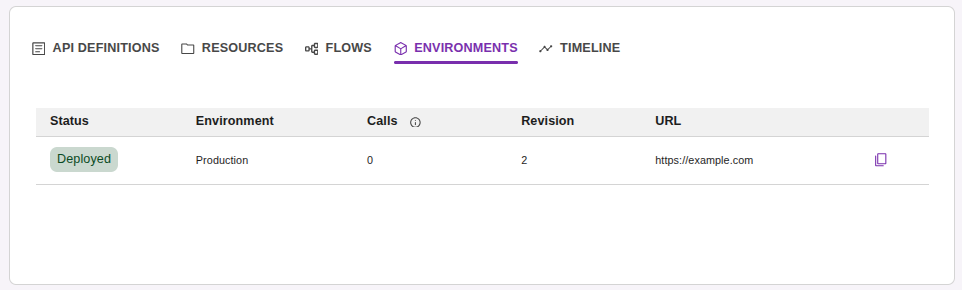
From the Overview screen, you can access traffic information and API-related data, such as:
Status of each environment.
Number of API calls in the last 30 days.
Revision number.
|
There is a copy button next to the URL. Use it to copy the address directly, without having to manually select the text. |
The Timeline tab shows the changes made to the API, with filters by time period and type of change.
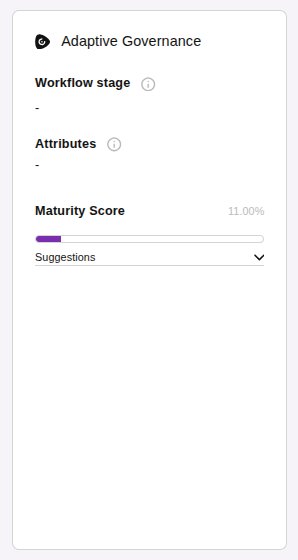
If Adaptive Governance is available in your Platform, a panel will be displayed on the right side of the screen with the Workflow stage, Attributes, and Maturity Score features.
These features show the progress of API creation, indicating the current stage, configured attributes, and the achieved maturity level, as well as suggesting improvements.
Share your suggestions with us!
Click here and then [+ Submit idea]