Thanks for your feedback!
EDIT
With the Scheduler trigger, you can schedule the integration flow’s execution for defined period of times.
Here’s how to add it to your canvas and configure your form.
Click the icon  , in the editing menu on the left;
Select the Scheduler.
The  Start is replaced by the trigger as soon as you add it to the canvas.
Configure your form.
To delete the Scheduler from the canvas, select it and click the  button. button.Deleting the trigger will disable the Test Mode function. |
Select the trigger on the canvas.
Click the edit icon ![]() .
.
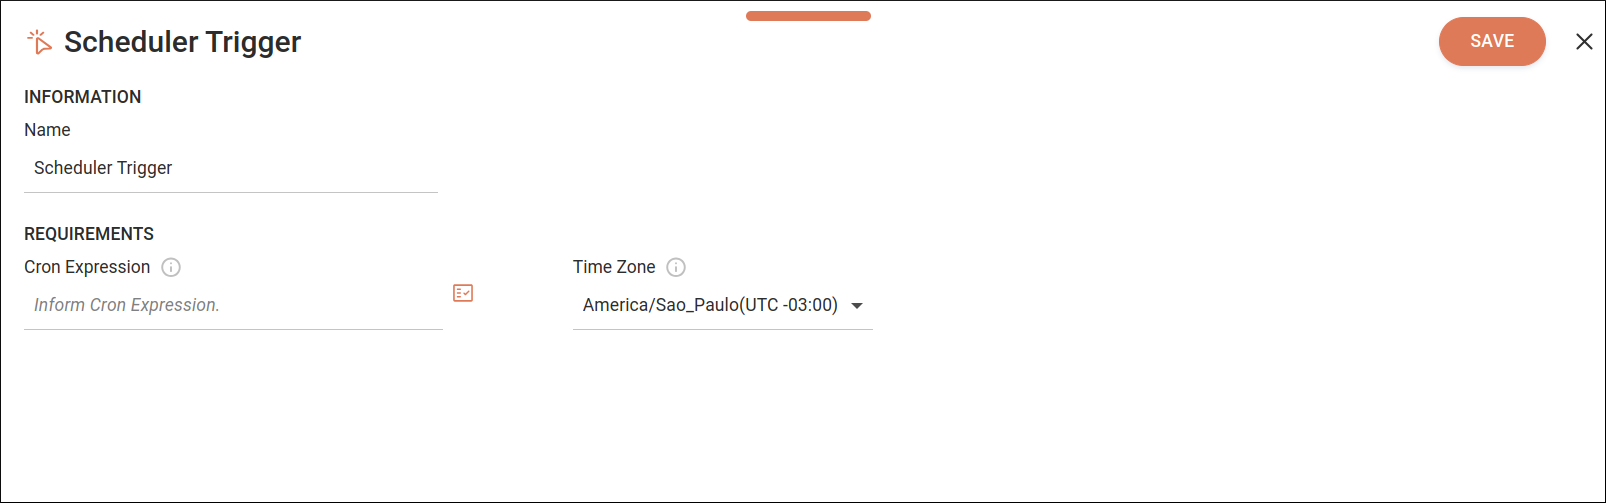
Fill in the following fields:
Name: enter the trigger’s name. The name cannot be used more than once in the same integration flow. By default, you will see Scheduler Trigger.
Cron Expression: set up a recurrence pattern to run the integration flow. Learn how a Cron Expression works.
By clicking the Properties ![]() icon on the right, you can:
icon on the right, you can:
Select previously registered variables.
Select input or output payloads from previous steps.
Create expressions using the Expression Builder.
| Read more about Properties and Expression Builder. |
Time Zone: select the time zone. You can type it or filter the available options. The default time zone is UTC.
Click SAVE to save the changes. To exit the form without saving, click X at the top right.
A cron expression is a string that defines periodic scheduling following a specific format.
The field Cron Expression accepts schedules with the following fields:
<minute> <hour> <day of month> <month> <day of week>
See below the special characters and values you can use for each field of the cron expression:
Minute
* |
any value |
, |
value list separator (only the specified values) |
- |
range of values (all the values included in the range) |
/ |
step values (the number before the slash specifies when the interval starts, and the number after the slash is the interval) |
0-59 |
allowed values |
Hour
* |
any value |
, |
value list separator (only the specified values) |
- |
range of values (all the values included in the range) |
/ |
step values (the number before the slash specifies when the interval starts, and the number after the slash is the interval) |
0-23 |
allowed values |
Day of month
* |
any value |
, |
value list separator (only the specified values) |
- |
range of values (all the values included in the range) |
/ |
step values (the number before the slash specifies when the interval starts, and the number after the slash is the interval) |
1-31 |
allowed values |
Month
* |
any value |
, |
value list separator (only the specified values) |
- |
range of values (all the values included in the range) |
/ |
step values (the number before the slash specifies when the interval starts, and the number after the slash is the interval) |
1-12 |
allowed values |
JAN-DEC |
alternative single values |
Day of week
* |
any value |
, |
value list separator (only the specified values) |
- |
range of values (all the values included in the range) |
/ |
step values (the number before the slash specifies when the interval starts, and the number after the slash is the interval) |
0-6 |
allowed values |
SUN-SAT |
alternative single values |
| To generate a cron expression, access Crontab guru. |
Here are some examples of cron expressions:
| Minute | Hour | Day of month | Month | Day of week | Meaning |
|---|---|---|---|---|---|
30 |
10 |
* |
* |
* |
Every day at 10:30 |
0 |
15 |
15 |
JUN |
* |
At 15:00 on June 15 |
0 |
17 |
* |
* |
6,0 |
At 17:00 on Saturday and Sunday |
0 |
* |
* |
* |
* |
Every hour |
0 |
0 |
* |
* |
* |
Once a day |
0 |
*/2 |
* |
* |
* |
Every 2 hours |
0 |
10/3 |
* |
* |
TUE |
Every 3 hours starting at 10:00 on Tuesday |
Share your suggestions with us!
Click here and then [+ Submit idea]