Thanks for your feedback!
EDIT
The FAULT TOLERANCE tab allows you to define fault tolerance rules for a specific service, as well as to manage the rules already created. To access it, select the service you want to create a rule for on the list of the Services screen (or after clicking on a mesh card on the Meshes screen).
Creating such rules makes your microservices system more resilient, limiting the impact of failures, latency spikes, and other network issues.
To create a new rule for the selected service, click the ADD NEW RULE button. A menu will be displayed with four features: Circuit Breaker, Request Timeout, Fault Injection, and Retry.
As Sensedia Service Mesh is a Kubernetes-native application, it is also possible to configure these rules from the command line using kubectl.
The box "Creating a rule from the command line" in the section of each feature provides an example of .yaml file to do this.
|
See how to set up a rule for each of them below.
The actions you can perform on this screen depend on the permissions set for your user in Sensedia Access Control.
The following table shows the possible permissions and the corresponding actions:
| Permission | Description |
|---|---|
List Circuit Breakers |
It allows the visualization in the rule list of the basic information of a Circuit Breaker rule created for a service. |
List Fault Injections |
It allows the visualization in the rule list of the basic information of a Fault Injection rule created for a service. |
List Timeouts |
It allows the visualization in the rule list of the basic information of a Request Timeout rule created for a service. |
List Retries |
It allows the visualization in the rule list of the basic information of a Retry rule created for a service. |
Read Circuit Breakers |
It allows the visualization of the configuration of a Circuit Breaker rule created for a service. It does not, however, allow the rule to be edited. |
Read Fault Injections |
It allows the visualization of the configuration of a Fault Injection rule created for a service. It does not, however, allow the rule to be edited. |
Read Timeouts |
It allows the visualization of the configuration of a Request Timeout rule created for a service. It does not, however, allow the rule to be edited. |
Read Retries |
It allows the visualization of the configuration of a Retry rule created for a service. It does not, however, allow the rule to be edited. |
Write Circuit Breakers |
It allows the editing, deletion, and the creation of a Circuit Breaker rule for a service. |
Write Fault Injections |
It allows the editing, deletion, and the creation of a Fault Injection rule for a service. |
Write Timeouts |
It allows the editing, deletion and the creation of a Request Timeout rule for a service. |
Write Retries |
It allows the editing, deletion, and the creation of a Retry rule for a service. |
Circuit Breaker is a mechanism that limits the impact of failures and delays in the network by rejecting new requests when certain limits are reached. One of the advantages of having a circuit breaker configured is that by interrupting a faulty communication flow, the chain propagation of faults is avoided. You can set limits for calls to individual hosts in a service, such as the number of concurrent connections or failed calls made to that host. It’s also possible to configure the rule to detect and temporarily remove from the connection hosts that are experiencing errors.
On the Services screen (or on the Meshes screen, after selecting the corresponding mesh), select the service for which you want to create the rule.
Click the FAULT TOLERANCE tab and then the ADD NEW RULE button. Select the Circuit Breaker option.
A screen will be displayed with two options: CONNECTION POOL and OUTLIER DETECTION.
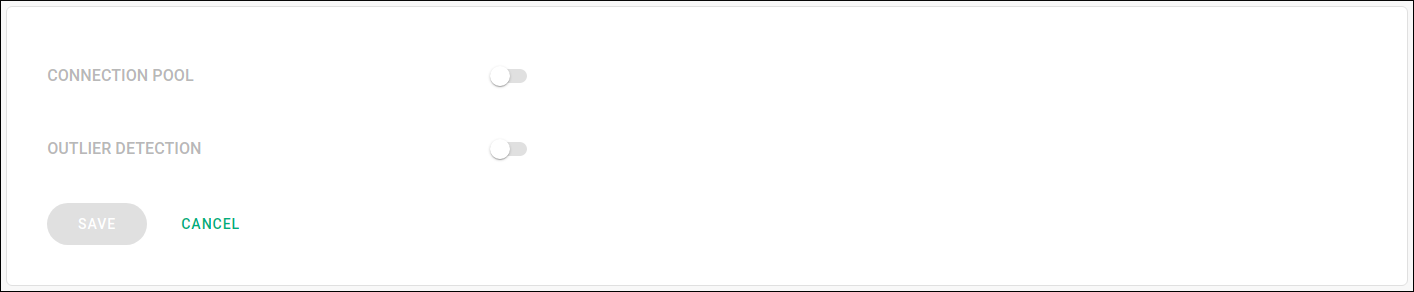
These options require specific settings that will be displayed when the corresponding option is enabled.
Connection Pool
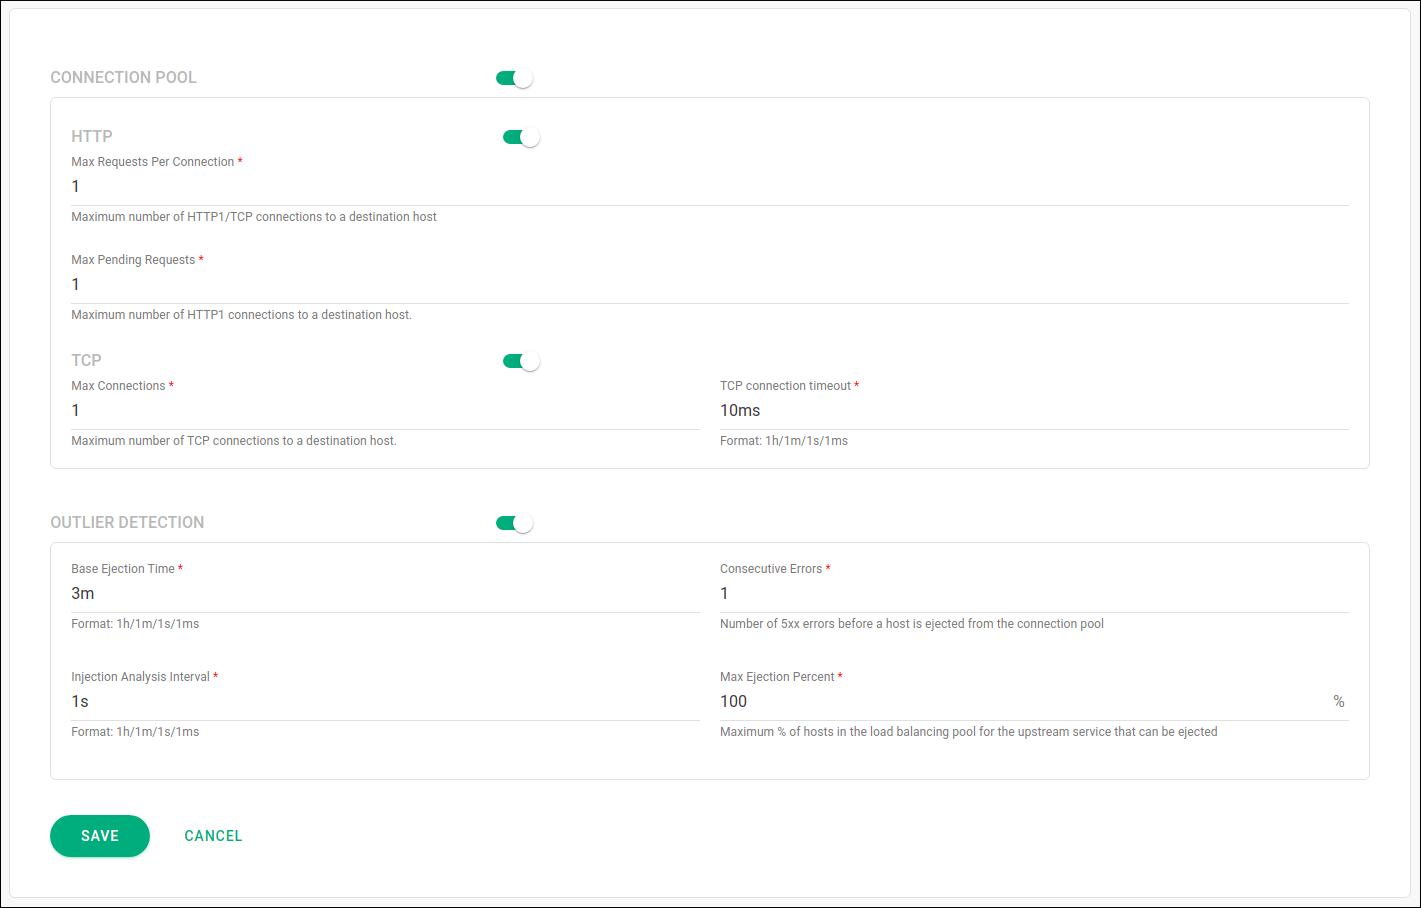
Setting the CONNECTION POOL option allows rejecting new requests when the number of concurrent connections and that of requests exceed the informed values.
You can configure the rule for HTTP requests, TCP or both:

For HTTP requests, the fields to be filled in are:
Max Requests Per Connection: maximum number of requests per connection.
Max Pending Requests: maximum number of requests to be queued.
For TCP requests, the following values are required:
Max Connections: maximum number of concurrent connections.
TCP connection timeout: timeout for a TCP connection. It must be informed as a duration (examples: 1h, 1m, 1s, 1ms).
Outlier Detection
The outlier detection feature monitors the state of each host and removes from the connection the one that presents a given number of consecutive errors.
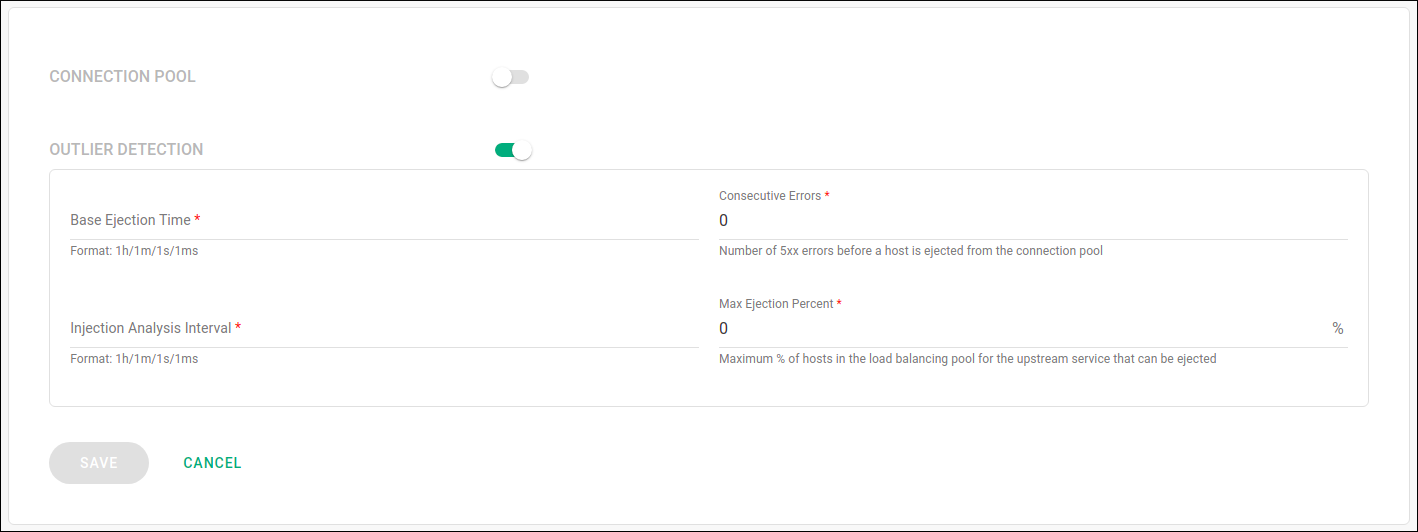
To configure the OUTLIER DETECTION option, the following fields must be filled in:
Base Ejection Time: Minimum ejection duration. The host will remain ejected for a period of time equal to the product of the minimum ejection duration and the number of times it has already been removed.
Consecutive Errors: number of consecutive errors for a host to be ejected from the connection.
Injection Analysis Interval: time interval between each analysis scan.
Max Ejection Percent: maximum percentage of hosts that can be ejected.
Once the fields are filled in, click the SAVE button to create the rule.
| It is possible to combine the features of connection pool and outlier detection in the same rule. |
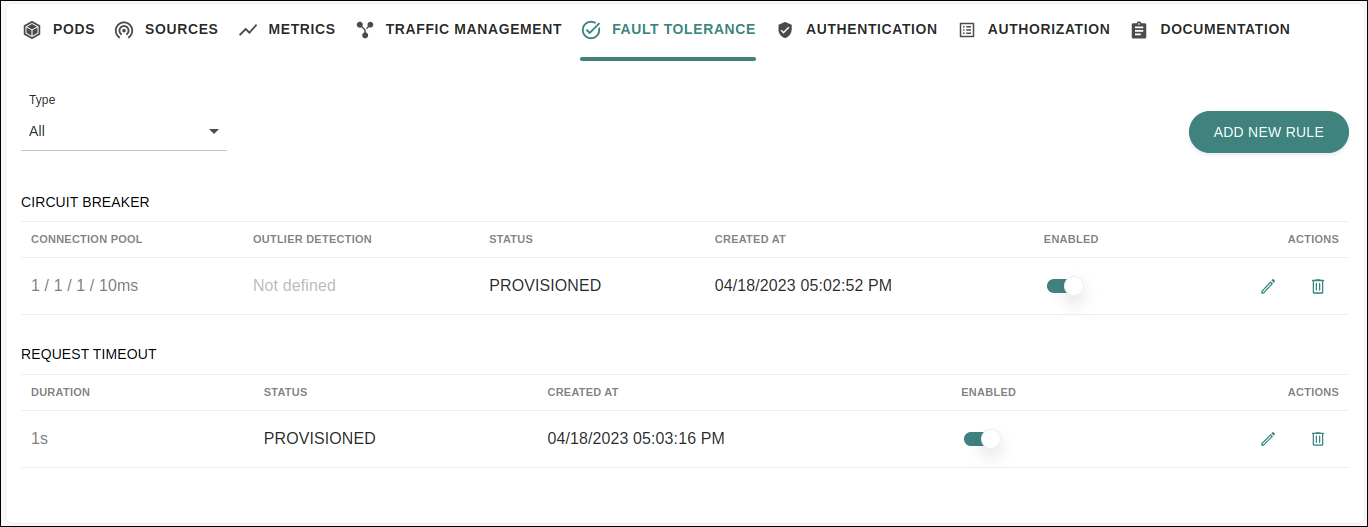
After creating the rule, you will be redirected to the FAULT TOLERANCE tab screen for the corresponding service, where you can manage the created rule.
This screen displays the following information about the rule:
values set for connection pool (column CONNECTION POOL);
values set for outlier detection (column OUTLIER DETECTION);
rule status, which can be "provisioned" or "disabled" — (column STATUS);
date and time the rule was created (column CREATED AT).
In addition to viewing this information, it is possible to disable or enable the rule through the button located in the ENABLED column.
Through the icons contained in the ACTIONS column you can:
edit the rule settings (![]() );
);
delete the rule (![]() ).
).
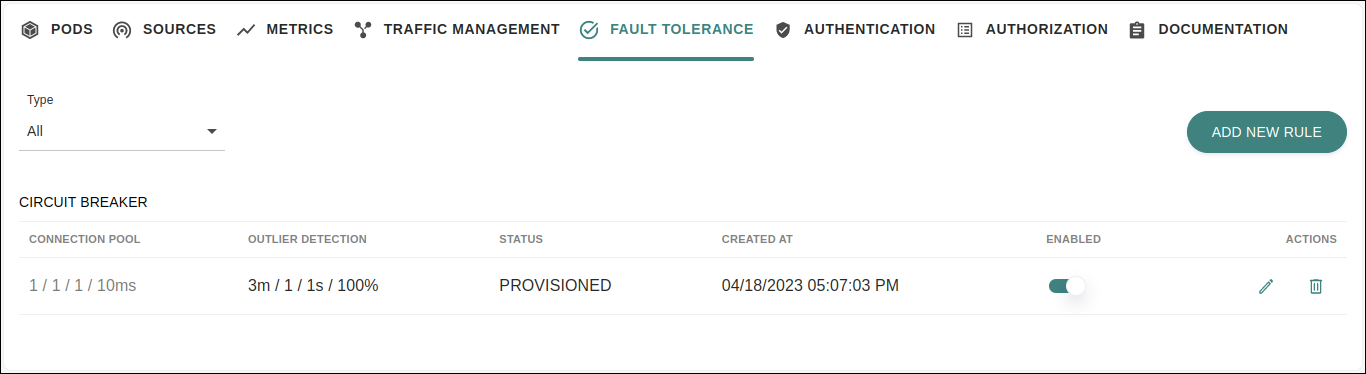
| There can’t be more than one Circuit Breaker rule configured per service. If you have already created one, the "Circuit Breaker" option will no longer be available in the list of the ADD NEW RULE button for that service. |
In the example shown in the image below, we are configuring a Circuit Breaker to limit the number of connections, requests per connection and pending requests by one and the TCP connection time by 10 milliseconds. In addition, we set the rule to check hosts for possible failures every 1 second and to remove a host from the load balancing pool for at least 3 minutes if it returns a 5xx error. In the latter case, we are allowing up to 100% of the hosts to be ejected.
The Request Timeout functionality allows you to handle latency in service calls in a simple way. If a service takes longer than usual to respond, there can be an impact in the entire system as this delay will be propagated across the network. When configuring a request timeout rule, you specify the maximum time to wait for a response from a particular service. If a call to this service takes longer than the specified time to complete, it will be interrupted (a "timeout" error is returned). Thus, this delay will not affect other microservices and will not impact the response time of the application as a whole.
Setting up a request timeout rule on Sensedia Service Mesh is simple, as shown as follows.
On the Services screen (or on the Meshes screen, after selecting the corresponding mesh), select the service for which you want to create the rule.
Click the FAULT TOLERANCE tab and then the ADD NEW RULE button. Select the Request Timeout option.
On the next screen, you will have to fill in a single field:
Duration: timeout for a request to complete. It must be informed as a duration (examples: 1m, 1s, 1ms).
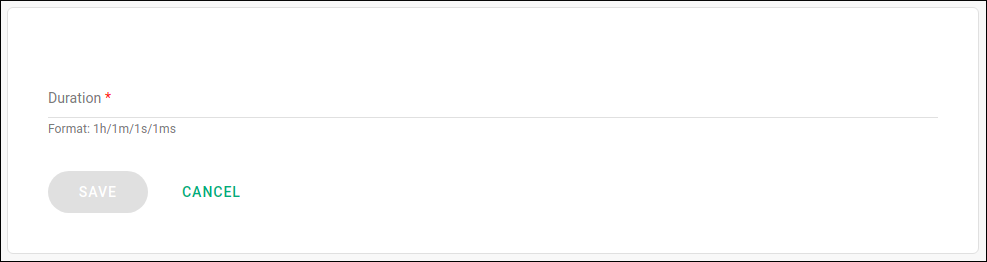
After filling in the field, click the SAVE button to create the rule.
Whether you create a rule from the Sensedia Service Mesh interface or from the command line, you can view it on the FAULT TOLERANCE tab of the corresponding service.
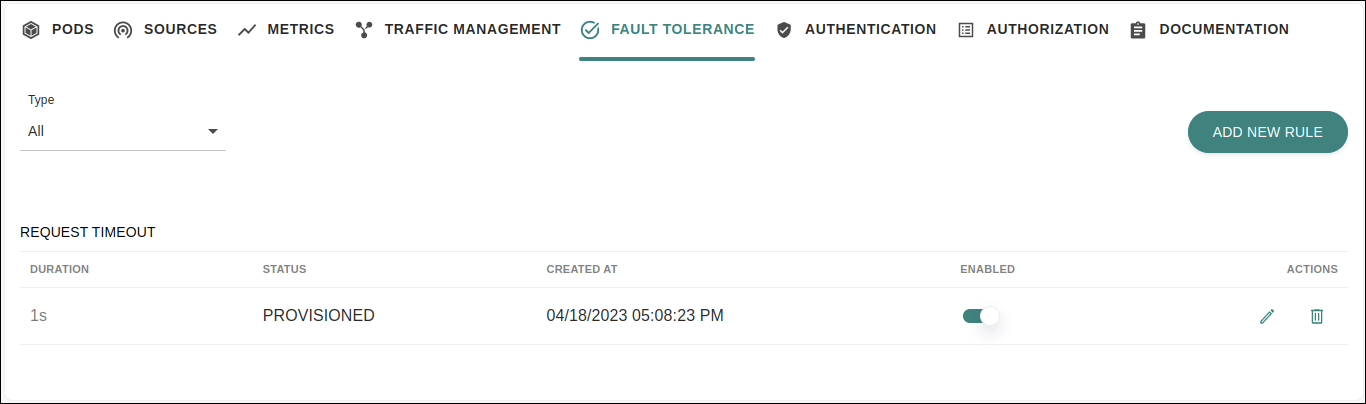
Here the following information about the rule is presented:
value specified for the Duration parameter (column DURATION);
rule status, which can be "provisioned" or "disabled" — (column STATUS);
date and time the rule was created (column CREATED AT).
Furthermore, it is possible to disable or enable the rule through the button located in the ENABLED column.
Through the icons contained in the ACTIONS column you can:
update the rule configuration (![]() );
);
delete the rule (![]() ).
).
| You can have only one Request Timeout rule per service. If you have already created one, the "Request Timeout" option will no longer be available in the list of the ADD NEW RULE button for that service. |
The Fault Injection functionality makes it possible to configure the injection of failures into the network. With this, you can test the resilience of your microservices system and observe the impact of possible failures on the application as a whole. It is useful, for example, to verify whether your failure recovery policies are adequate for your system, thus preventing critical services from being unavailable.
On the Services screen (or on the Meshes screen, after selecting the corresponding mesh), select the service for which you want to create the rule.
Click the FAULT TOLERANCE tab and then the ADD NEW RULE button. Select the Fault Injection option.
A screen will then be displayed with two fault options: HTTP ABORT and HTTP DELAY. The fields to be filled in depend on the type of fault to be configured.
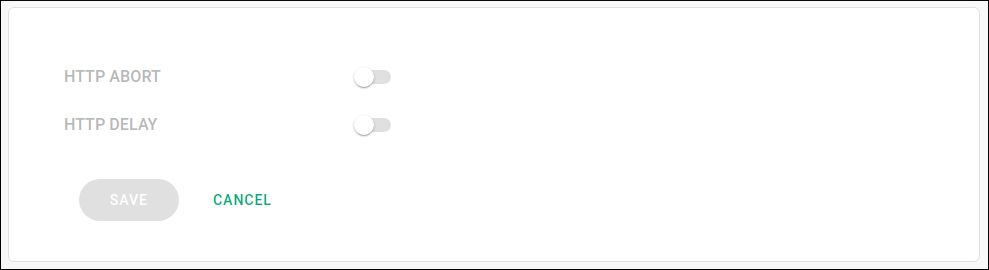
HTTP Abort
By setting the HTTP ABORT option you can observe how your application will behave when HTTP failures arise on the system. You can specify the HTTP status code to be returned, as well as the percentage of requests that will be subjected to the fault.
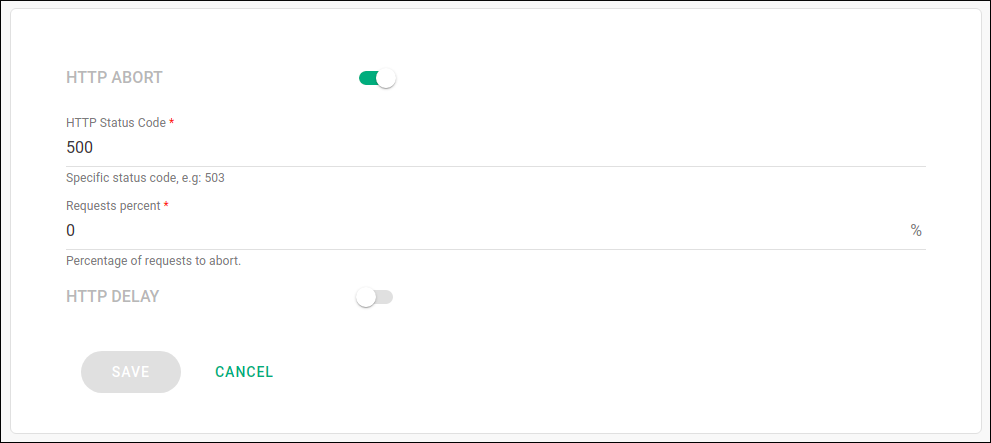
Configuring HTTP Abort injection requires filling in the following fields:
HTTP Status Code: HTTP error code to be returned for requests made to the corresponding service. Example: 503.
Requests percent: percentage of requests to be aborted with the error code specified in the HTTP Status Code field. The provided value must be an integer greater than zero.
HTTP Delay
Setting the HTTP DELAY option allows you to add a delay in the response of a specific service. With this, it is possible to simulate an increase in network latency or the situation in which a service is overloaded.
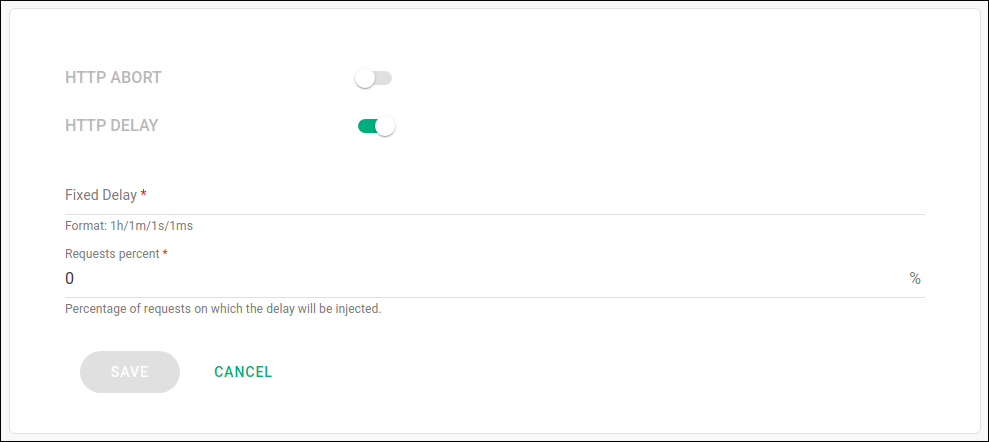
The following fields are required to configure HTTP Delay injection:
Fixed Delay: delay to be added to the service response time. It must be informed in duration format. Examples: 1h, 1m, 1s, 1ms.
Requests percent: percentage of requests on which the delay will be injected. The provided value must be an integer greater than zero.
Once you have filled in the required fields for the type of fault you want, click on the SAVE button to create the rule.
| It is possible to combine the two types of faults (HTTP Abort and HTTP Delay) in the same rule. |
The fault injection rule you created will be visible on the FAULT TOLERANCE tab screen for the corresponding service.
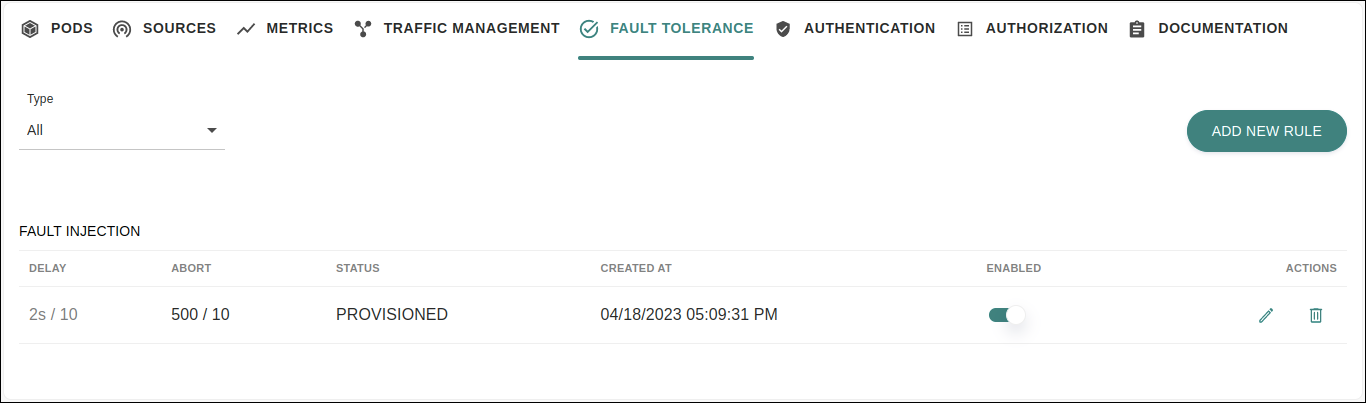
Here you can view the following information about the rule:
values set for HTTP Delay (column DELAY). If this option has not been defined in the rule, the message "Not defined" is displayed;
values set for HTTP Abort (column ABORT). If this option has not been defined in the rule, the message "Not defined" is displayed;
rule status, which can be "provisioned" or "disabled" — (column STATUS);
date and time the rule was created (column CREATED AT).
The button located in the ENABLED column allows you to disable or enable the rule.
Through the icons contained in the ACTIONS column you can:
edit the rule settings (![]() );
);
delete the rule (![]() ).
).
| There can’t be more than one fault injection rule configured per service. If there is already one, the "Fault Injection" option will no longer be available in the list of the ADD NEW RULE button for that service. |
The Retry functionality allows you to determine the maximum number of retries to connect to a service in case a call fails. The purpose of this functionality is to prevent calls to a service from permanently failing due to temporary network or service problems. The proper adjustment of the Retry parameters is important to ensure the availability of the microservices and to prevent misconfigured retries from slowing down the application’s response.
See below how to set up a Retry rule for a specific service in Sensedia Service Mesh.
On the Services screen of the interface of Sensedia Service Mesh (or on the Meshes screen, after selecting the corresponding mesh), select the service for which you want to create the rule.
Click the FAULT TOLERANCE tab and then the ADD NEW RULE button. Select the Retry option.
A modal window with two fields for configuring the rule will then open:
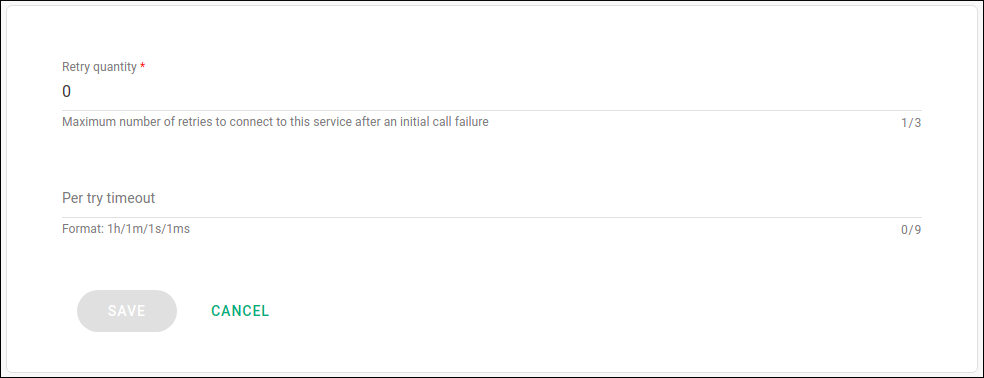
The fields available for completion on this screen are as follows:
Retry quantity: maximum number of retries to connect to the corresponding service if the initial call fails. Required field.
Per try timeout: timeout to wait for connection success on each retry. Optional field. Must be entered as a duration (examples: 1m, 1s, 1ms).
After entering the desired values, click the SAVE button to create the rule.
A created Retry rule will be visible on the FAULT TOLERANCE tab preview screen for the corresponding service:
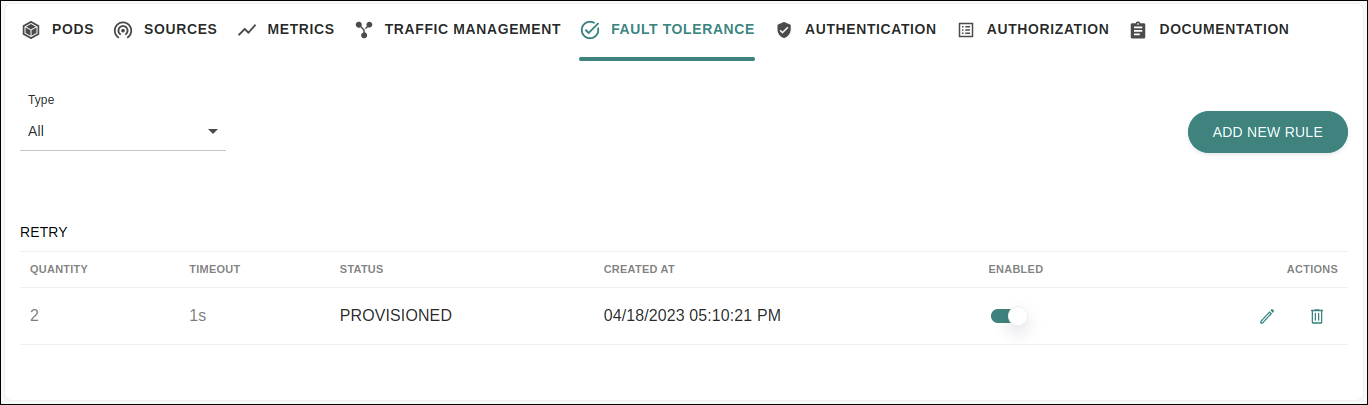
This screen displays the following information about the rule:
value specified for the parameter "Retry quantity" (column QUANTITY);
value specified for the parameter "Per try timeout" (column TIMEOUT);
rule status, which can be PROVISIONED or DISABLED (column STATUS);
date and time the rule was created (column CREATED AT).
In addition to viewing this information, it is possible to disable or enable the rule through the button located in the ENABLED column.
The column ACTIONS contains icons that allow you to:
edit the rule configuration (![]() );
);
delete the rule (![]() ).
).
| You can only have one Retry rule per service. If you have already created one, the "Retry" option will no longer be available in the list of the ADD NEW RULE button for that service. |
Share your suggestions with us!
Click here and then [+ Submit idea]